Product & Service
Product
https://wesshelp.wessconnect.com/2023/12/29/how-to-add-a-product/
Step 1: Click “Product & Service” .
Step 2: Click “RETAIL PRODUCT” or “SALON PRODUCT“.
[!] The difference between these two product types
Retail product: product for sale.
Salon product: product to be used in service.
Step 3: Click on “NEW” .
Step 4: Here the main product “Name” needs to be entered.
Step 5: And the next is enter the product “Price” .
Step 6: Can add information as many as you want here.
Step 7: Click on “APPLY” or other disk icons to save.
Step 8: Make sure the new product has been saved.
Last Updated: July 2024
https://wesshelp.wessconnect.com/2023/12/29/how-to-edit-a-product/
Step 1: Click “Product & Service” .
Step 2: Click “RETAIL PRODUCT” or “SALON PRODUCT“.
[!] The difference between these two product types
Retail product: product for sale.
Salon product: product to be used in service.
Step 3: Click on the pen icon “✏️” to edit.
Step 4: Edit information as many as you want here.
Step 5: Click on “APPLY” or other disk icons to save.”
Step 6: Make sure the change has been saved.
Last Updated: July 2024
https://wesshelp.wessconnect.com/2023/12/29/how-to-unpublish-a-product/
Step 1: Click “Product & Service” .
Step 2: Click “RETAIL PRODUCT” or “SALON PRODUCT” .
[!] The difference between these two product types
Retail product: product for sale.
Salon product: product to be used in service.
ℹ️ Method 1
Step 3: Click on the pen icon “✏️” to edit.

Step 4: Set “Published” to “No” .
Step 5: Click on “APPLY” or other disk icons to save.
Step 6: Make sure the change has been saved.
ℹ️ Method 2
Step 3: Click on the tick icon “✔️” to unpublish.
Step 4: Make sure the change has been saved.
Last Updated: July 2024
https://wesshelp.wessconnect.com/2023/12/29/how-to-publish-back-unpublished-products/
Step 1: Click “Product & Service” .
Step 2: Click “RETAIL PRODUCT” or “SALON PRODUCT” .
[!] The difference between these two product types
Retail product: product for sale.
Salon product: product to be used in service.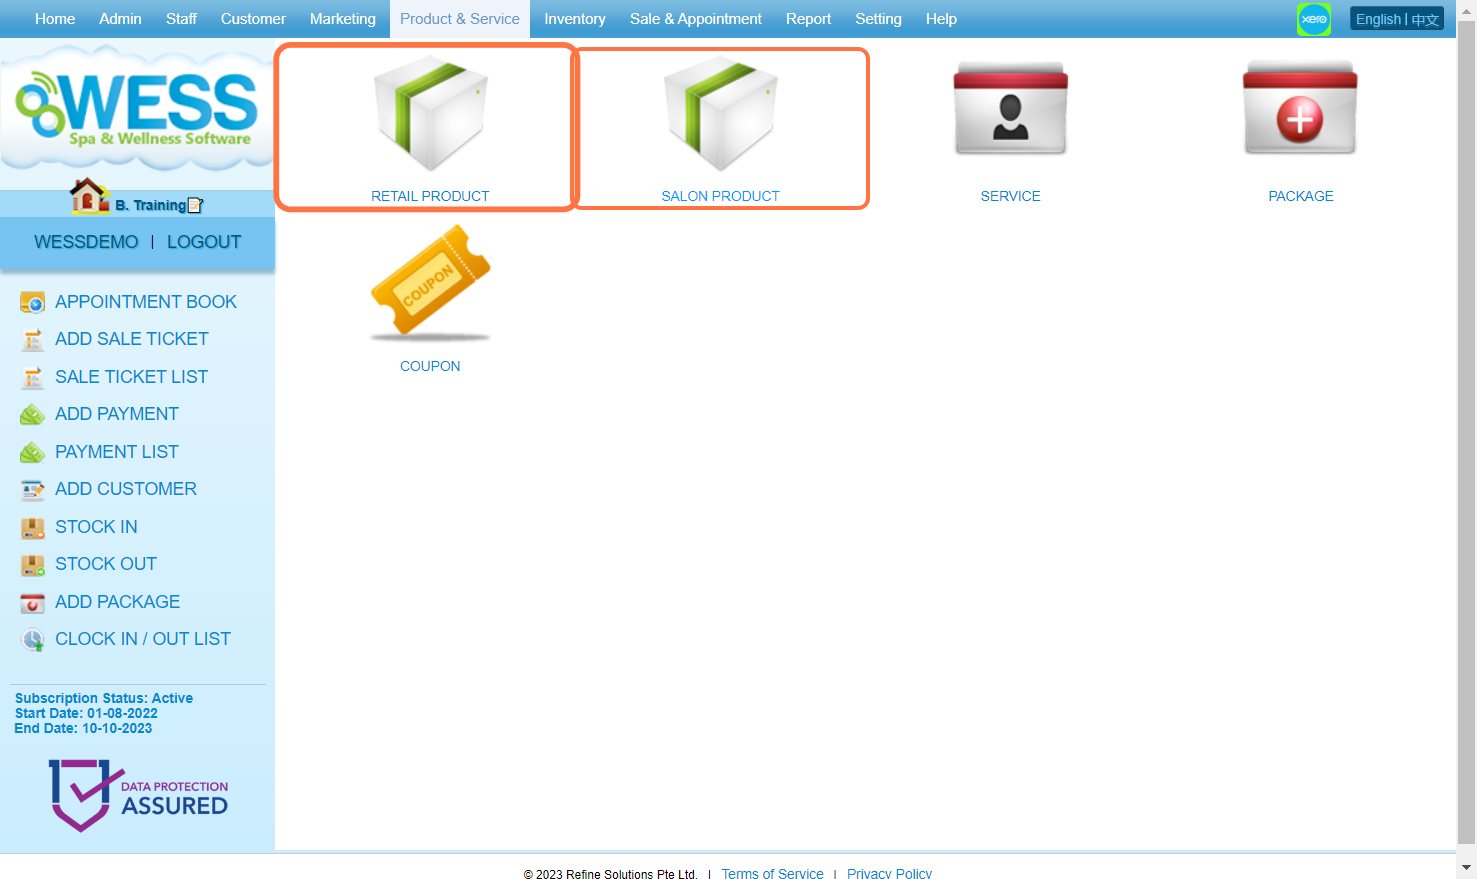
Step 3. Select “No” to show the unpublished products.
ℹ️ Method 1
Step 3: Click on the pen icon “✏️” to edit.
Step 4: Set “Published” to “Yes” .
Step 5: Click on “APPLY” or other disk icons to save.
Step 6: Make sure the change has been saved.
ℹ️ Method 2
Step 3: Click on the red close icon “❎” to publish.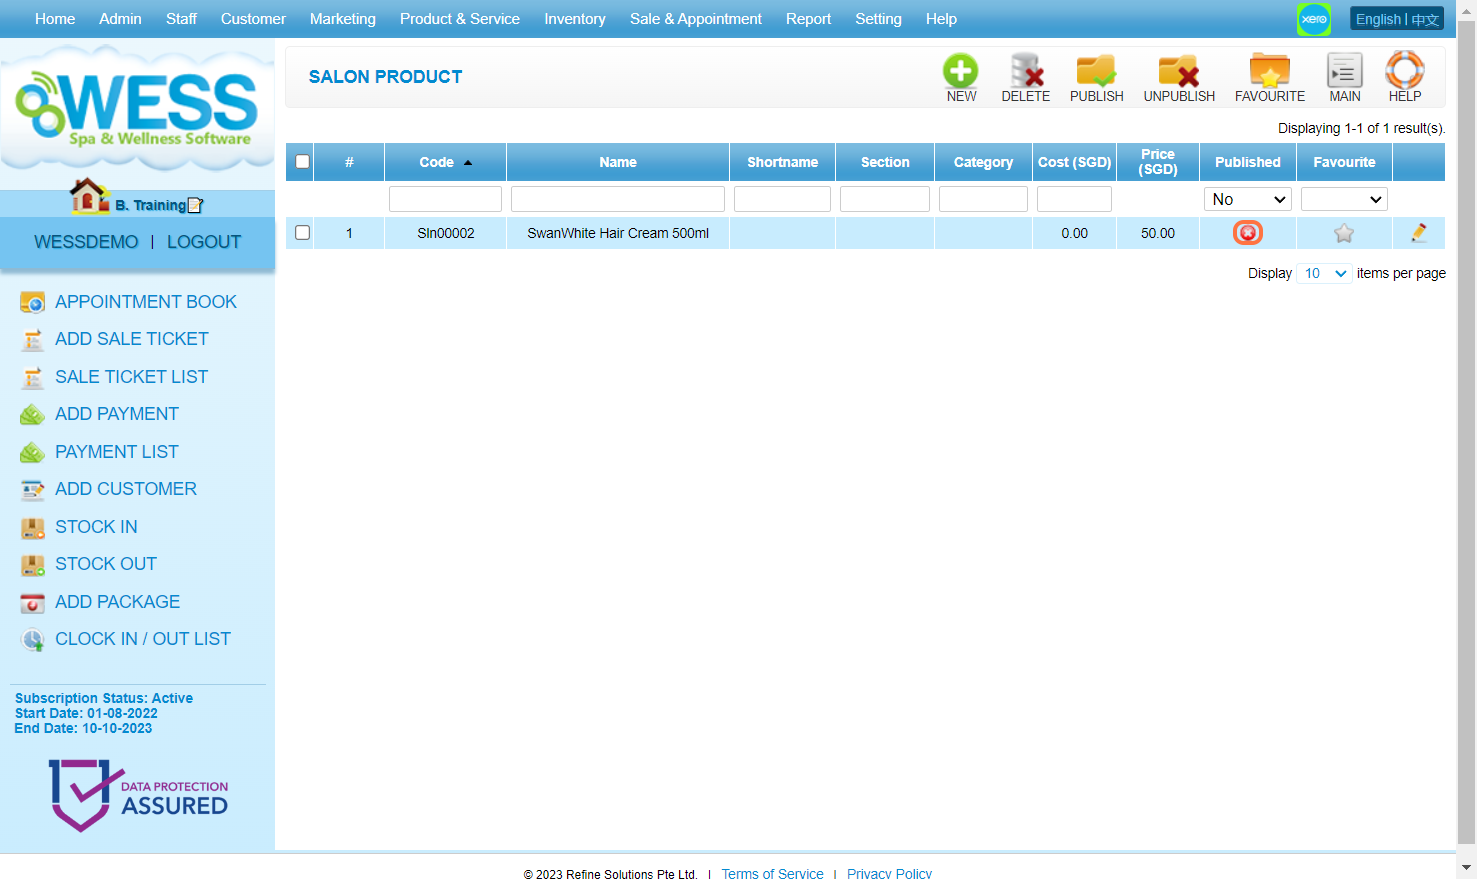
Step 4: Make sure the change has been saved.
Last Updated: July 2024
https://wesshelp.wessconnect.com/2023/12/29/how-to-create-a-product-category/
Step 1: Click “Setting” .
Step 2: Click on “PRODUCT CATEGORY” .
Step 3: Click on “NEW” .
Step 4: Enter a “Name” for the new product category.
Step 5: Here can write more details in the “Description” field.
Step 6: Make sure the “Published” has been set to “Yes” .
Step 7: Click on “APPLY” or other disk icons to save.
Step 8: Make sure the change has been saved.
Last Updated: July 2024
https://wesshelp.wessconnect.com/2023/12/29/how-to-add-a-new-product-section/
Step 1: Click “Setting” .
Step 2: Click on “PRODUCT SECTION” .
Step 3: Click on “NEW” .
Step 4: Enter a “Name” for the new product section.
Step 5: Can write more details in the “Description” field.
Step 6: Make sure the “Published” has been set to “Yes” .
Step 7: Click on “APPLY” or other disk icons to save.
Step 8: Make sure the new product section has been saved.
Last Updated: July 2024
https://wesshelp.wessconnect.com/2023/12/29/how-to-control-sharing-items-between-branches/
Step 1: Click “Product & Service” .
Step 2: Click “RETAIL PRODUCT” or “SALON PRODUCT” .
[!] The difference between these two product types
Retail product: product for sale.
Salon product: product to be used in service.
Step 3: Click on the pen icon “✏️” to edit.
Step 4: Click on “BRANCH MANAGEMENT” .
Step 5: Set Visibility to “Select ▾” .
[!] Set “All” will make this product available to all branches
Step 6: Select the “Branches” this product can be available.
Step 7: Click on “APPLY” or other disk icons to save.
Step 8: Make sure the change has been saved.
Last Updated: July 2024
https://wesshelp.wessconnect.com/2023/12/29/how-to-add-a-promotion-title/
Step 1: Click “Setting” .
Step 2: Click on “PROMOTION” .
Step 3: Click on “NEW” .
Step 4: Enter a “Name” for the new promotion.
Step 5: Can write more details in the “Description” field.
Step 6: Make sure the “Published” has been set to “Yes” .
Step 7: Click on “APPLY” or other disk icons to save.
Step 8: Make sure the new promotion has been saved.
Last Updated: July 2024
https://wesshelp.wessconnect.com/2023/12/29/how-to-set-up-a-promotion-for-retail-products/
Step 1: Click “Product & Service” .
Step 2: Click “RETAIL PRODUCT” . 
Step 3: Click on the pen icon “✏️” to edit.
Step 4: Click on “PROMOTION” .
Step 5: Select a “Promotion” title.
Step 6: Click on the calendar icon “📅” to select a start date.
Step 7: Click on the calendar icon “📅” to select an end date.
Step 8: Enter the amount for the “Promotion Price” .
Step 9: [Optional] Here can set “Limit Qty” as “Yes” to sell the product at a discounted price for a limited amount.
Step 10: [Optional] Enter the amount for the limited quantity in Qty field.
Step 11: [Optional] Click on “Reset” to reset the quantity to the saved amount during the promotion.
Step 12: Click on “APPLY” or other disk icons to save.
Step 13: Make sure the change has been saved.
Last Updated: July 2024
Service
https://wesshelp.wessconnect.com/2021/06/16/how-to-add-service/
Step 1: Click “PRODUCT & SERVICE” .
Step 2: Click “SERVICE” .
Step 3: Click “NEW” .
Step 4: Fill in service details.
Step 5: Click “SAVE” .
Last update: April 2021
https://wesshelp.wessconnect.com/2021/06/16/how-to-edit-service/
Step 1: Click “PRODUCT & SERVICE” .
Step 2: Click “SERVICE” .
Step 3: Select the service.
Step 4: Click “EDIT”.
Step 5: You can make the changes if needed.
Step 6: Click “SAVE”.
Last update: April 2021
https://wesshelp.wessconnect.com/2021/06/16/how-to-unpublish-service/
Step 1: Click “PRODUCT & SERVICE” .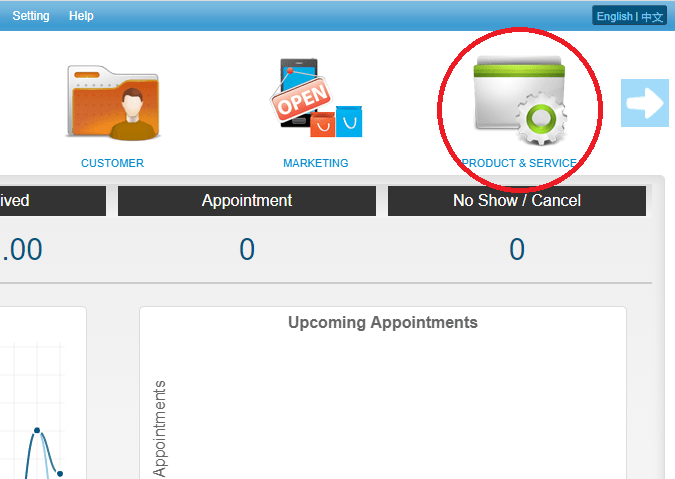
Step 2: Click “SERVICE”.
Step 3: Click the “✓” to unpublish the service.
Last update: April 2021
https://wesshelp.wessconnect.com/2022/12/01/how-to-publish-back-the-unpublished-service/
Step 1 : Go to “Product & Services” and click “Service” .
Step 2 : Click the Publish section and change it to “No”.
Step 3 : Click the icon “x” to publish back which service you want.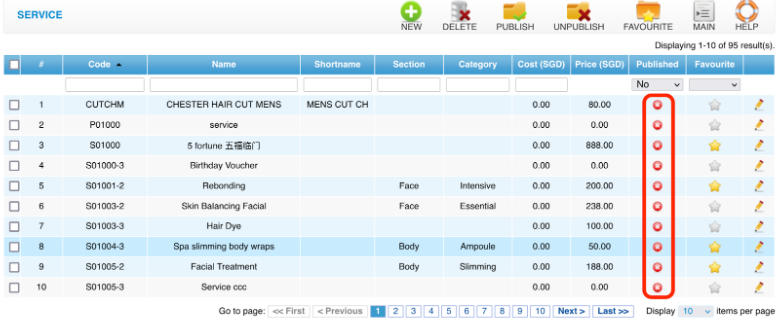
Last Update: November 2022
https://wesshelp.wessconnect.com/2021/06/16/how-to-control-the-lowest-selling-price-of-service/
Step 1: Click “PRODUCT & SERVICE” .
Step 2: Click “SERVICE” .
Step 3: Select the service.
Step 4: Click “EDIT” .
Step 5: Enter the lowest selling price.
Step 6: Click “SAVE” .
Last update: April 2021
Package
https://wesshelp.wessconnect.com/2021/06/16/how-to-add-package/
Step 1: Click “PRODUCT & SERVICE” .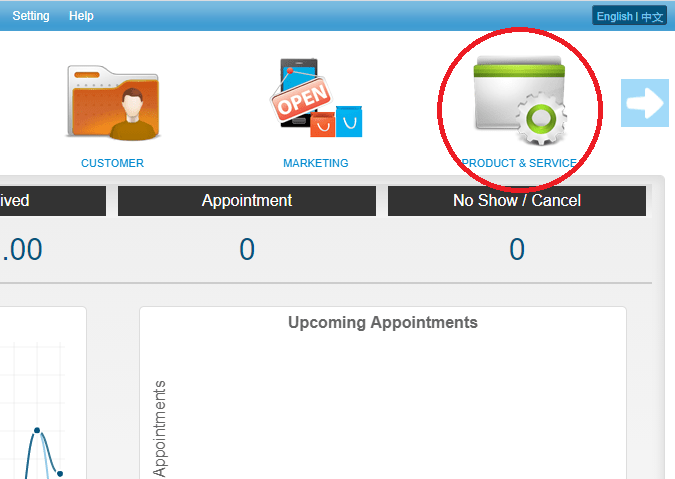
Step 2: Click “PACKAGE” .
Step 3: Click “NEW” .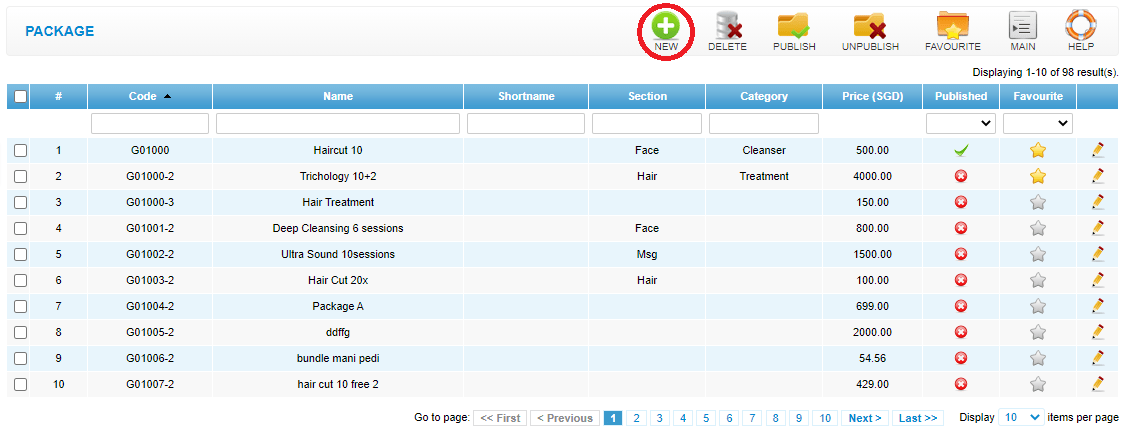
Step 4: Fill in package details .
Step 5: Enter the service details that included in this package .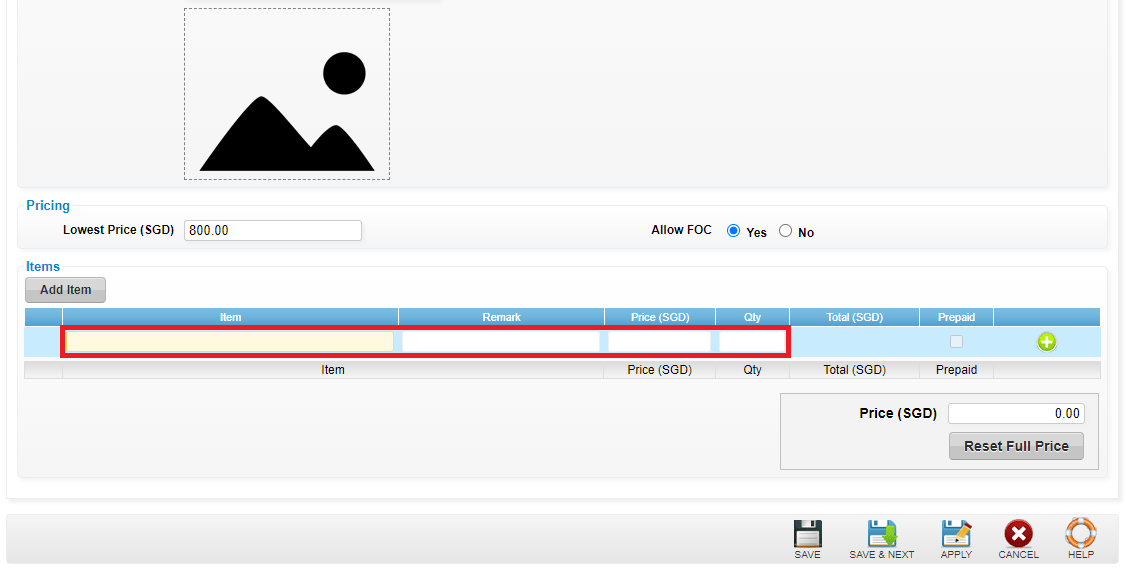
Step 6: Tick the prepaid option and click “✚” .
Step 7: You also can enter the product details that included in this package.
Step 8: Reset the full price.
Step 9: Click “SAVE” .
Last update: April 2021
https://wesshelp.wessconnect.com/2021/06/16/how-to-edit-package/
Step 1: Click “PRODUCT & SERVICE” .
Step 2: Click “PACKAGE” .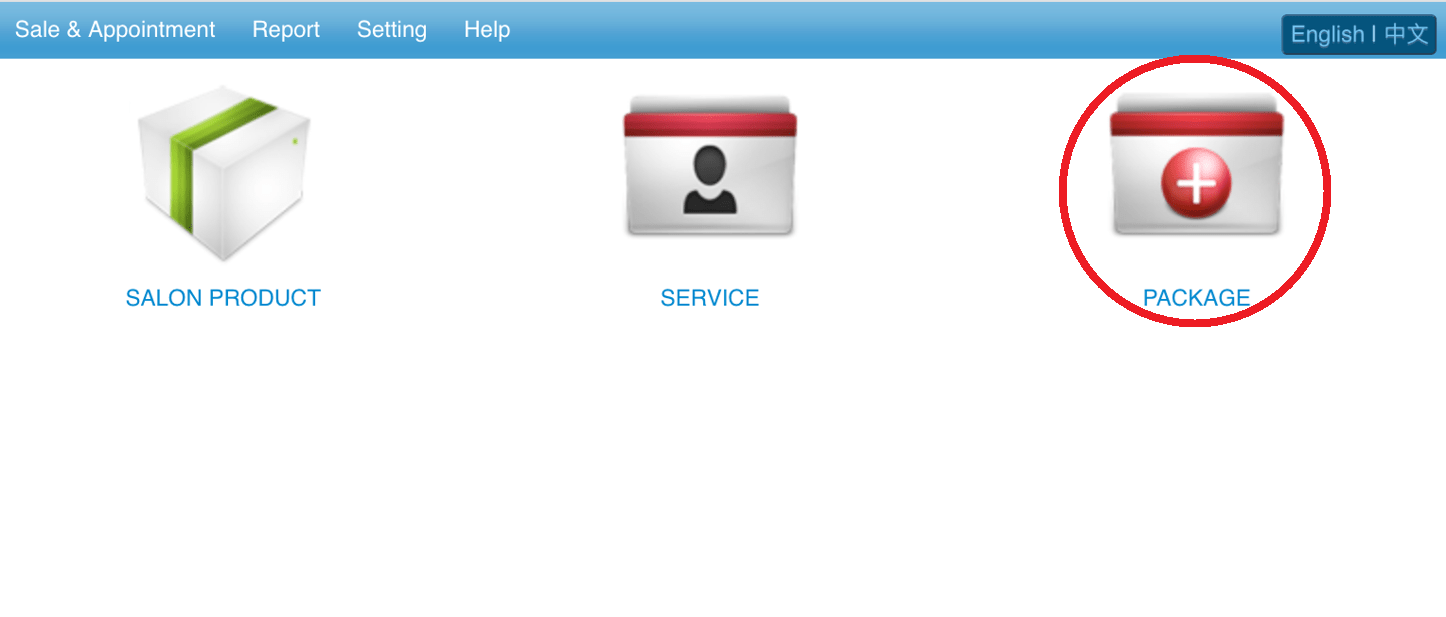
Step 3: Select the package.
Step 4: Click “EDIT”.
Step 5: You can make the changes if needed.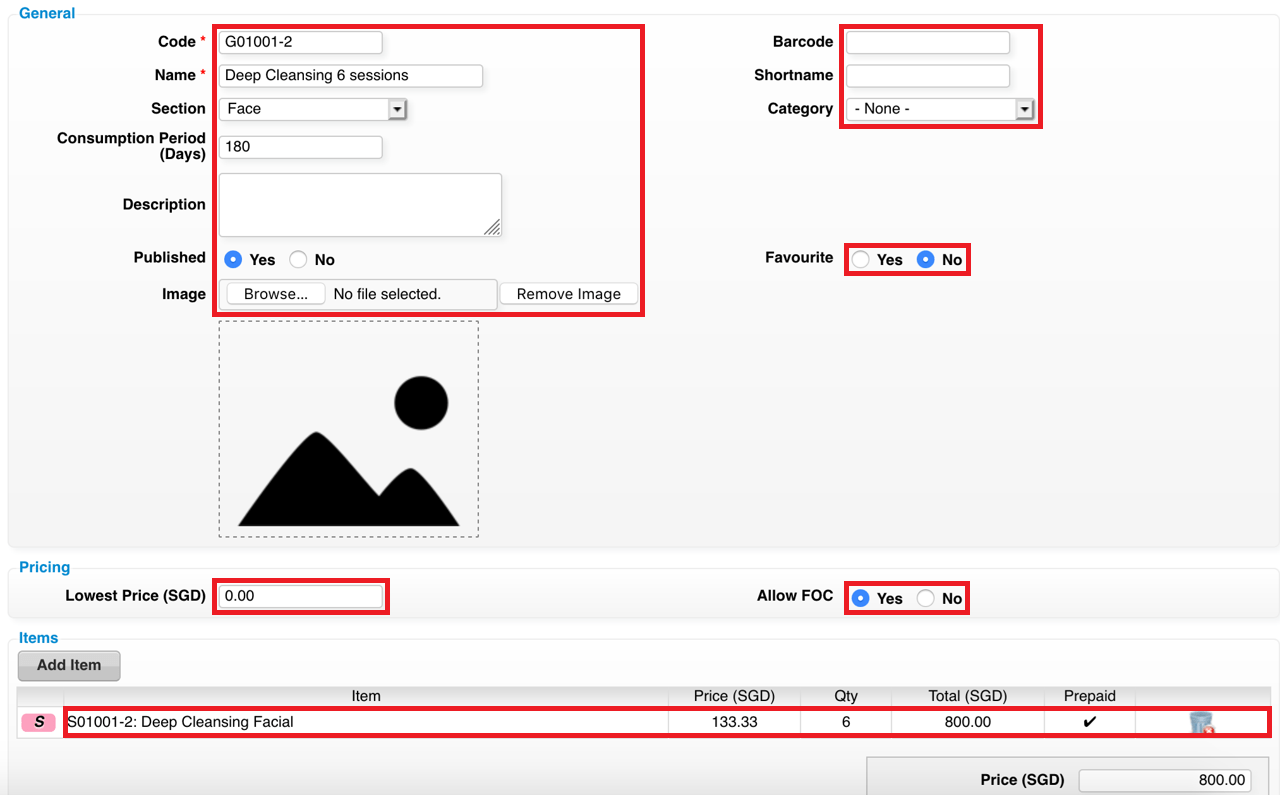
Step 6: Click “SAVE”.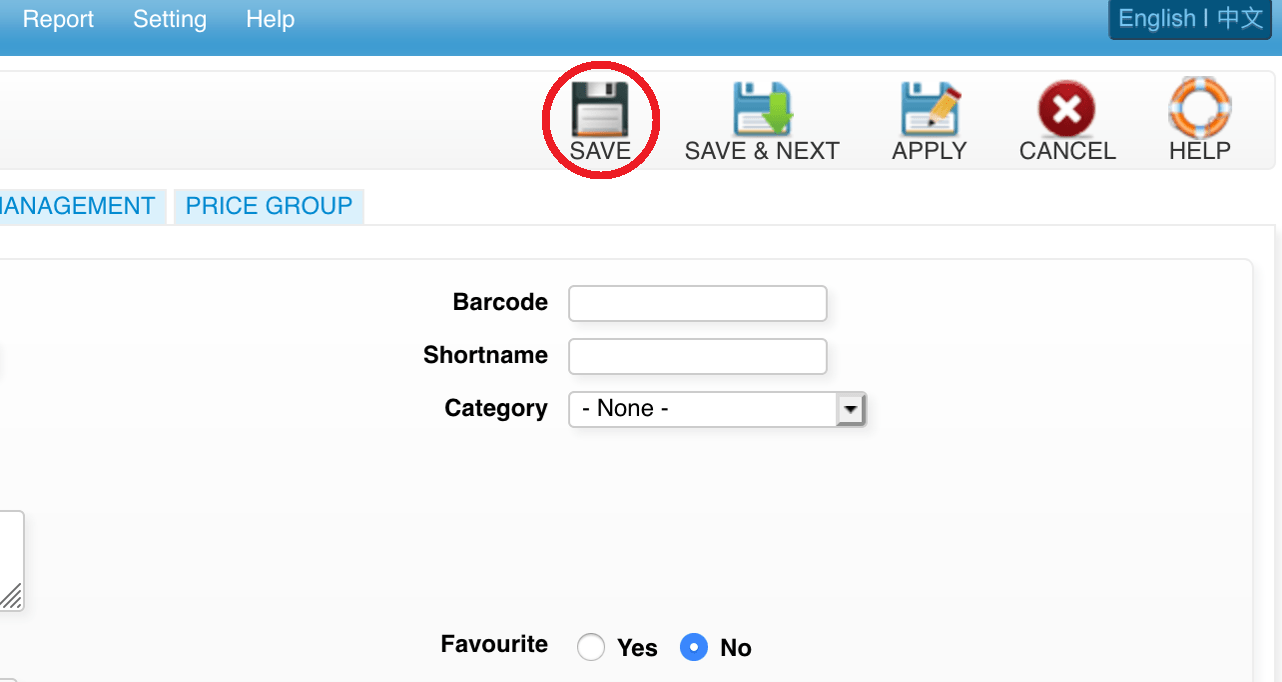
Last update: April 2021
https://wesshelp.wessconnect.com/2021/06/16/how-to-unpublish-package/
Step 1: Click “PRODUCT & SERVICE”.
Step 2: Click “PACKAGE”.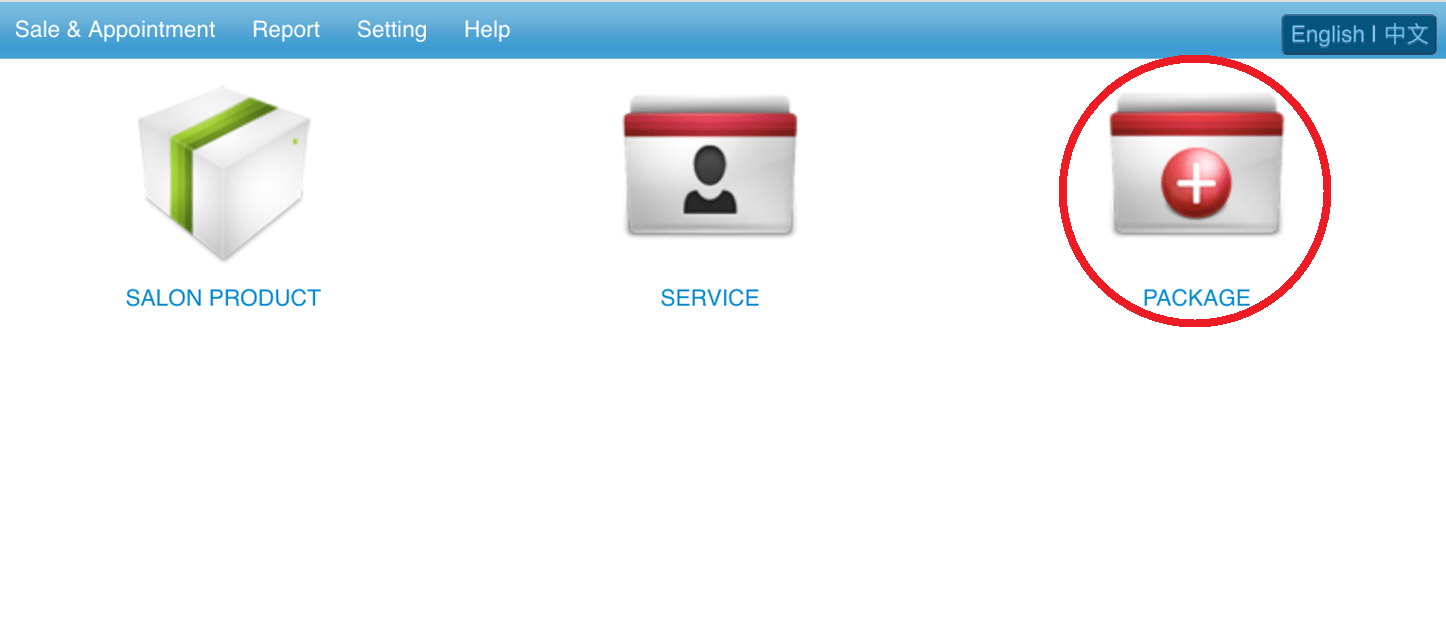
Step 3: Click the “✓” to unpublish the package.
Last update: April 2021
https://wesshelp.wessconnect.com/2022/12/01/how-to-publish-back-the-unpublished-package/
Step 1 : Go to “Product & Service” and click “Package”.
Step 2 : Click the Publish section and change it to “No”.
Step 3 : Click the icon “x” to publish back which package you want. 
Last Update: November 2022
Coupon
https://wesshelp.wessconnect.com/2024/12/12/how-to-create-discount-coupon/
Step 1: Click “PRODUCT & SERVICE” .
Step 2: Click “COUPON” .
Step 3: Click “NEW” .
Step 4: Fill in coupon details .
Step 5: [Optional] If need to sell this discount coupon then fill in the “Price” field with the price.![Step 5: [Optional] If need to sell this discount coupon then fill in the “Price” field with the price.](https://images.tango.us/workflows/7c7eba9b-bd4e-44c0-ad20-a2d0c4a6ba6d/steps/6748bbe2-4c7d-490b-aad8-e56fde8888a1/536e0745-ed79-42ce-a543-fd2354f64a85.png?mark-x=503&mark-y=634&m64=aHR0cHM6Ly9pbWFnZXMudGFuZ28udXMvc3RhdGljL2JsYW5rLnBuZz9tYXNrPWNvcm5lcnMmYm9yZGVyPTQlMkNGRjc0NDImdz0yMjAmaD0zNiZmaXQ9Y3JvcCZjb3JuZXItcmFkaXVzPTEw)
Step 6: Click “Discount Coupon” to select the type of coupon.
Step 7: Next in the “Transferable” field, choose and click “YES” or “NO” .
*YES – Anyone can redeem this coupon.
*NO – The person who holds the coupon can redeem this coupon.
Step 8: Enter the discount amount or discount percentage.
For example : 10 or 10%
Step 9: [Optional] In the “Is Item Coupon” field, click “Yes” or “No” .
*No : you can instead specify a particular item for the coupon in the “Item Saving” field.![Step 9: [Optional] In the “Is Item Coupon” field, click “Yes” or “No” .](https://images.tango.us/workflows/7c7eba9b-bd4e-44c0-ad20-a2d0c4a6ba6d/steps/400e0bb6-fcb1-48f6-8c6d-6464bda4185a/c5865d3b-0d0e-44b0-bb4c-c629c52589e9.png?mark-x=573&mark-y=555&m64=aHR0cHM6Ly9pbWFnZXMudGFuZ28udXMvc3RhdGljL2JsYW5rLnBuZz9tYXNrPWNvcm5lcnMmYm9yZGVyPTQlMkNGRjc0NDImdz02NyZoPTQ2JmZpdD1jcm9wJmNvcm5lci1yYWRpdXM9MTA%3D)
*Yes : you’ll be able to specify a Type Restriction for the coupon.
Step 10: Click “SAVE” .
Step 11: Make sure the record has been saved.
Last Updated: December 2024
https://wesshelp.wessconnect.com/2021/06/16/how-to-create-credit-coupon/
Step 1: Click “PRODUCT & SERVICE” .
Step 2: Click “COUPON” .
Step 3: Click “NEW” .
Step 4: Fill in coupon details .
Step 5: [Optional] If need to sell this credit coupon then fill in the “Price” field with the price.
Step 6: Click Credit Coupon to select the type of coupon.

Step 7: Credit (SGD) field can select “CREDIT THE PAID AMOUNT” or “CREDIT THE FOLLOWING AMOUNT” .
*Credit the paid amount – Customer will receive the credit equal to the selling price.
*Credit the following amount – Customer will receive the fixed credit (set by staff)
Step 8: [Optional] Enter the discount amount or discount percentage.
For example : 10 or 10%

Step 9: [Optional] Select the item type that can be redeemed by the credit .
Step 10: Click “SAVE” .
Step 11: Make sure the record has been saved.
Last update: Aug 2024
https://wesshelp.wessconnect.com/2021/06/16/how-to-create-coupon-with-serial-number/
Step 1: Click “PRODUCT & SERVICE” .
Step 2: Click “COUPON” .
Step 3: Click “NEW” .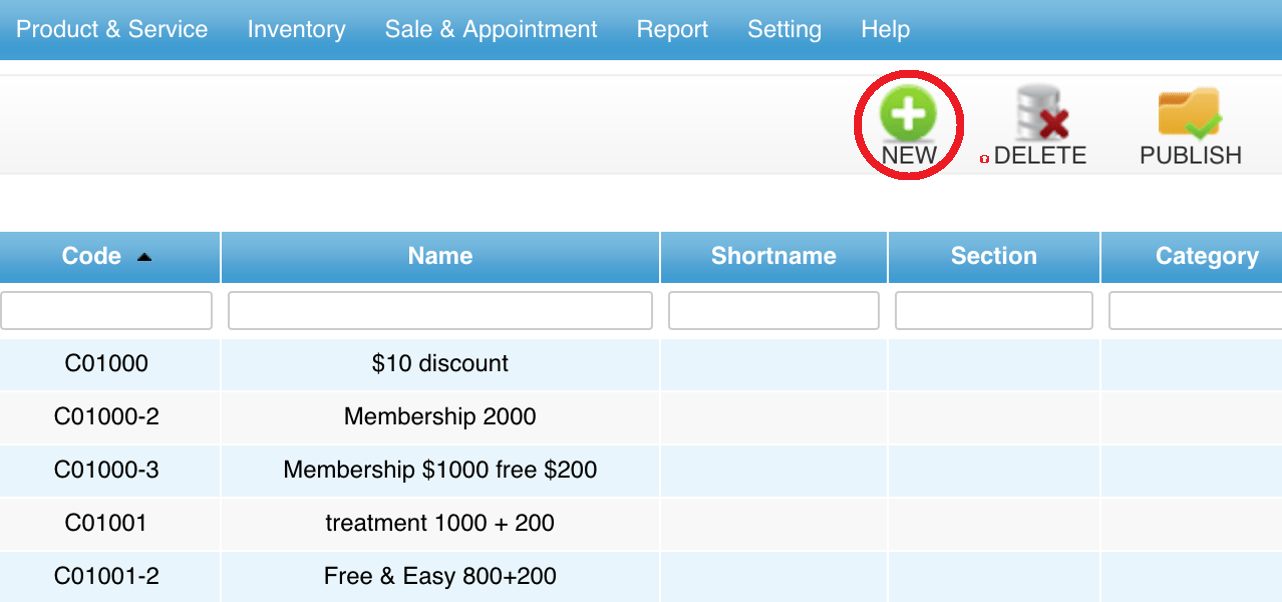
Step 4: Fill in coupon details.
Step 5: Select “DISCOUNT COUPON”.
Step 6: Transferable can select “YES” or “NO”.
*YES – Can be selected from Use Coupon
*NO – Redeem serial number coupon from Use Prepaid
Step 7: Select “YES”.
Step 8: “Enter the discount amount or discount percentage (For e.g. 10 or 10%)”.
Step 9: Click “SAVE”.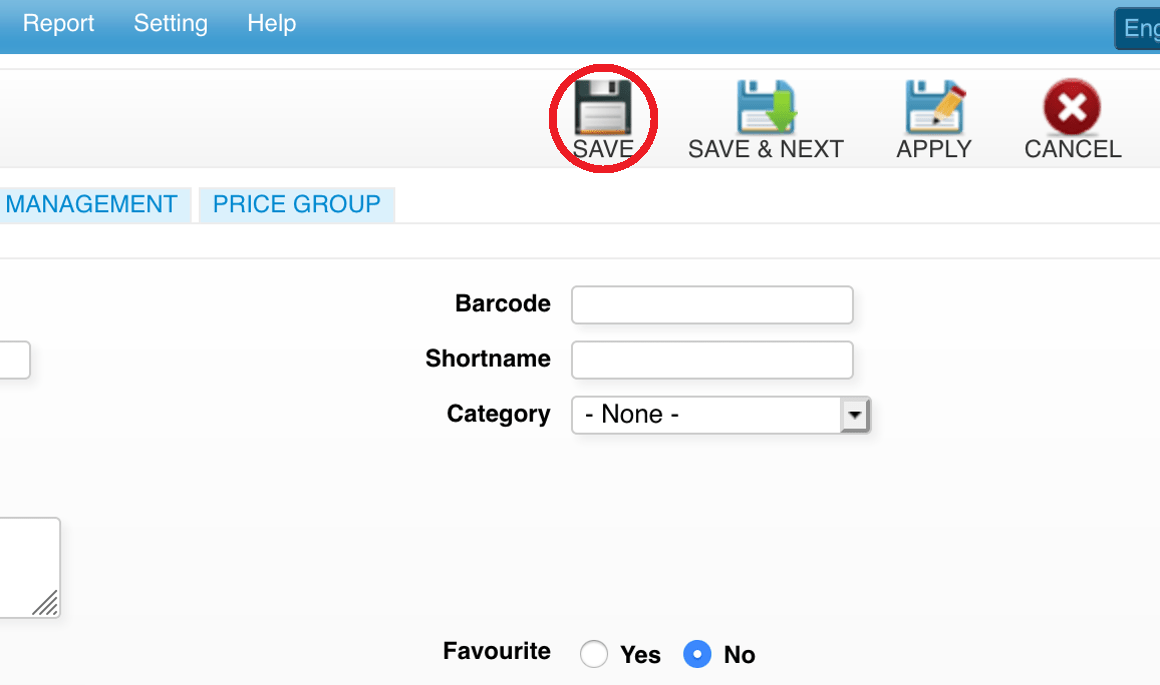
Step 10: Click “INVENTORY”.
Step 11: Click “ISSUE COUPON”.
Step 12: Click “NEW”.
Step 13: Select the coupon you have created just now and fill in coupon details.
Step 14: Click “SAVE”.
Last update: November 2022
https://wesshelp.wessconnect.com/2021/06/16/how-to-edit-coupon/
Step 1: Click “PRODUCT & SERVICE” .
Step 2: Click “COUPON” .
Step 3: Select the coupon.
Step 4: Click “EDIT” . 
Step 5: You can make the changes if needed.
Step 6: Click “SAVE”.
Last update: April 2021
https://wesshelp.wessconnect.com/2021/06/16/how-to-unpublish-coupon/
Step 1: Click “PRODUCT & SERVICE” .
Step 2: Click “COUPON” .
Step 3: Click the “✓” to unpublish the coupon.
Last update: November 2022
https://wesshelp.wessconnect.com/2022/12/01/how-to-publish-back-the-unpublished-coupon/
Step 1 : Go to “Product & Services” and click “Coupon” .
Step 2 : Click the Publish section and change it to “No” .
Step 3 : Click the icon “x” to publish back which coupon you want. 
Last update: November 2022
This section is organized into two parts.
[i] Part 1 ▿▿▿
Step 1: Click “Product & Service”.
Step 2: Click on “COUPON“.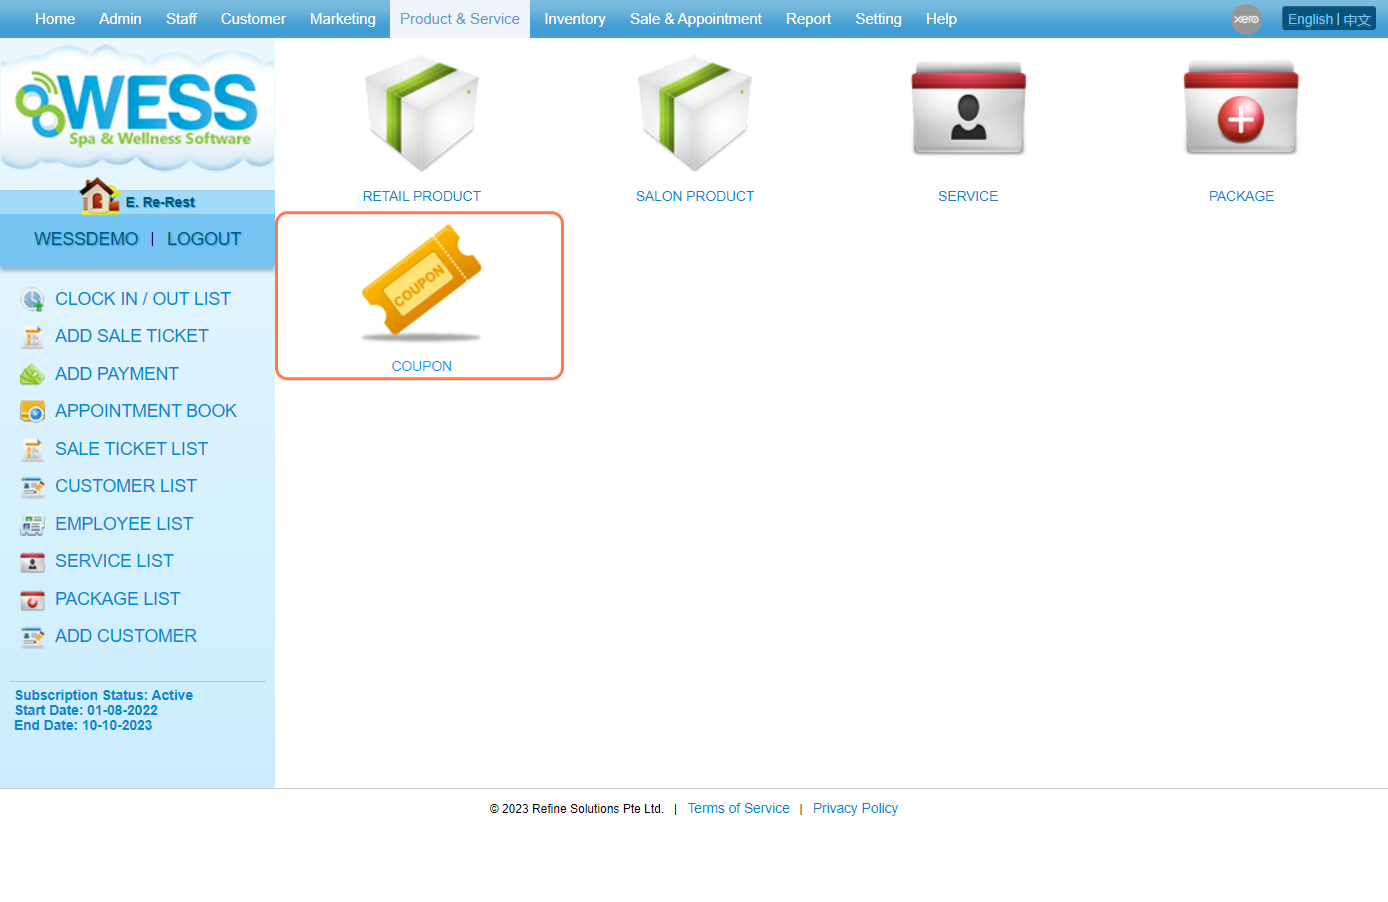
Step 3: Click on “NEW“.
Step 4: Type a “Name” for the new coupon.
Step 5: Type “0” zero for Price. Make sure you select “Yes” for “Allow FOC“.
Step 6: Select “Credit Coupon” for “Type“.
Step 7: Select “Credit the paid amount” for Credit.
Step 8: Make sure there is no discount for this coupon.
Step 9: Click on Save icon “💾”.
Step 10: Notice the new coupon has been created.
[ii] Part 2 ▿▿▿
Step 11: Click on “Sale & Appointment“.
Step 12: Click on “SALE TICKET“.
Step 13: Click on “NEW“.
Step 14: Find the overcharged customer.
Step 15: Set an employee to make sale.
Step 16: Search for the new coupon in search box.
Step 17: Click on the added coupon.
Step 18: Enter a value for “Price“, the price will be the amount of credit in the coupon.
Step 19: Again, make sure there is no discount applied to the coupon.
Step 20: Tick icon “✔️” checkbox to “Prepaid“, then the customer can use the coupon in the future.
Step 21: Select FOC so that the coupon is free with credits.
Step 22: Click OK icon “✔️”.
Step 23: Click “CHECK OUT“.
Step 24: Make sure the ticket has been created.
Step 25: In the future, this prepaid item can be viewed in the “TRANSACTION” section of the Customer Details page.
Step 26: Here it will show to see a new coupon with the amount entered.
Last update: July 2024
Error Handling - Product & Service
https://wesshelp.wessconnect.com/2021/06/16/why-i-cant-delete-the-item/
If you found this error message when you try to delete the item, it is because the item is used in package, coupon, or the item being sold before. Since the system will record all the transactions. “Hence, you may unpublish the item only”

Last update: November 2022
