
https://wesshelp.wessconnect.com/2021/06/15/how-to-add-new-customer/
Step 1: Click “CUSTOMER”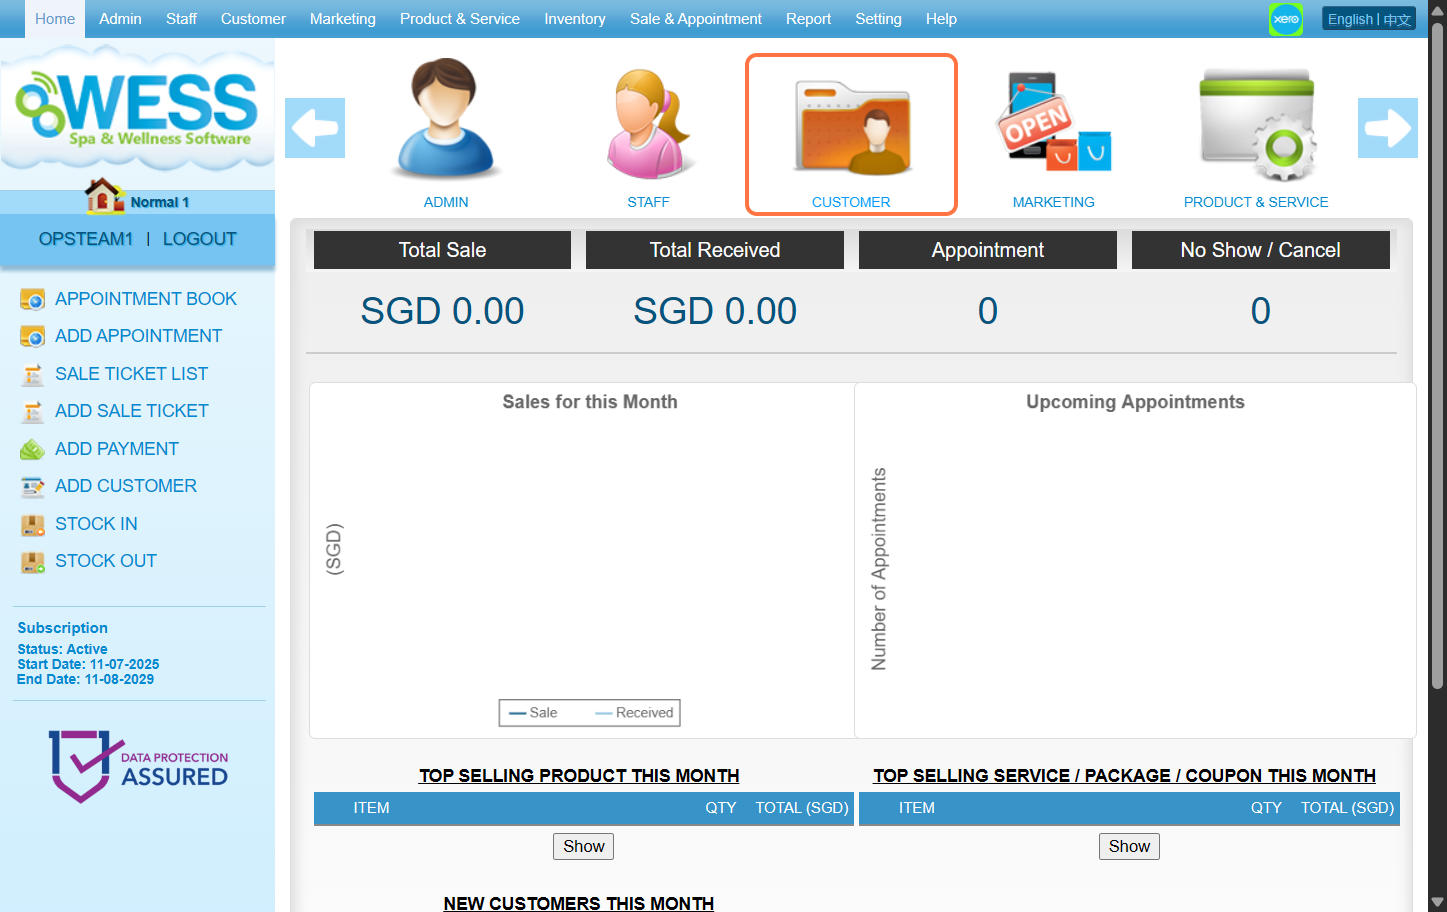
Step 2: Click “CUSTOMER”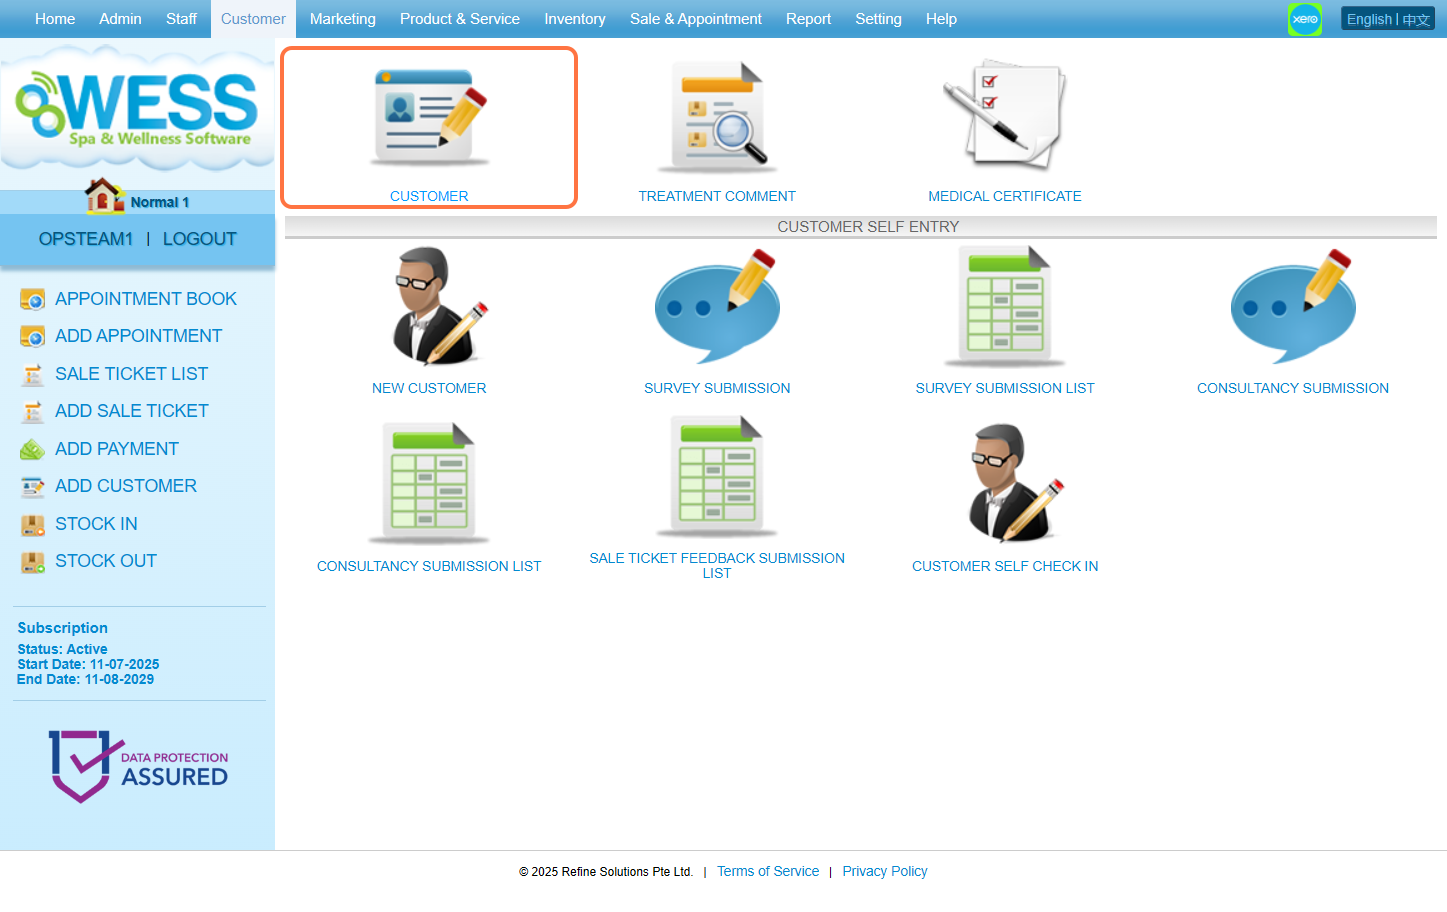
Step 3: Click “NEW”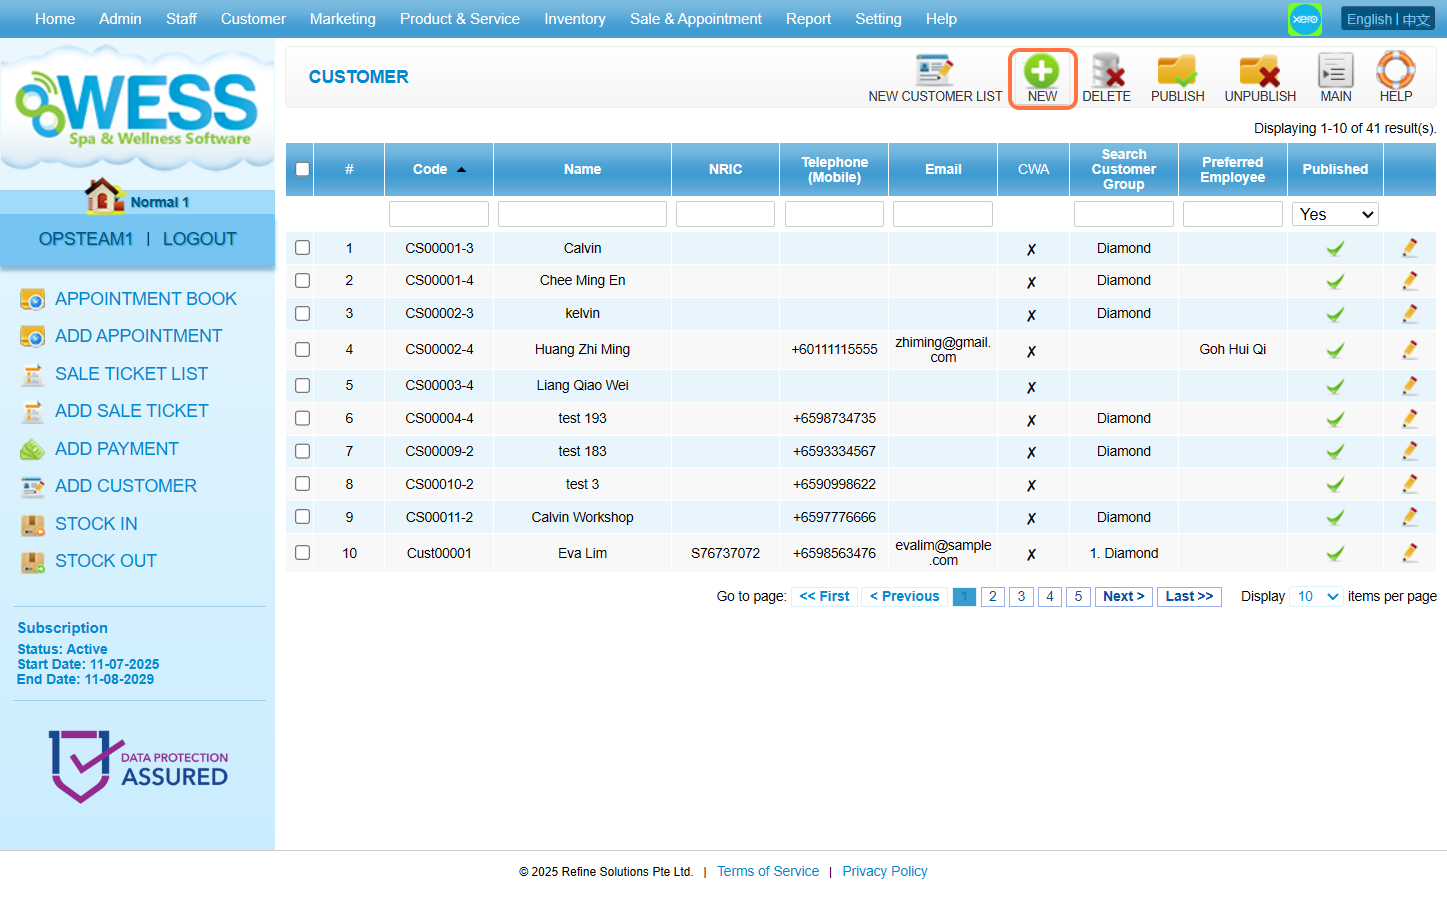
Step 4: Fill in customer details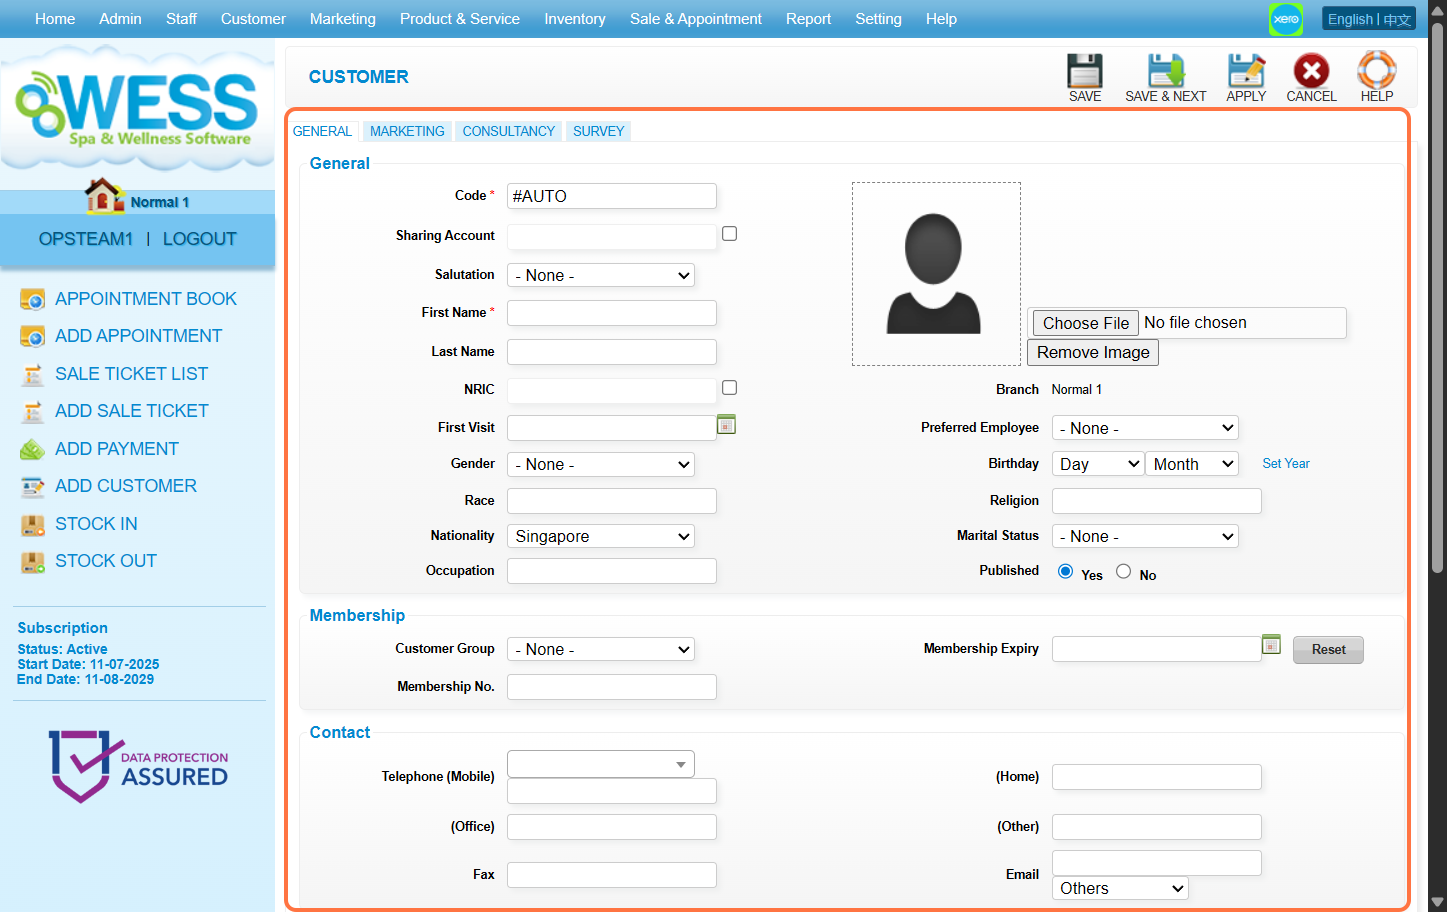
Step 5: Click “SAVE”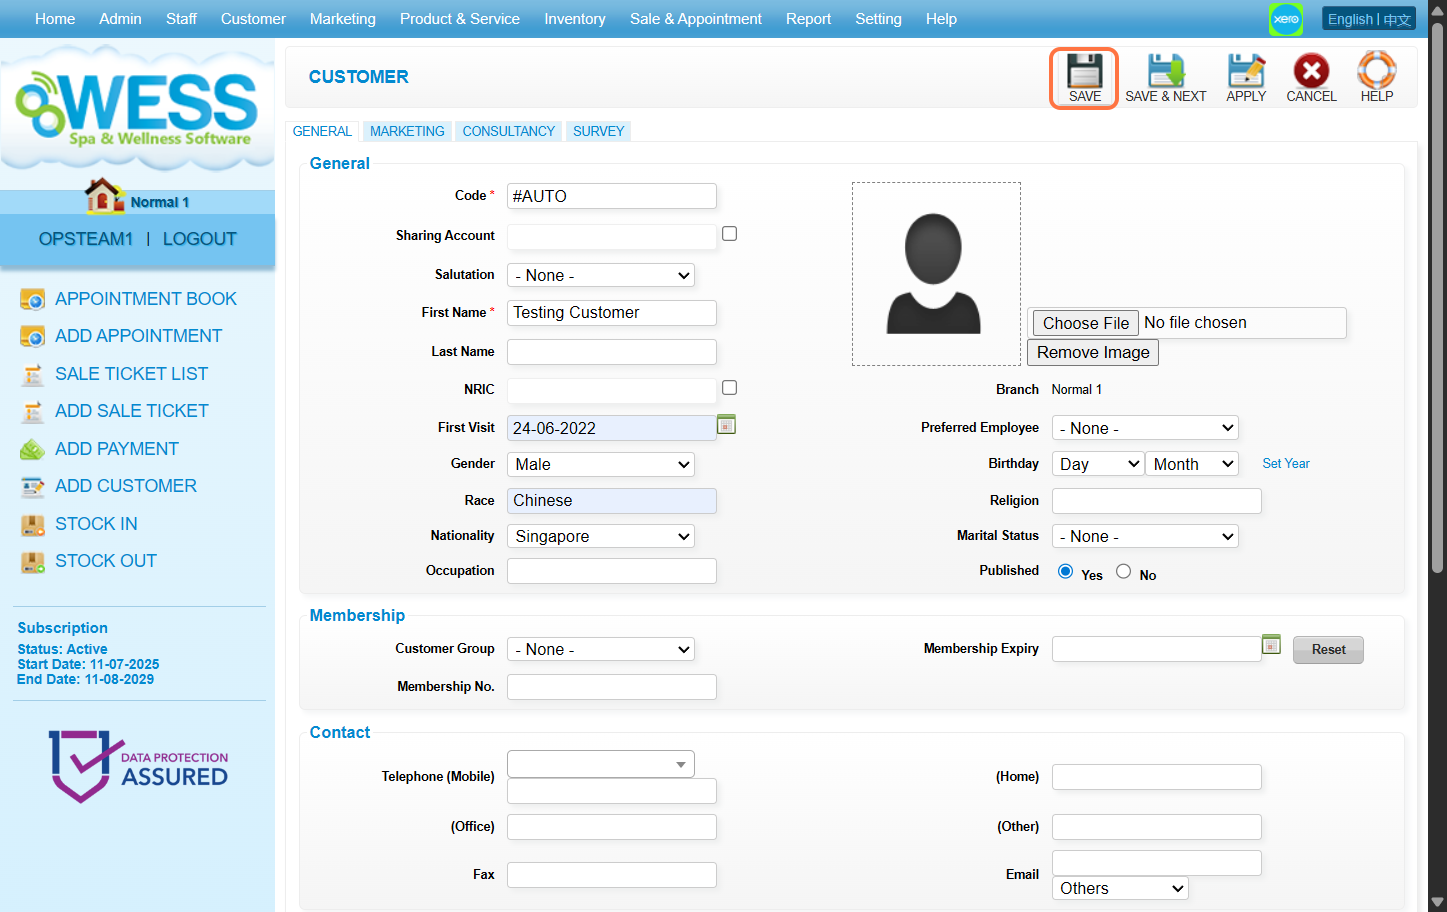
Last update: August 2025
https://wesshelp.wessconnect.com/2023/12/13/how-to-edit-customer-details-2/
Step 1: Click “Customer” .
Step 2: Click “CUSTOMER” .
Step 3: Click on the pen icon “✏️” to edit.
Step 4: Edit information as many as you want here.
Step 5: Click on “APPLY” or other disk icons to save.
Step 6: Make sure the change has been saved.
Last Updated: July 2024
https://wesshelp.wessconnect.com/2023/12/13/how-to-unpublish-a-customer/
Step 1: Click “Customer” .
Step 2: Click “CUSTOMER” .
ℹ️ Method 1
Step 3: Click on the pen icon “✏️” to edit.
Step 4: Set “Published” to “No” .
Step 5: Click on “APPLY” or other disk icons to save.
Step 6: Make sure the change has been saved.
ℹ️ Method 2
Step 7: Click on the “✔️” to unpublish.
Step 8: Make sure the change has been saved.
Last Updated: July 2024
https://wesshelp.wessconnect.com/2023/12/13/how-to-publish-back-the-unpublished-customer-2/
Step 1: Click “Customer” .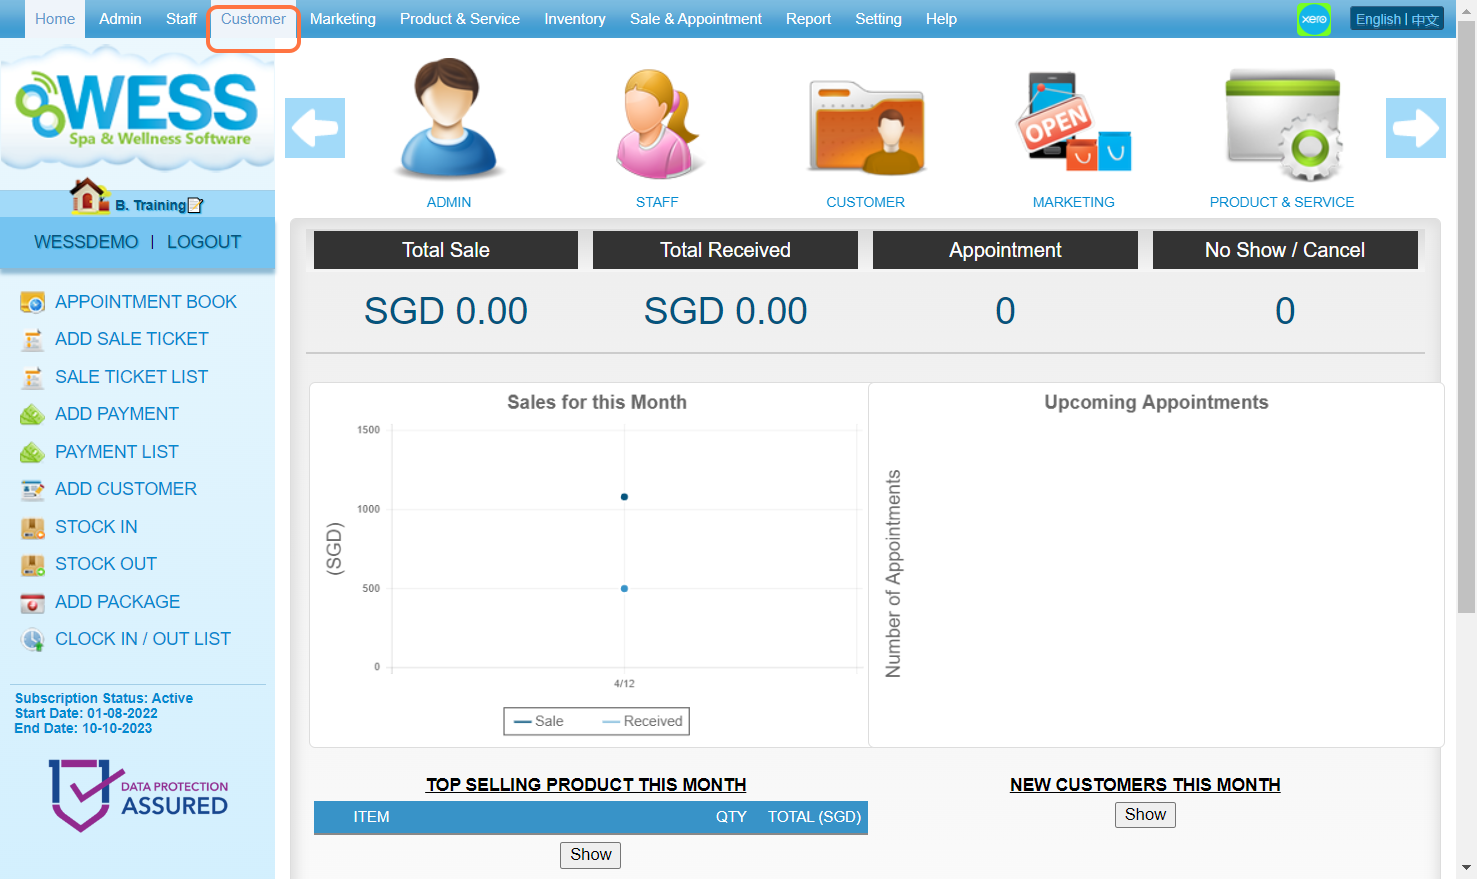
Step 2: Click “CUSTOMER” .
Step 3. Select “No” to show the unpublished user.
ℹ️ Method 1
Step 4: Click on the pen icon “✏️” to edit.
Step 5: Set “Published” to “Yes” .
Step 6: Click on “APPLY” or other disk icons to save.
Step 7: Make sure the change has been saved.
ℹ️ Method 2
Step 8: Click on the red close icon “❎” to publish.
Step 9: Make sure the change has been saved.
Last Updated: July 2024
https://wesshelp.wessconnect.com/2023/12/13/how-to-check-customer-transaction-history-2/
Step 1: Click “Customer” .![]()
Step 2: Click “CUSTOMER” .![]()
Step 3: Click on a customer Name to view its details.![]()
Step 4: Click on TRANSACTION.![]()
Step 5: Check the “Latest Transaction History” here.![]()
Step 6: [Optional] Click on View All.![]()
Step 7: [Optional] Check the “Sale Detail” which is a more detailed transaction history here.![]()
Last Updated: July 2024
https://wesshelp.wessconnect.com/2023/12/19/how-to-set-customer-code-2/
Step 1: Click “Setting” .
Step 2: Click on “REFERENCE CODE” .
Step 3: Click on the pen icon “✏️” to edit.
Step 4: Edit information as many as you want here.
Step 5: Click on “APPLY” or other disk icons to save.
Step 6: Make sure the change has been saved.
Last Updated: July 2024
https://wesshelp.wessconnect.com/2023/12/19/how-to-add-customer-member-groups-2/
Step 1: Click “Setting” .
Step 2: Click on “CUSTOMER GROUP” .
Step 3: Click on “NEW” .
Step 4: Enter the “Name” of the new customer group.
Step 5: Set the validity time for this customer group once assigned.
[!] Leave it empty will make this group permanent until removed manually.
Step 6: [Optional] As the expiry date can be updated, thus can turn this on to prevent it.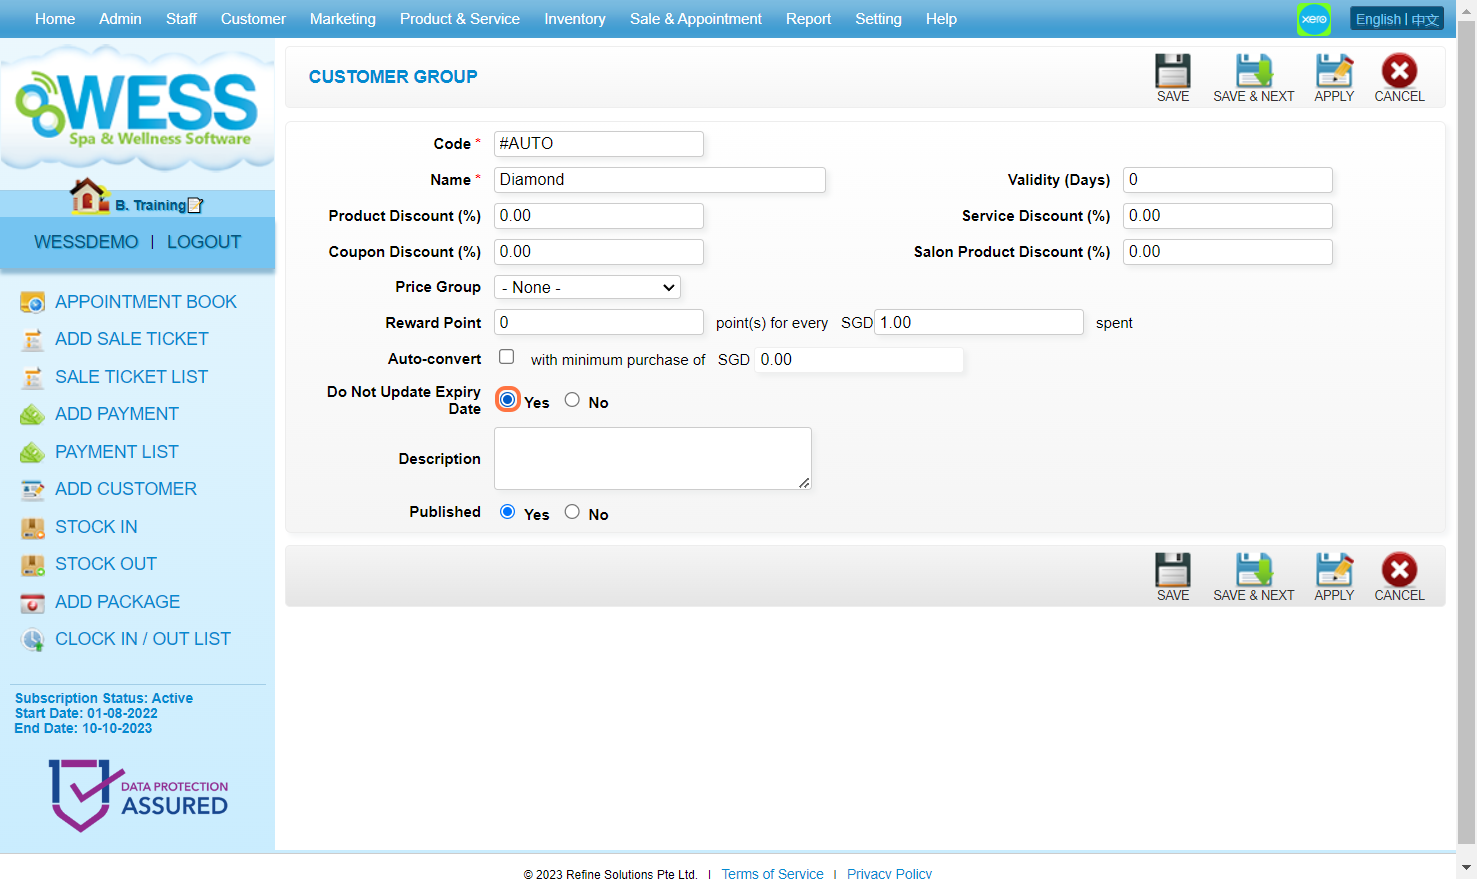
Step 7: Make sure the “Published” has been set to “Yes“.
Step 8: Can add information as many as you want here.
Step 9: Click on “APPLY” or other disk icons to save.”
Step 10: Make sure the new customer group has been saved.
Last Updated: July 2024
Step 1: Click “Setting” .
Step 2: Click “CUSTOMER SETTING” .
Step 3: Set “Allow Phone Duplication” to “On” .
Step 4: Click on Save icon “💾” .
Step 5: Make sure the change has been saved.
Last Updated: July 2024
Step 1: Click “Customer” .
Step 2: Click “CUSTOMER” .
Step 3: Click on the pen icon “✏️” to edit.
Step 4: Click “TRANSACTION” .
Step 5: Click on the ‘i’ icon “ⓘ” . 
Step 6: Write the “Prepaid Remarks” here.
Step 7: Click on “Cancel” .
[!] The OK button can be ignored here.
Step 8: Click on “APPLY” or other disk icons to save.
Step 9: Make sure the change has been saved.
Last Updated: July 2024
https://wesshelp.wessconnect.com/2023/12/19/how-to-share-the-account-with-multiple-customers/
Step 1: Click “Customer” .
Step 2: Click “CUSTOMER” .
Step 3: Click on the pen icon “✏️” to edit.
[!] It can be anyone from the sharing group
Step 4: Tick the Sharing Account checkbox “☑️” . 
Step 5: Click on “APPLY” or other disk icons to save.
Step 6: Make sure the change has been saved.
Step 7: Copy the code from the “Sharing Account field“.
Step 8: Click on CANCEL icon “❌” .
Step 9: Select another customer and Click on the pen icon “✏️” to edit.
Step 10: Tick theSharing Account checkbox “☑️” .
Step 11: Paste the copied code into “Sharing Account” field.
Step 12: Select a customer who matched to this code.
Step 13: Click on “APPLY” or other disk icons to save.
Step 14: Make sure the change has been saved.
[ℹ️] To check if the customers have shared the same account
Step 15: In the new ticket, select a customer who shared their account with another.
Step 16: Click on “Use Prepaid“.
Step 17: Hover the mouse over the ‘i’ icon “ⓘ” to show which customer has shared this prepaid item.
Last Updated: July 2024
https://wesshelp.wessconnect.com/2023/12/19/how-to-turn-on-customer-loyalty-rewards-2/
Step 1: Click “Setting” .
Step 2: Click “LOYALTY SETTING“.
a. [!] If needing to turn off customer loyalty reward can do this .
Step 3: Set Calculate Reward Point By to “– None –” .
Step 4: Click on Save icon “💾” .
Step 5: Make sure the change has been saved.
b. [!] If needing to turn on customer loyalty reward can do this .
Step 3: Select a reward method from “Commission Scheme Calculate Reward Point By” .
* None: Off
[T] Total: Give points based on payment amount.
[I] Item: Give points based on item details.
[C] Total & Customer Group: Work as “Total” + “Item” , but it varies based on the customer group.

Step 4: Enter “Reward Point For Referring New Customer” .
Regardless of any calculation method, this reward will be given.
Step 5: Click on Save icon “💾” .
Step 6: Make sure the change has been saved.
ℹ️ [T] If “Commission Scheme Calculate Reward Point By” is set as “Total“
- N: Number of points given per amount spent.
- M: Amount needed to earn one point.
- C: Percentage if paying an outstanding balance.
Step 1:
Set “Calculate Reward Point By” to “Total“, then
enter Points Given per Spent Amount (denoted as ‘N‘) .
For example, based to the diagram, that enter ‘2‘ points.
FORMULA : Points = Amount x N/M x C% (if paying outstanding amount)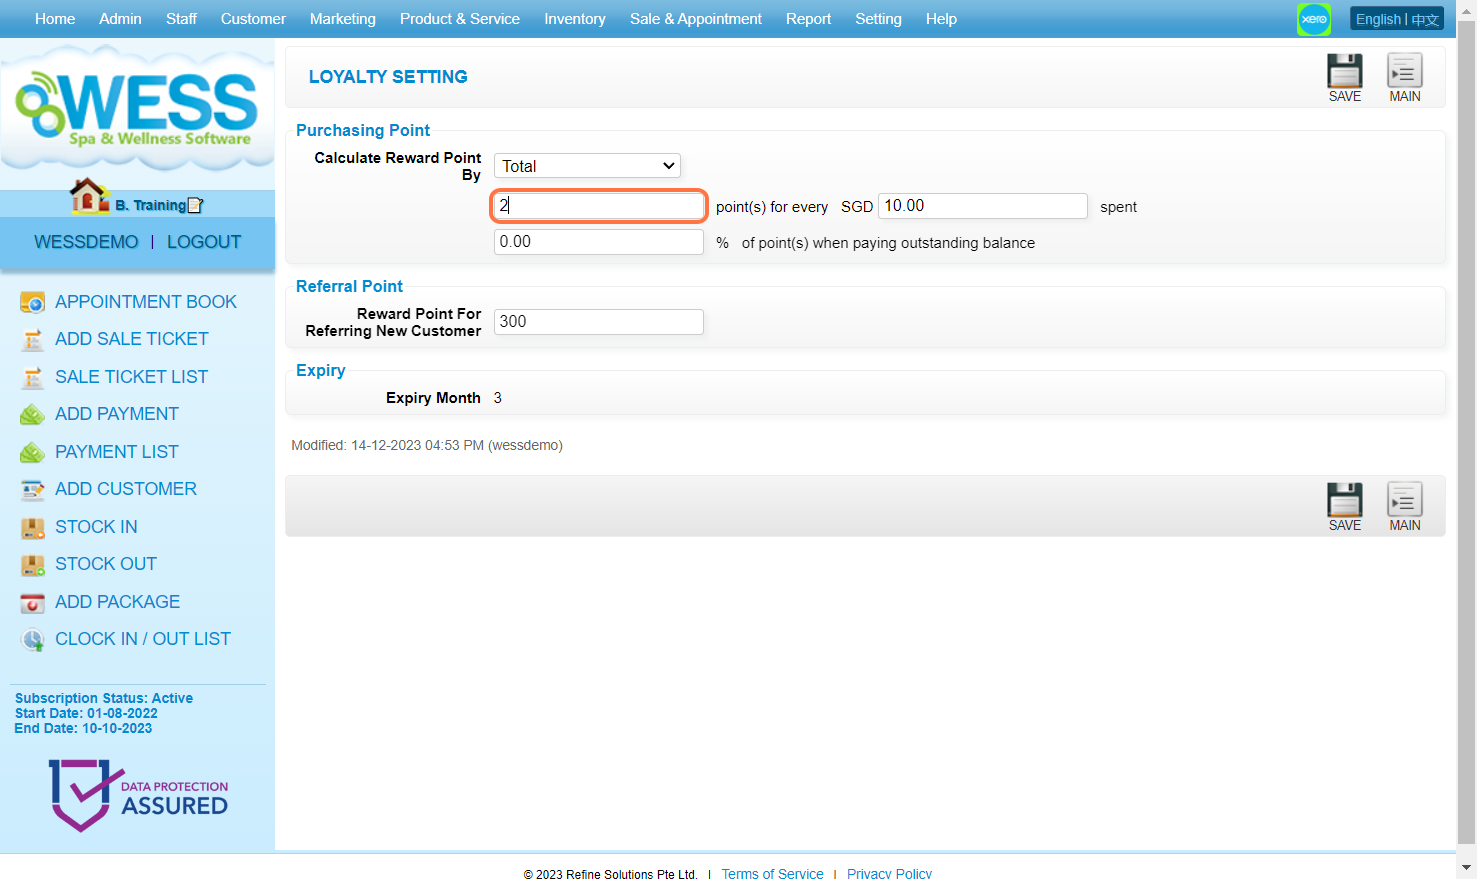
Step 2:
In the same screen, enter the Spent Amount per Point Given (M).
For example, based to the diagram, that enter ‘1‘.
FORMULA : Points = Amount x N/M x C% (if paying outstanding amount)

Step 3:
In the same screen, enter the Percentage for Outstanding Payment (C%).
For example, based to the diagram, that enter ‘50%‘ .
Step 4: Click on Save icon “💾” .
Step 5. Make sure the change has been saved.
ℹ️ [I] If “Commission Scheme Calculate Reward Point By” is set as “Item“
Step 1. Click on the pen icon “✏️” to edit.
[!] This applies on products, services, packages, and coupons
Step 2: Click on “LOYALTY” .
Step 3: Enter Reward Point given after purchasing this item.
[Optional] Tick the checkbox “☑️” of always use this reward point if you wish to ignore rules from the customer group.
Step 4: Click on “APPLY” or other disk icons to save.
Step 5: Make sure the change has been saved.
ℹ️ [C] If “Commission Scheme Calculate Reward Point By” is set as “Total & Customer Group”
Step 1: Click “Setting“.
Step 2: Click on “CUSTOMER GROUP“.
Step3: Click on the pen icon “✏️” to edit.
Step 4: Edit points per amount, it is similar to the default points setting.
Step 5: Tick the Auto-convert checkbox “☑️” and set the minimum amount before giving points.
Step 6: Click on “APPLY” or other disk icons to save.
Step 7: Make sure the change has been saved.
Last Updated: July 2024
https://wesshelp.wessconnect.com/2023/12/20/how-to-add-a-treatment-comment/
Step 1: Click “Customer” . 
Step 2: Click “TREATMENT COMMENT” .
Step 3: Click on “NEW” .
Step 4: Enter a “Customer” name and select a customer.
Step 5: Select a programme.
Step 6: Click on “Employee” .
Step 7: Select an employee.
Step 8: Click on SET.
Step 9: Write more details in the “Remark field” .
Step 10: Write a comment.
Step 11: Click on the “➕” to add.
Step 12. [Optional] Click on DELETE “🛢❌” to remove added comments.
Step 13: [Optional] Click on added comments for editing.
Step 14: [Optional] Click on the blue tick icon “☑️” to apply the changes.
Step 15: Click on “APPLY” or other disk icons to save.
Step 16: Make sure the new treatment comment has been saved.
Last Updated: July 2024
https://wesshelp.wessconnect.com/2023/12/20/how-to-edit-treatment-comments/
Step 1: Click “Customer” .
Step 2: Click on “TREATMENT COMMENT” .
Step 3: Click on the pen icon “✏️” to edit.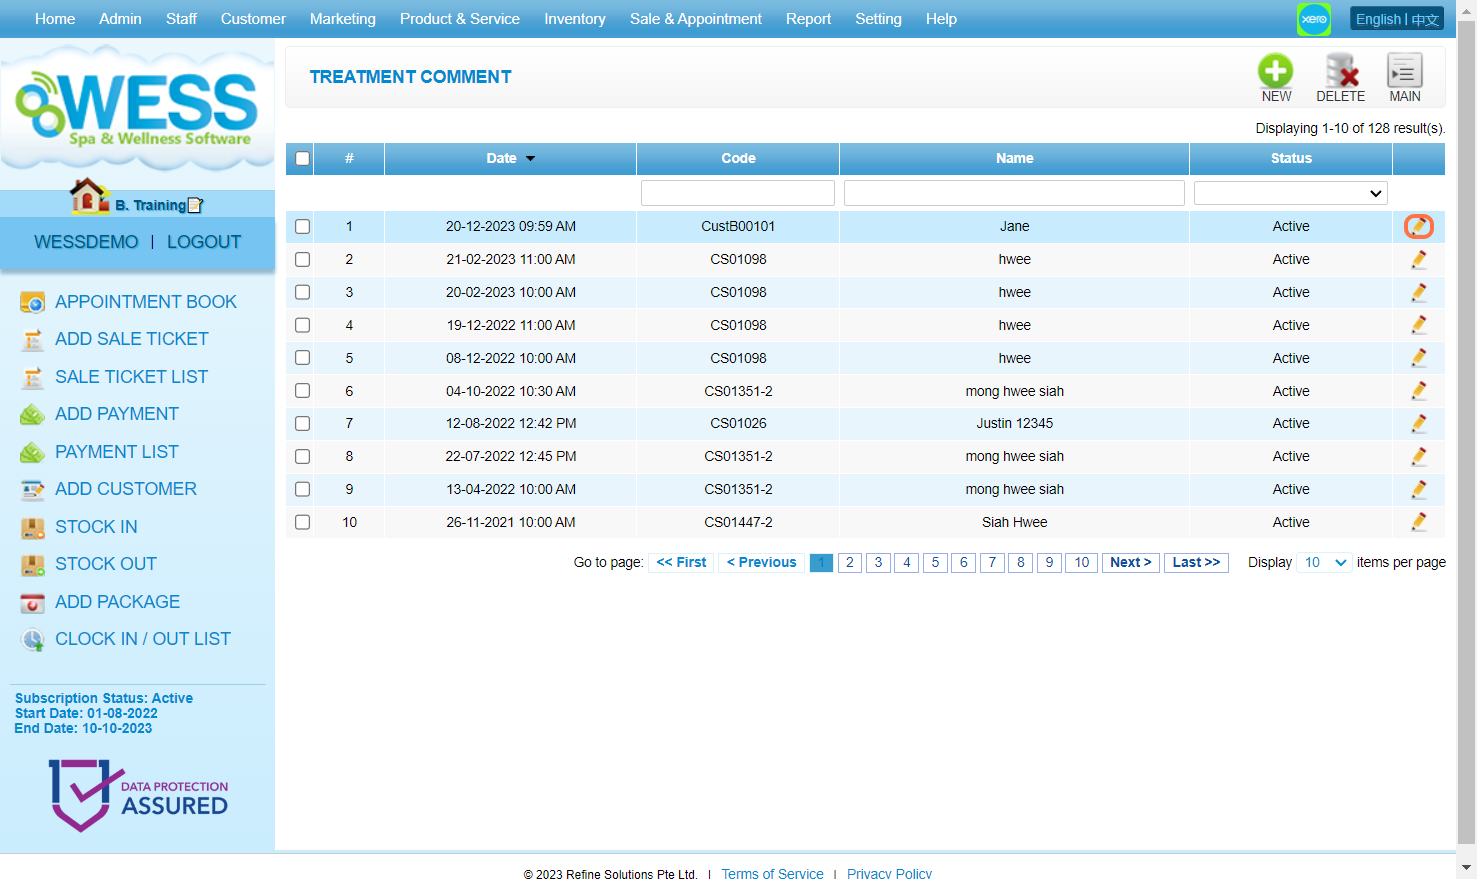
Step 4: Edit information as many as you want here.
Step 5: Click on “APPLY” or other disk icons to save.
Step 6: Make sure the change has been saved.
Last Updated: July 2024
https://wesshelp.wessconnect.com/2023/12/20/how-to-add-an-image-to-a-treatment-comment/
Step 1: Click “Customer” .
Step 2: Click on “TREATMENT COMMENT” .
Step 3: Click on the pen icon “✏️” to edit.
Step 4: Click on “Add Image” .
Step 5: Select an image from the device.
Step 6: Make sure the image has been uploaded.
Step 7: [Optional] Click on Edit.
Step 8: [Optional] Edit the image here.
Step 9: Click on “OK” .
Step 10: [Optional] Click on the blue tick icon “☑️” to deselect the image.
Step 11: [Optional] Click on the orange close icon “❎” to select the image.
Step 12: Make sure the intended image is selected to be added.
Step 13: Click on “APPLY” or other disk icons to save.
Step 14: Make sure the change has been saved.
Last Updated: July 2024
https://wesshelp.wessconnect.com/2023/12/20/how-to-void-treatment-comments/
Step 1: Click “Customer” .
Step 2: Click on “TREATMENT COMMENT” .
Step 3: Click on the pen icon “✏️” to edit.
Step 4: Click on “VOID” .
Step 5: Make sure the record has been voided.
Last Updated: July 2024
https://wesshelp.wessconnect.com/2023/12/20/how-to-check-a-customers-latest-treatment-comment/
Step 1: Click “Customer” .
Step 2: Click “CUSTOMER” .
Step 3: Click on the customer “Name” to view their profile details.
Step 4: Click on “TREATMENT HISTORY” .
Step 5: Check the “Latest Treatments Comment” here.
Step 6: [Optional] Click on View All.
Step 7: [Optional] Check the detailed list of the “Latest Treatment Comments” here.
Step 8: Click the pen icon “✏️” to edit the record.
Step 9: Edit information as many as you want here.
Last Updated: July 2024
https://wesshelp.wessconnect.com/2023/12/20/how-to-add-a-medical-certificate/
Step 1: Click “Customer” .
Step 2: Click “MEDICAL CERTIFICATE” .
Step 3: Click on “NEW” .
Step 4: Enter the Customer Name and select a customer.
Step 5: Click on the Calendar icon “📅” .
Step 6: Select a date and time here.
Step 7: Click “Employee” .
Step 8: Select an employee to tick.
Step 9: Click on SET icon “✔️” .
Step 10: Select an medical certificate (MC) in “Comment” field to tick.
Step 11: Can write more details in the “Remark field” .
Step 12: Click on Save icon “💾” .
Step 13: Make sure the record has been saved.
Last Updated: July 2024
https://wesshelp.wessconnect.com/2023/12/20/how-to-print-a-medical-certificate/
Step 1: Click “Customer” .
Step 2: Click “MEDICAL CERTIFICATE” .
Step 3: Click on the pen icon “✏️” to edit.
Step 4: Click “PRINT” .
Last Updated: July 2024
https://wesshelp.wessconnect.com/2023/12/20/how-to-delete-a-medical-certificate/
Step 1: Click “Customer” .
Step 2: Click “MEDICAL CERTIFICATE” .
Step 3: Tick the checkbox “☑️” to select the record.
Step 4: Click on DELETE “🛢❌” .
Step 5: Make sure the record has been deleted.
Last Updated: July 2024
https://wesshelp.wessconnect.com/2026/05/07/how-to-create-new-customer-entry-form/
Step 1: Click on “SETTING”
Step 2: Click on “CUSTOMER NEW ENTRY”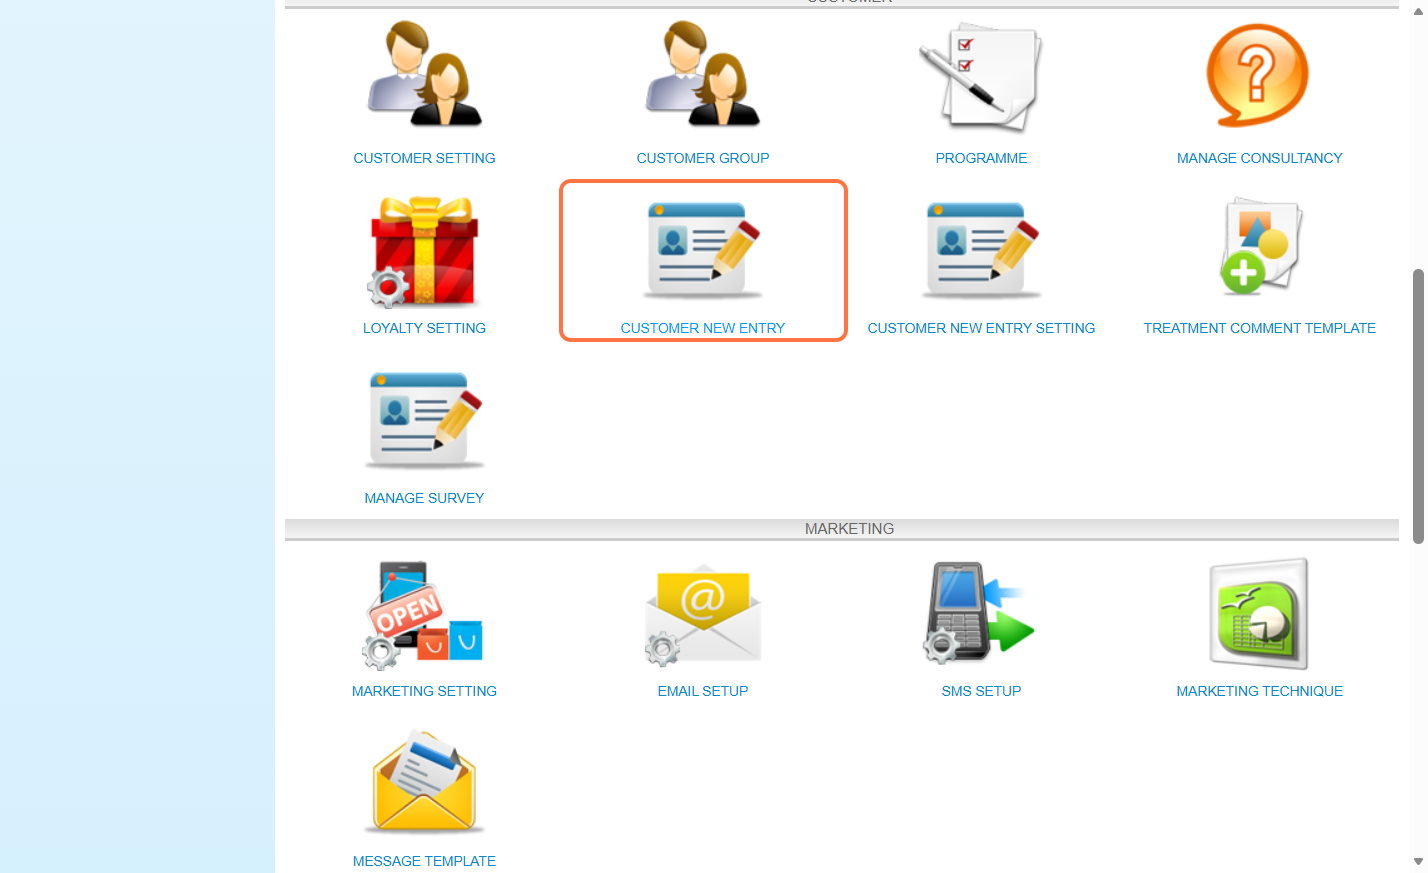
Step 3: Click on “NEW”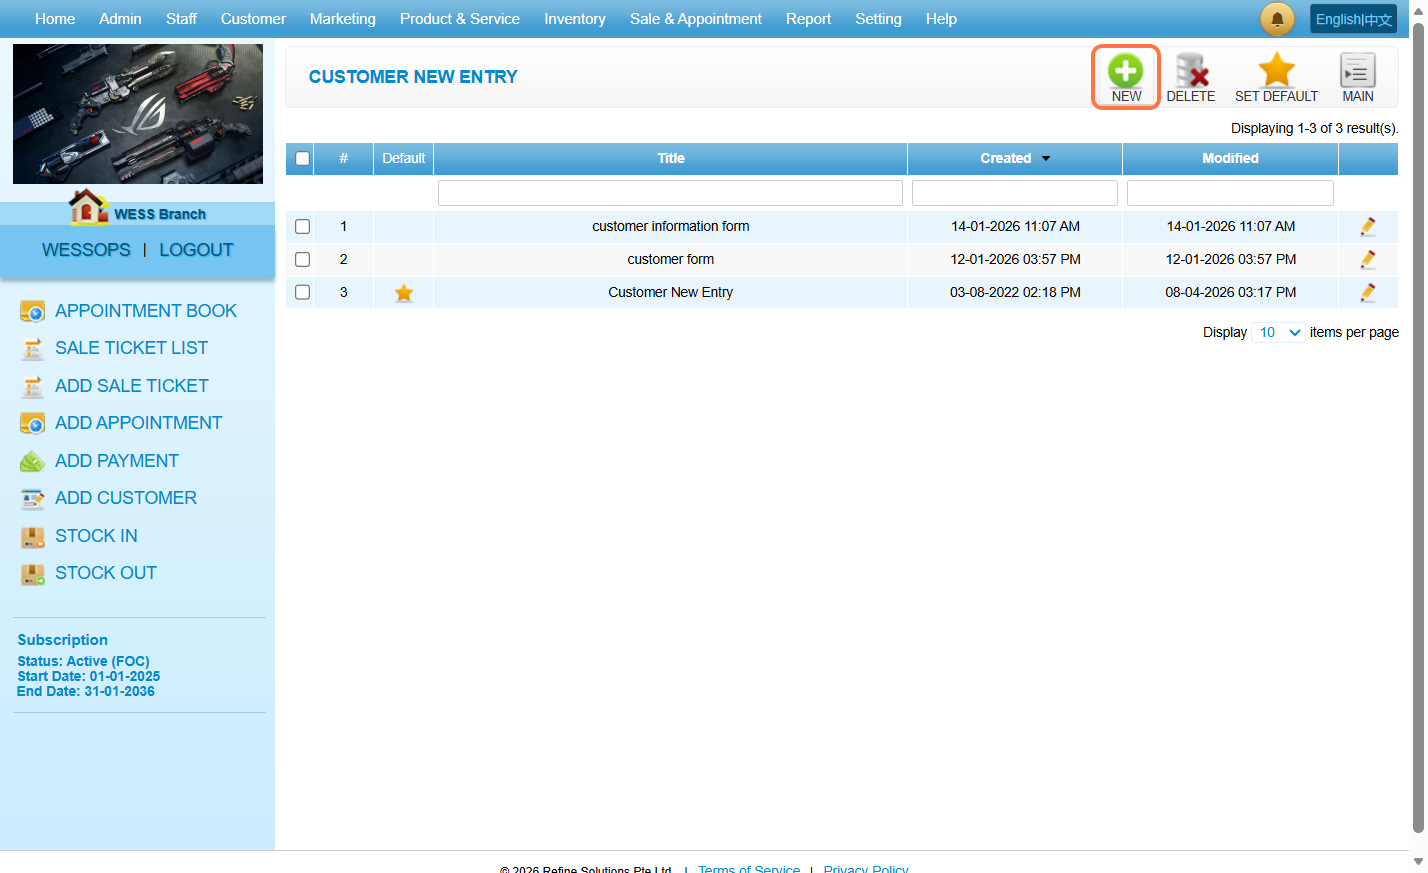
Step 4: Fill in the title and description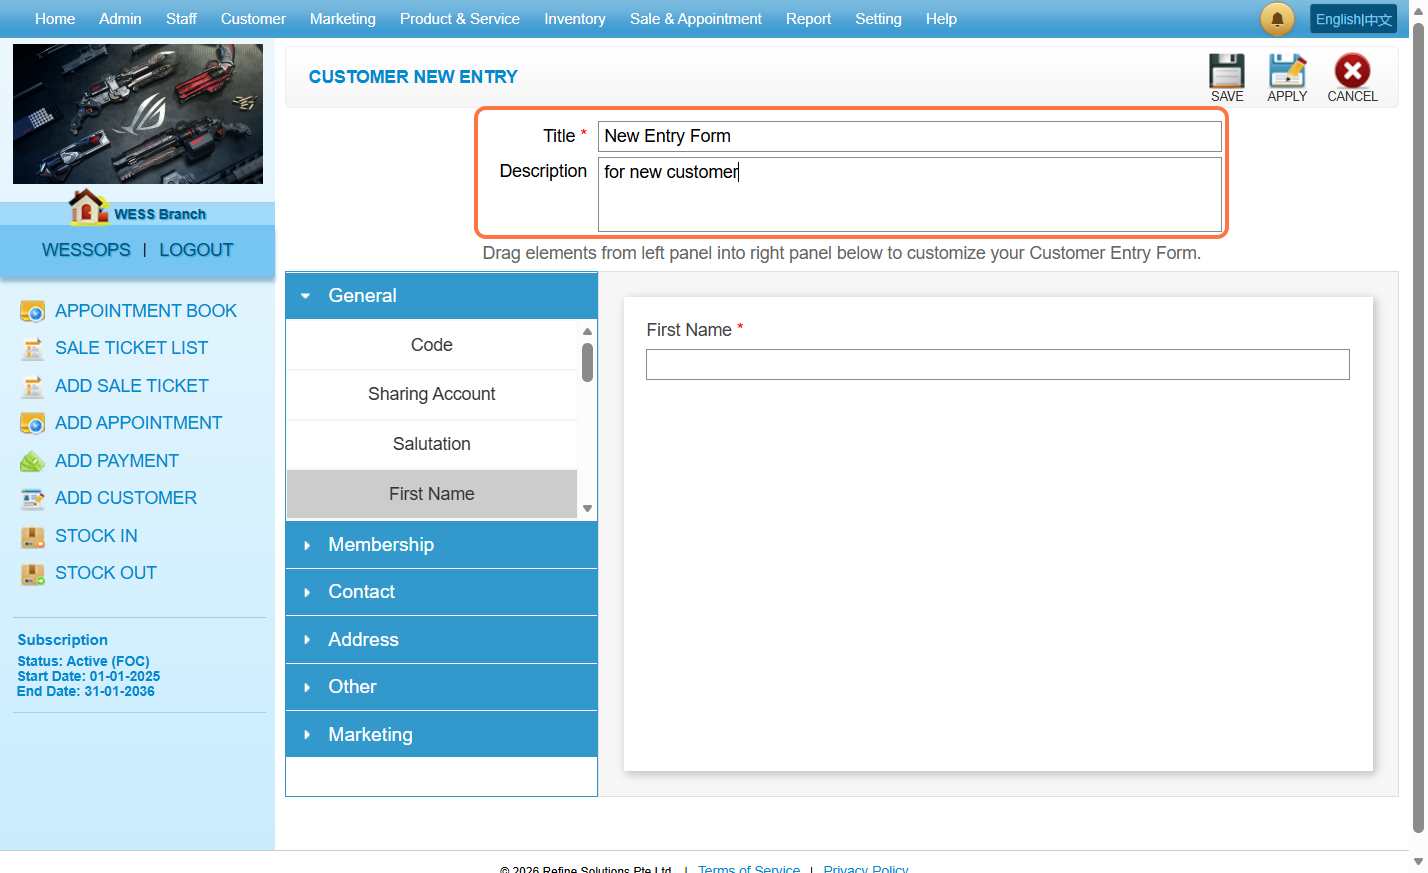
Step 5: Drag and drop the field needed from the left panel to the right panel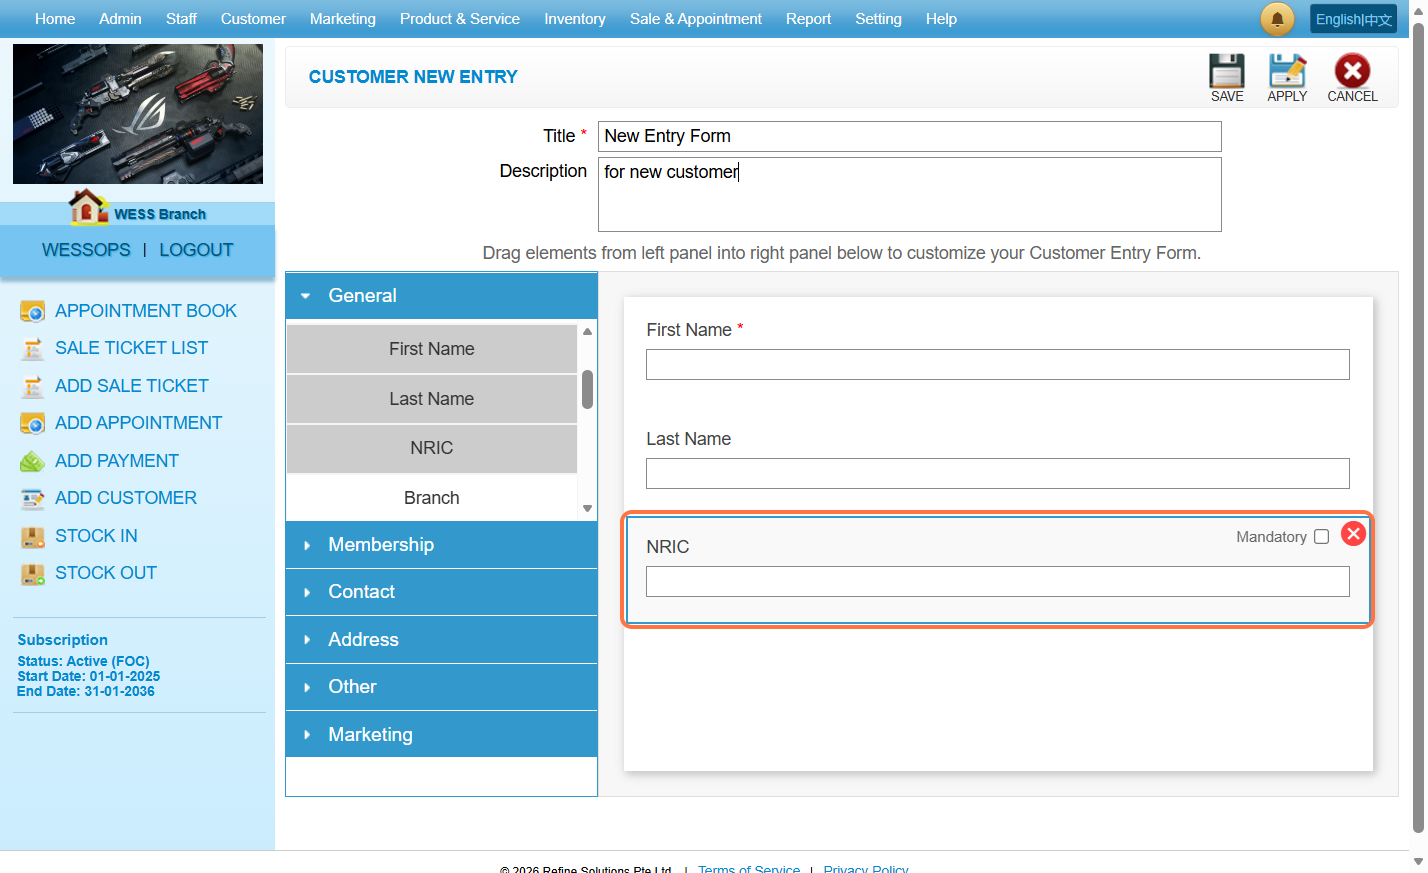
Step 6: Click on “SAVE”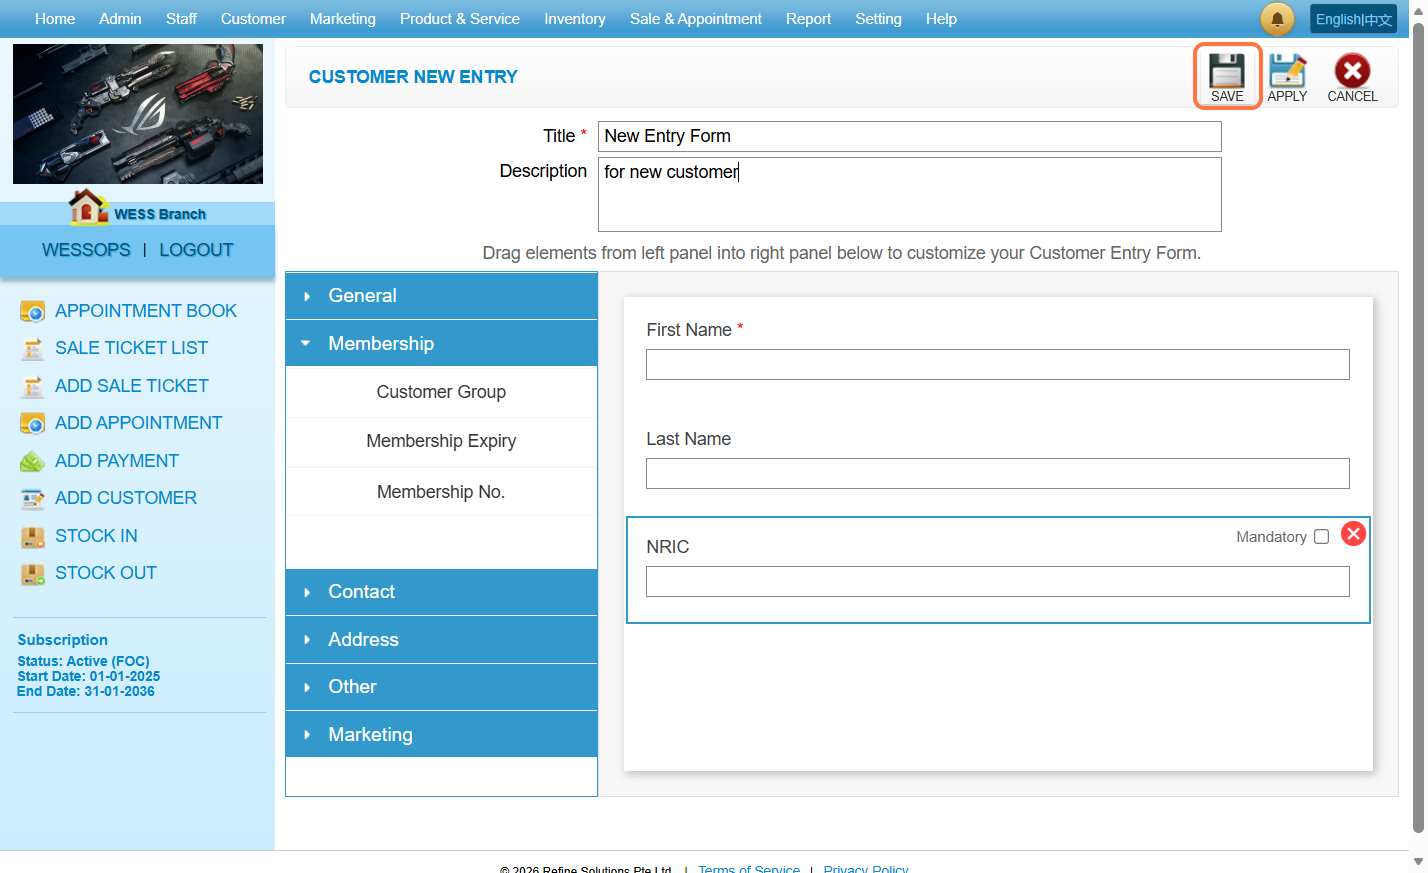
Step 7: To set a form as the default form, tick the checkbox next to the desired form.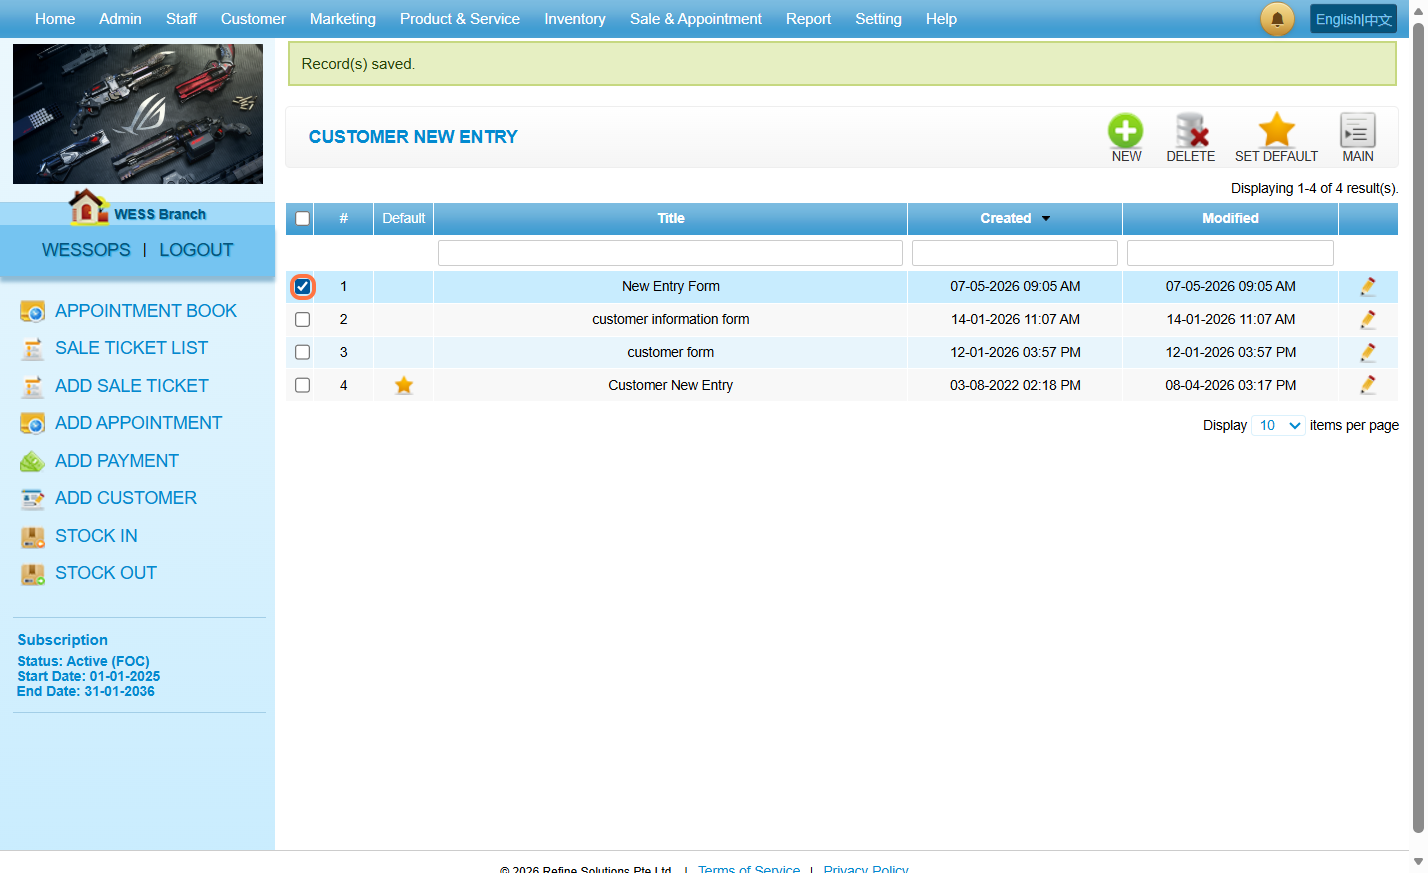
Step 8: Then click on “SET DEFAULT”.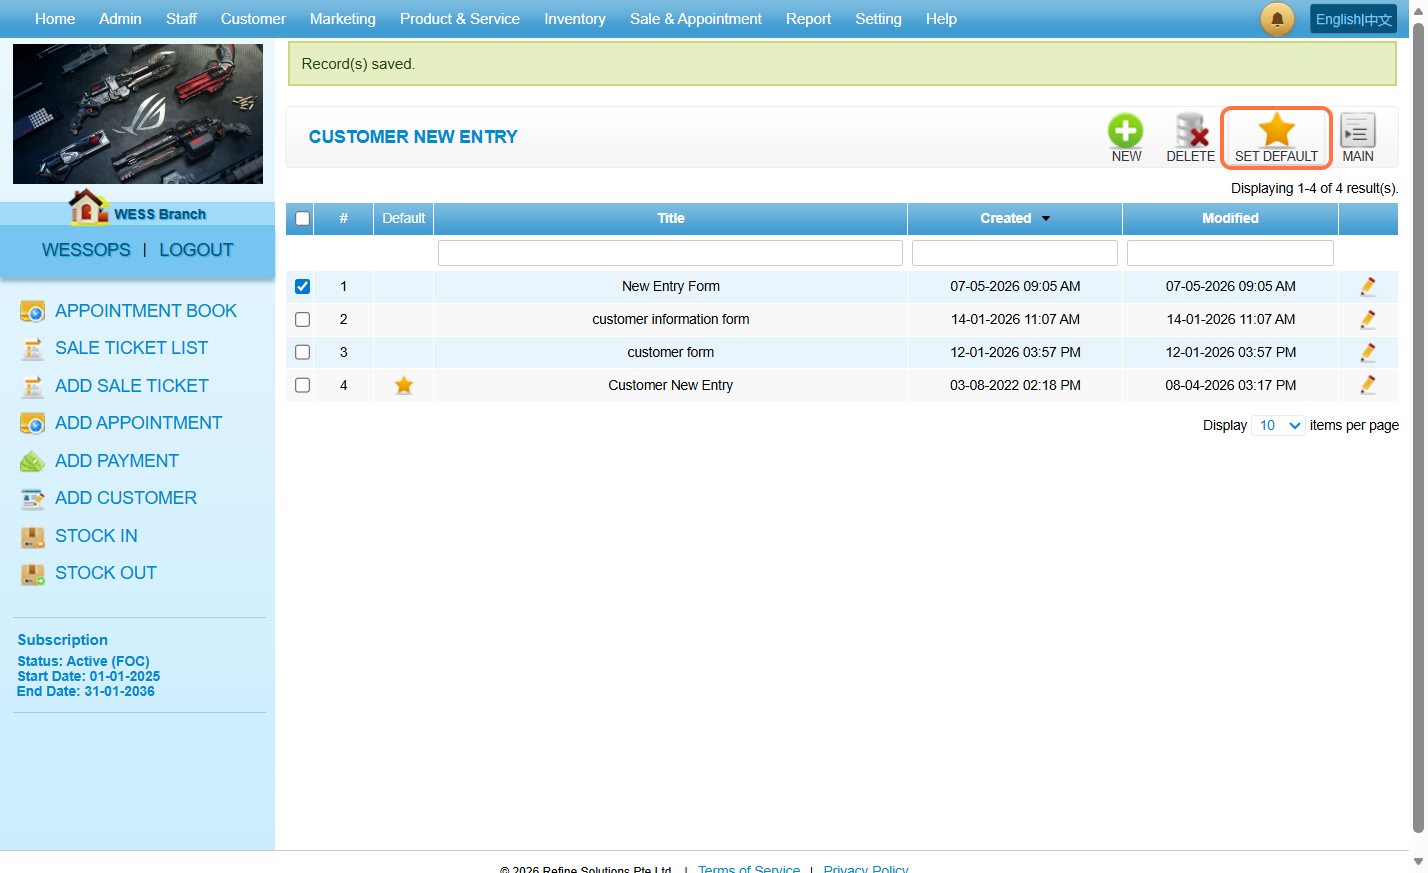
Last Updated: May 2026
Step 1: Click “Customer” .
Step 2: Click “NEW CUSTOMER” .
Step 3: Add information as many as you want here.
Step 4: Click on “Create” .
Step 5: Make sure the new customer has been saved.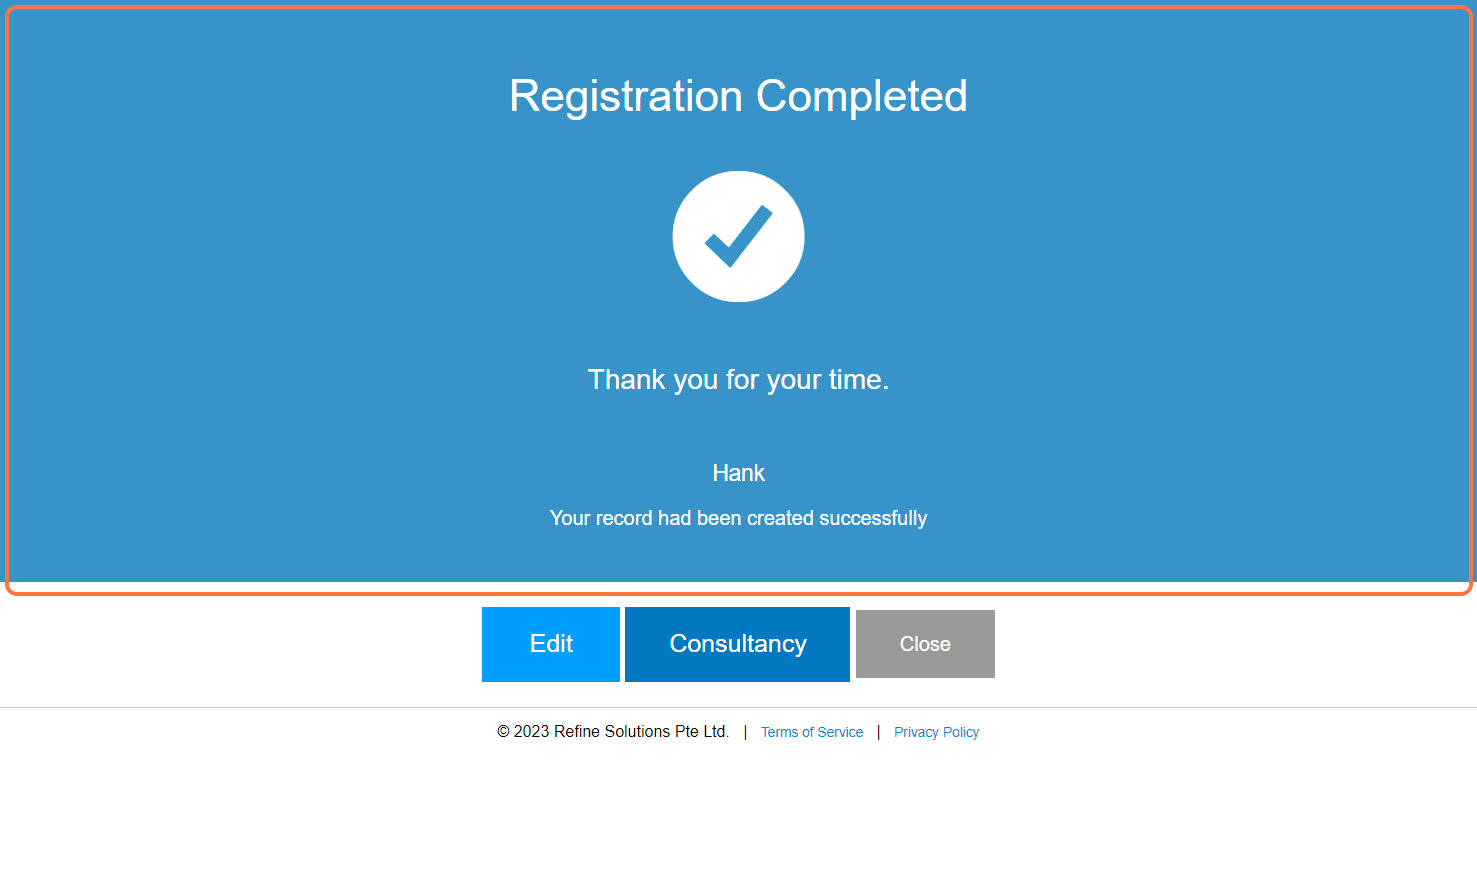
Step 6: [Optional] Can click on “Edit” to continue editing customer details.
Last Updated: July 2024
https://wesshelp.wessconnect.com/2023/12/13/how-to-edit-the-customer-new-entry-form-2/
Step 1: Click “Setting” .
Step 2: Click “CUSTOMER NEW ENTRY” .
Step 3: Click on the pen icon “✏️” to edit.
Step 4: Drag elements from the left panel into the right panel to add it.
Step 5: [Optional] Tick the checkbox “☑️” if the information mandatory to be filled.

Step 6: [Optional] : Click on the red close icon “❎” to remove the element.
Step 7: Click on “APPLY” or other disk icons to save.
Step 8: Make sure the change has been saved.
Last Updated: July 2024
Step 1: Click “CUSTOMER”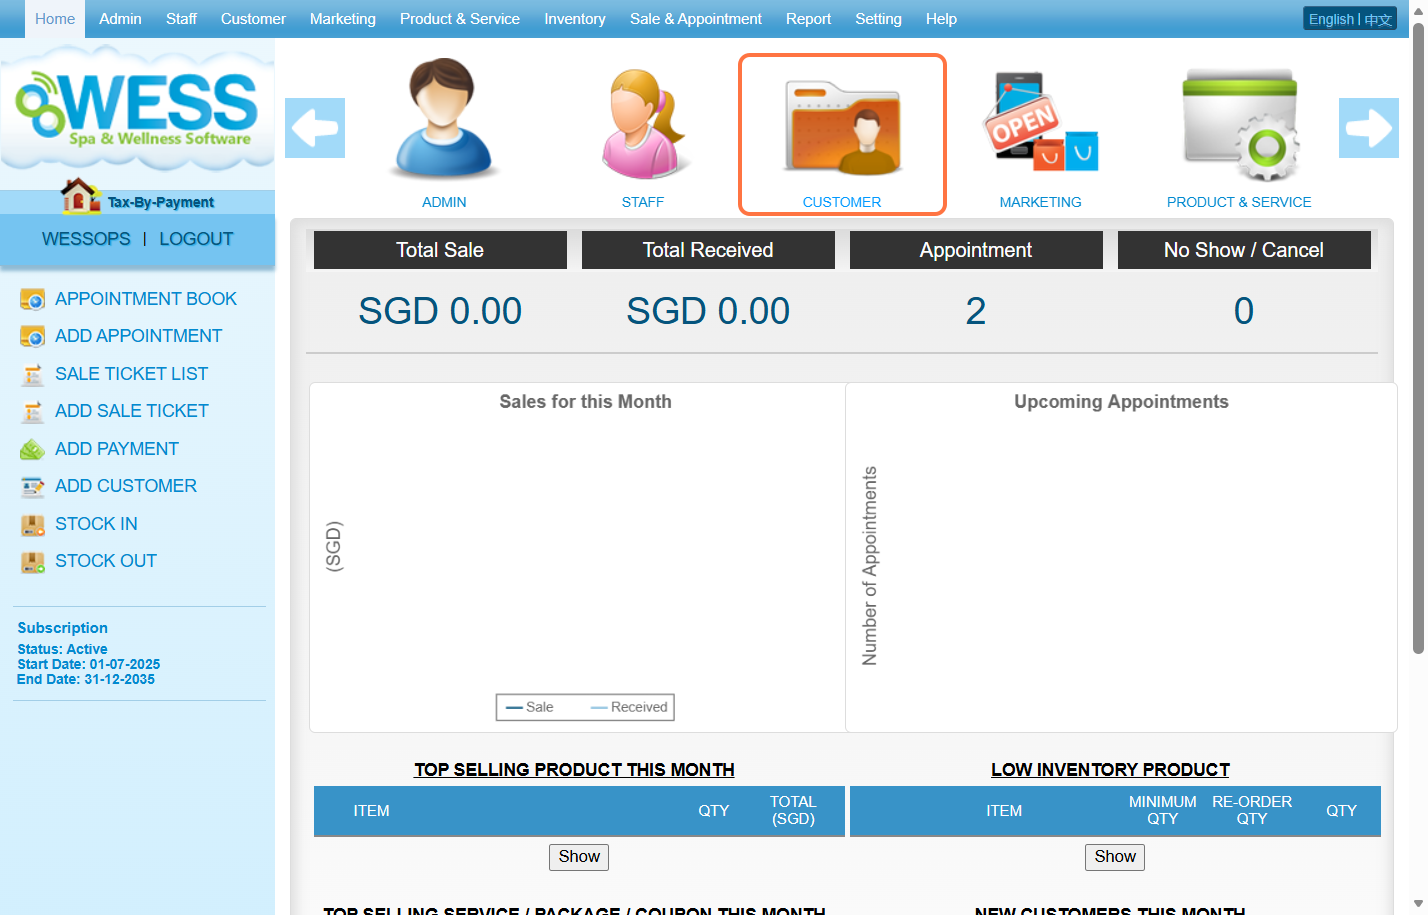
Step 2: Click “EDIT CUSTOMER”
Step 3: Search for the customer using their name, code, IC number, mobile number, or membership number.
Step 4: Select the customer you want to edit.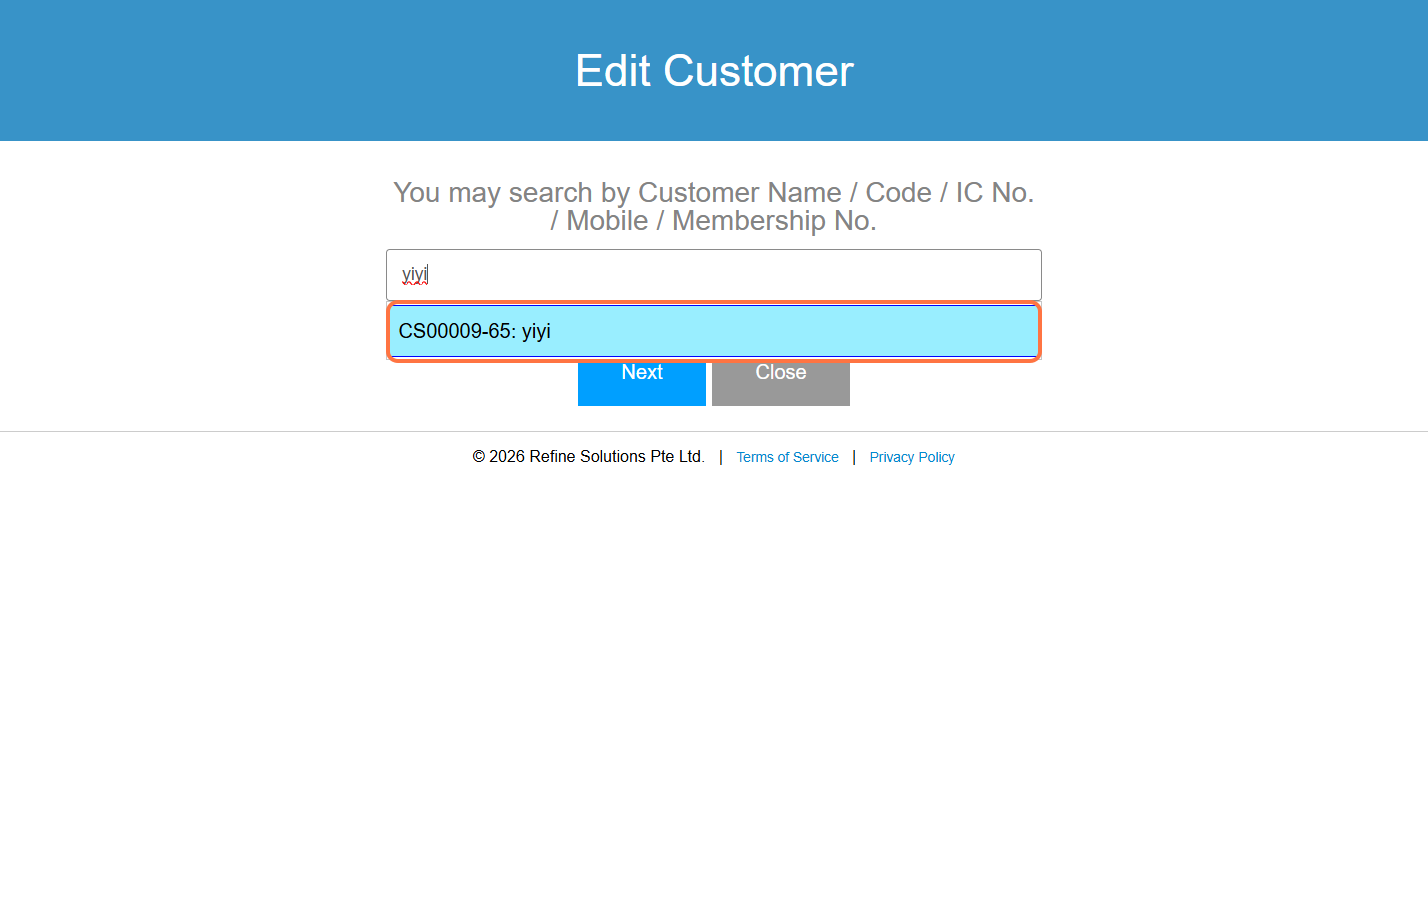
Step 5: Then click “Next” to proceed.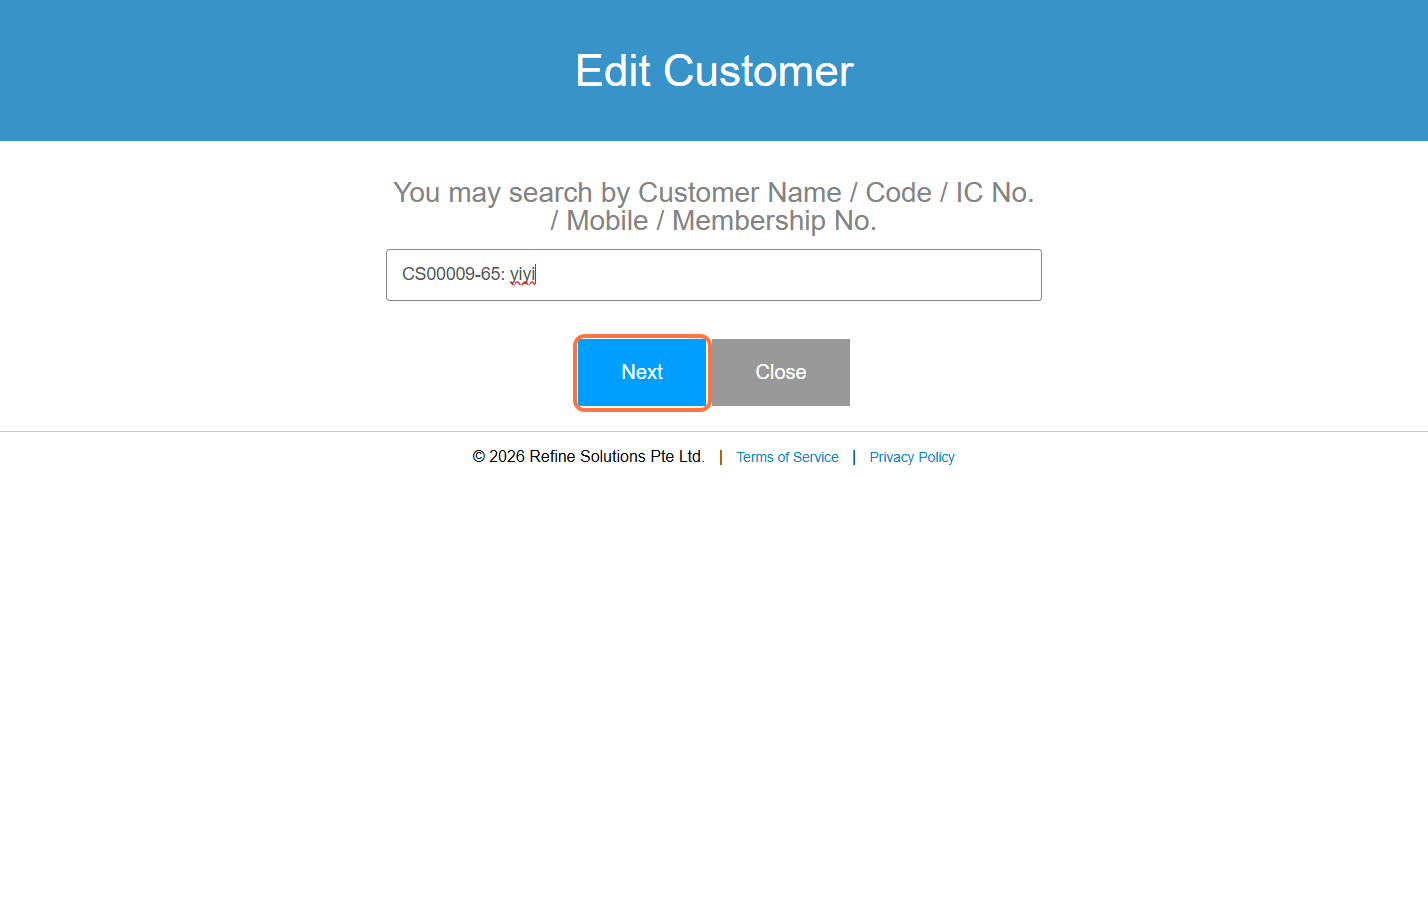
Step 6: In this page, you can continue editing and filling in the remaining information.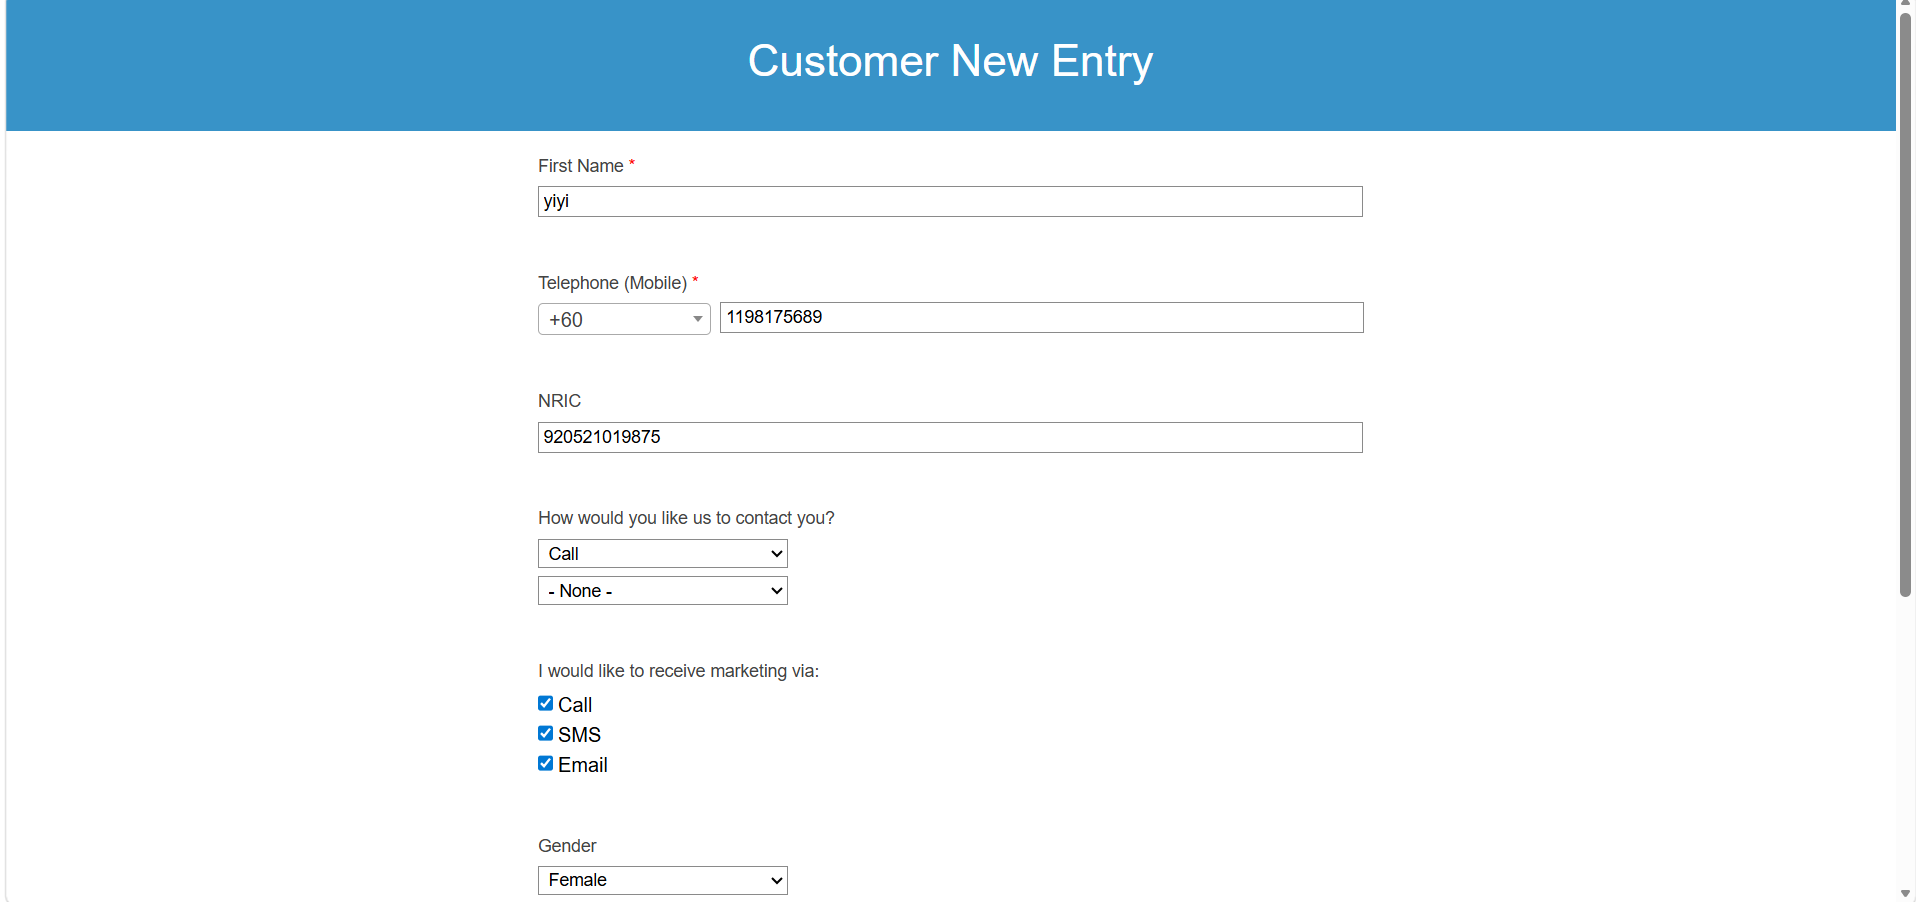
Step 7: Click the “Update” button to save the changes.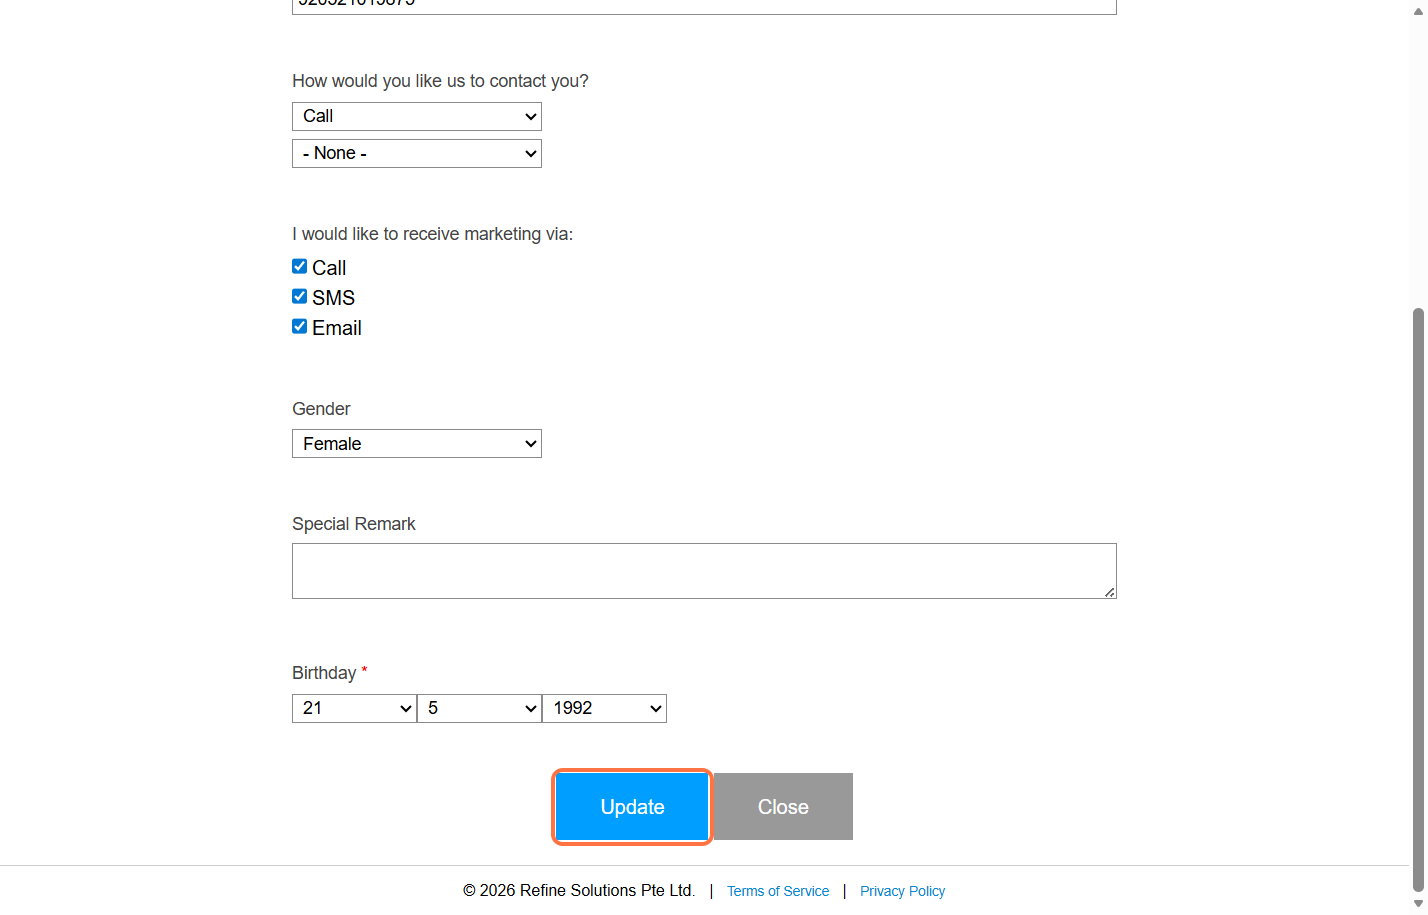
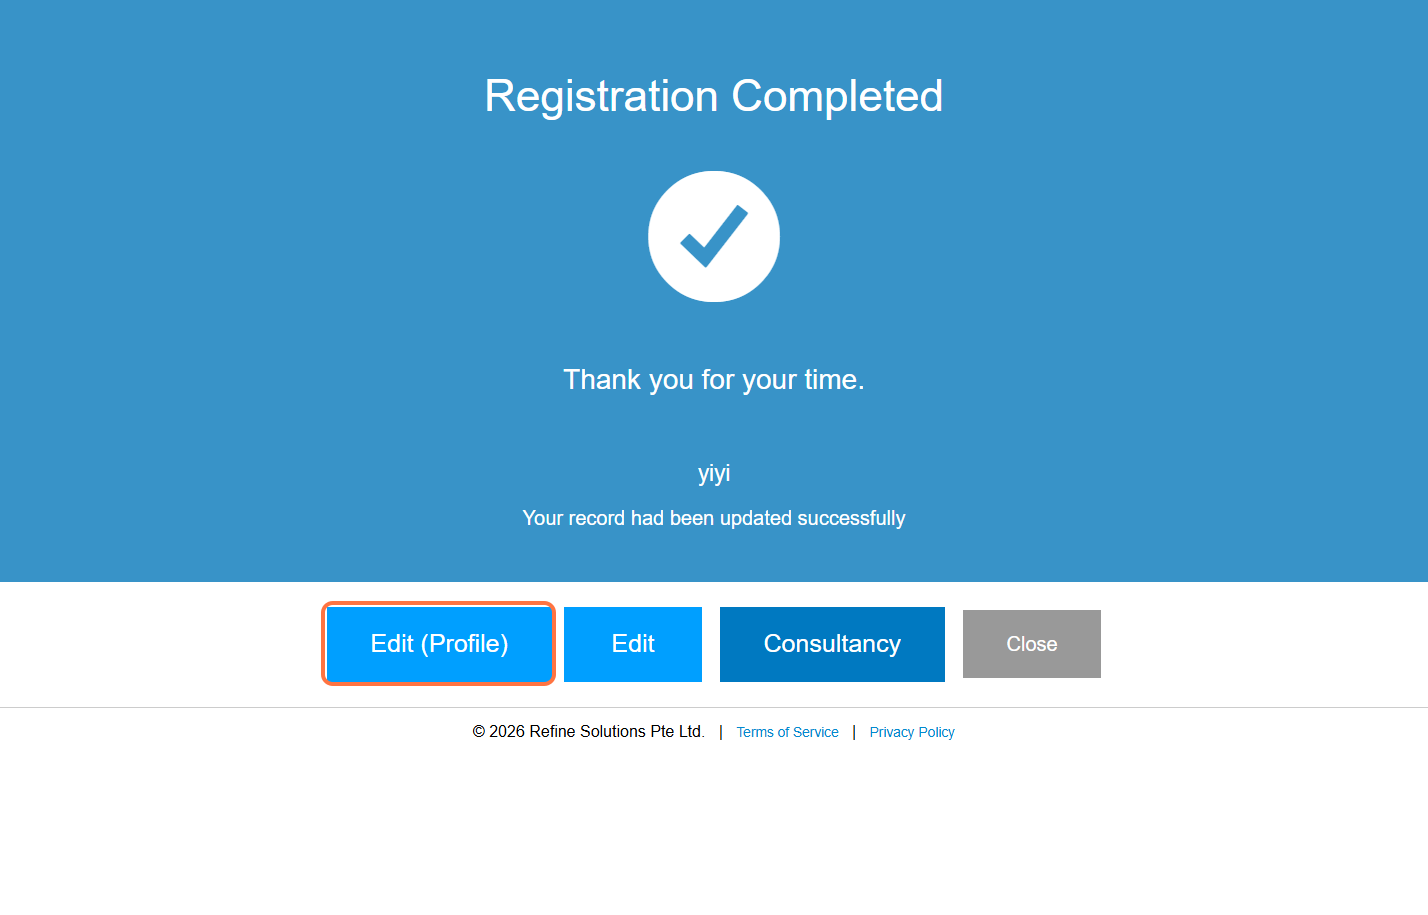
Step 8: After updating, you will see several options:
“Edit (Profile)” – Continue editing more profile details
“Edit” – Return to the previous edit page
“Consultancy” – Fill in another consultancy form
“Close” – Close the page if no further action is needed
Last Updated: April 2026
https://wesshelp.wessconnect.com/2026/05/06/how-to-enable-mandatory-birthday-year-setting/
Step 1: Click on “SETTING”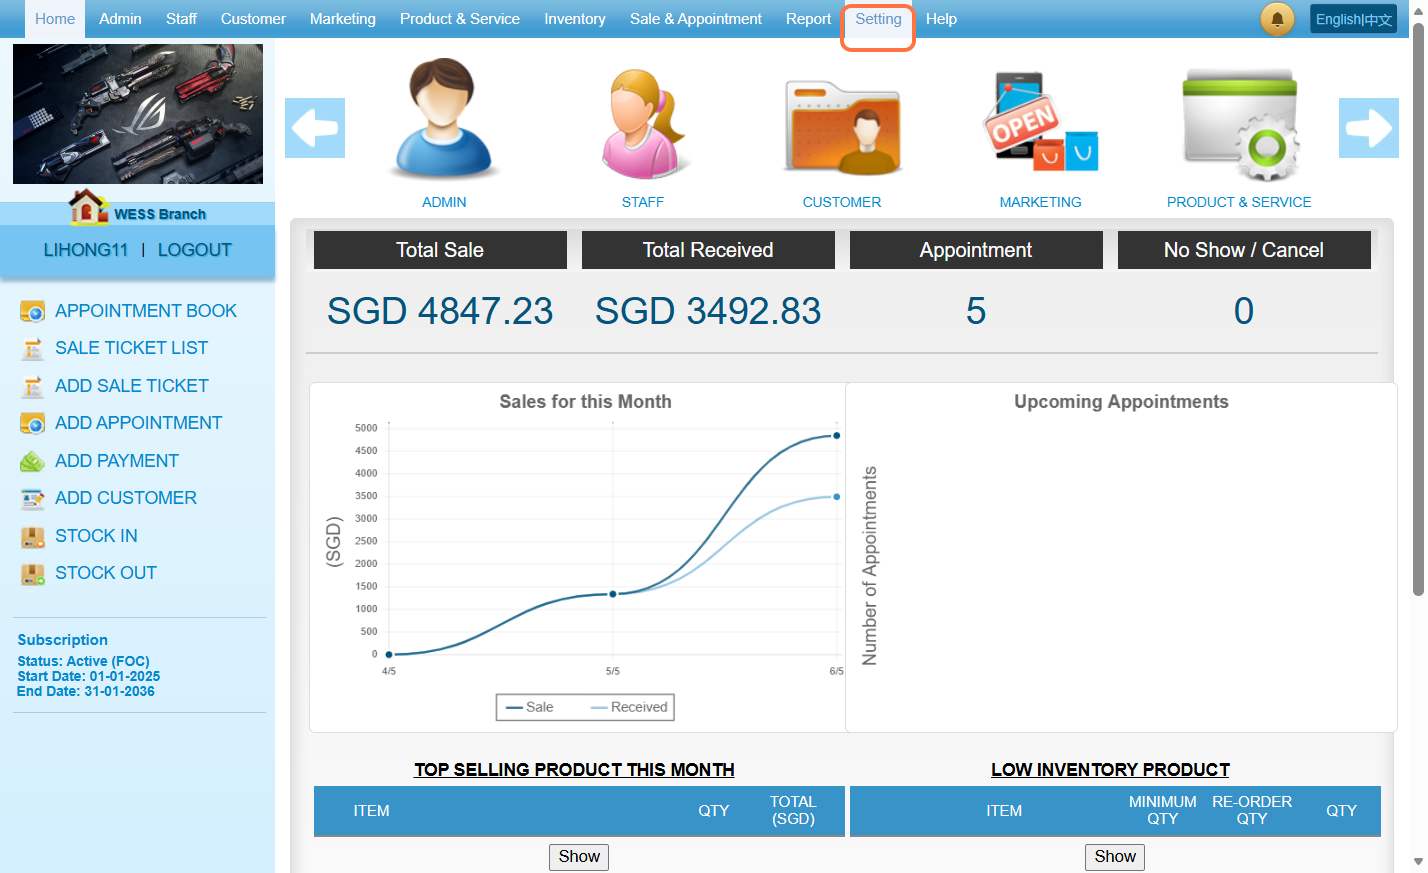
Step 2: Click on “CUSTOMER NEW ENTRY SETTING”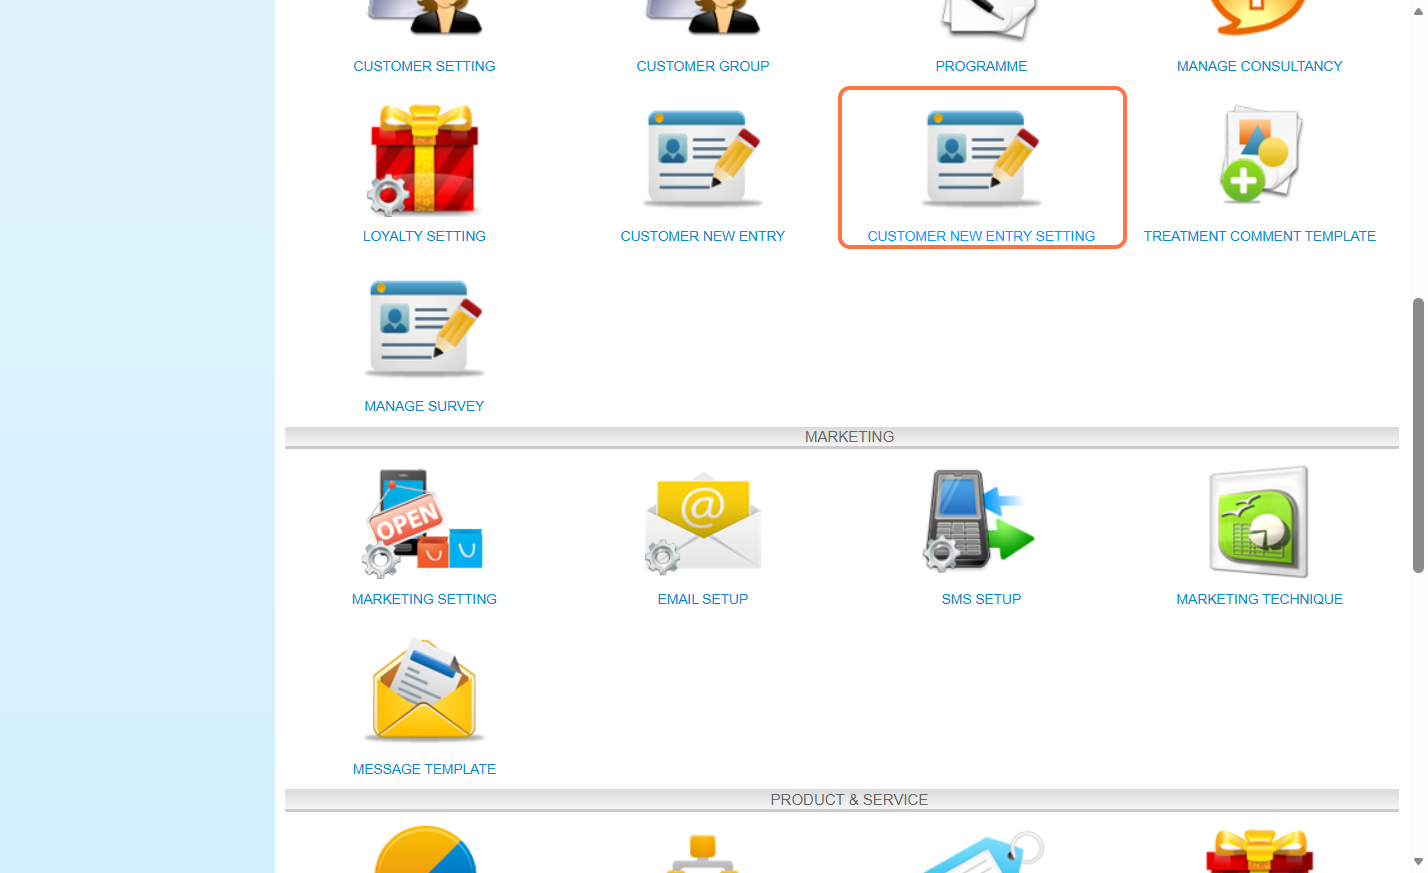
Step 3: Select “Yes”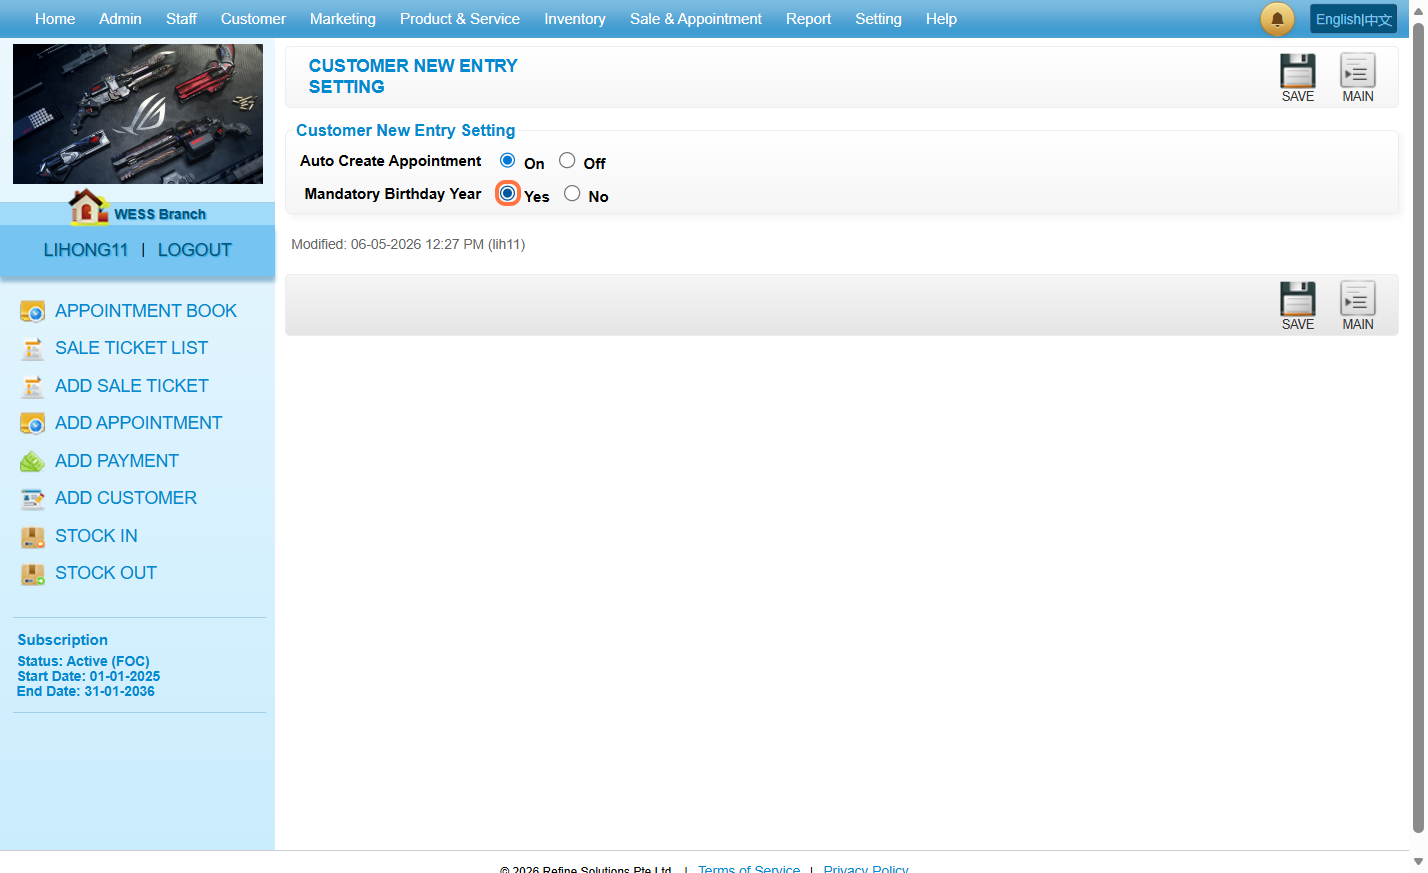
Step 4: Click on “SAVE”
As a result: when the user does not select a birth year before clicking the “CREATE” button, the system will display an “Invalid birthday” error because the year defaults to “0”.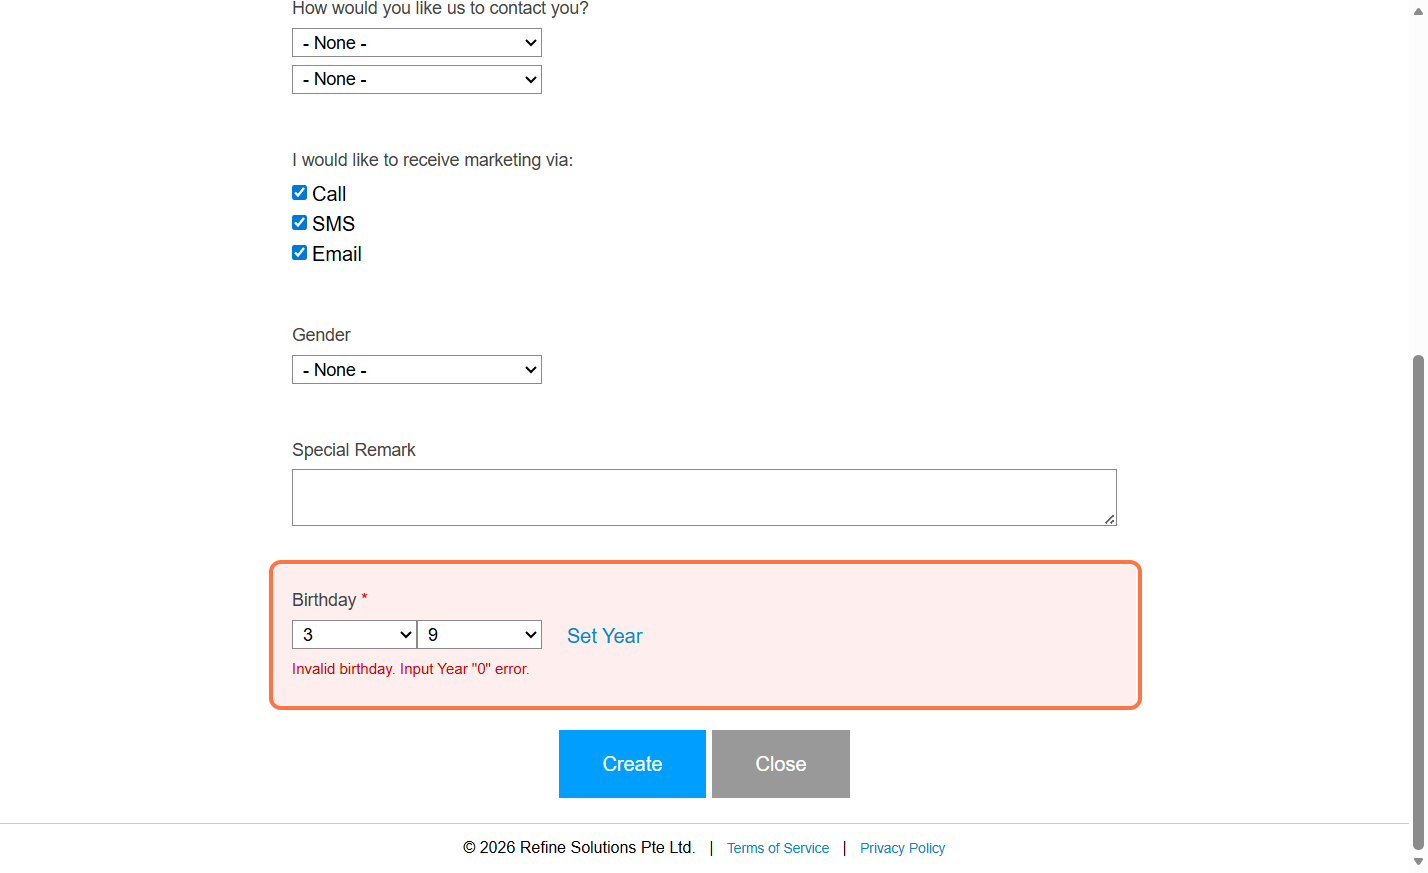
Last Updated: May 2026
https://wesshelp.wessconnect.com/2023/12/27/how-to-create-a-consultancy-form/
Step 1: Click “Setting” .
Step 2: Click on “MANAGE CONSULTANCY” .
Step 3: Click on “NEW” .
Step 4: Enter a “Title” for new consultancy form in the Consultancy Setting. Also the Description and Remark can be filled in here if needed.
Step 5: Click once on the “Form Description” field on the right to edit it. 
Step 6: The left side will automatically display the “Description field” in the Field Setting then enter the content in the box.
The right side will then display the format of the Form.
Step 7. Click “Add Field” .
Step 8: A list of the elements and formats entered in the form is displayed here.
Step 9: Long-press and drag “elements” from the left panel into the right panel to add it. In the example diagram, the Radio Button is chosen.
Step 10: Enter information in the “Question” field.
Step 11: Enter the contents in the “Option Title” .
Step 12. [Optional] When clicking on the last input box, a new option input box is automatically created below.
Or click the orange plus button (+) next to the option input box.
Step 13: [Optional] Click on the red close icon “❎” to remove the option.
Step 14: [Optional] Check “Mandatory” if the question is mandatory to the form.
Step 15: In the example image, when clicking on the element on the right to edit again.
Step 16: Click on the red close icon “❎” to remove the element.
Step 17: Click “DRAFT” .
Step 18: Make sure the new consultancy form has been saved.
Step 19: If decide to activate the form and let the customer fill it in, click START icon “➦” .
[!] Once a customer starts submitting this form, the form will not be available for editing.
Step 20: Make sure the form has been activated/started.
Last Updated: July 2024
Step 1: Click “Setting” .
Step 2: Click on “MANAGE CONSULTANCY” .
Step 3: Click on the pen icon “✏️” to edit.
Step 4: Scroll down in “Consultancy Settings” first to “Branch” and select which branch this form applies to.
Step 5: Click “DRAFT” .
Step 6: Make sure the change has been saved.
Last Updated: July 2024
https://wesshelp.wessconnect.com/2023/12/27/how-to-let-customers-fill-in-the-consultancy-form/
Step 1: Click “Customer” . 
Step 2: Click on “CONSULTANCY SUBMISSION” .
Step 3: Select a form that will be given to the customer.
For example “Consultancy form” is selected in the example image.
Step 4: Enter the customer name and select a customer.
Step 5: Click “Next” .
Step 6: Fill out the form that was chosen earlier, such as the Counseling form.
Step 7: Click “Submit” .
Step 8: Make sure the response has been submitted.
Step 9: [Optional] Click on “View” to check the submitted response.
Last Updated: July 2024
Step 1: Click “Customer” .
Step 2: Click on “CONSULTANCY SUBMISSION LIST” .
Step 3: Select a form that will be given to the customer.
For example “Consultancy form” is selected in the example image.
Step 4: When the form is opened, click “Edit” .
Step 5: Can edit information as many as you want here.
Step 6: Click “Submit” .
Step 7: Make sure the change has been saved.
Last Updated: July 2024
https://wesshelp.wessconnect.com/2024/08/28/how-to-clone-the-consultancy-form/
Step 1: Click “Setting” . 
Step 2: Click “MANAGE CONSULTANCY” . 
Step 3: Click on the pen icon “✏️” of any consultancy form to edit.
Step 4: Click “CLONE” to copy this form. 
Step 5: Make sure the record has been saved.
Step 6: When you return to the page, the record will be shown here. 
Last Updated: Aug 2024
https://wesshelp.wessconnect.com/2023/12/27/how-to-create-a-survey-form/
Step 1: Click “Setting” .
Step 2: Click “MANAGE SURVEY” .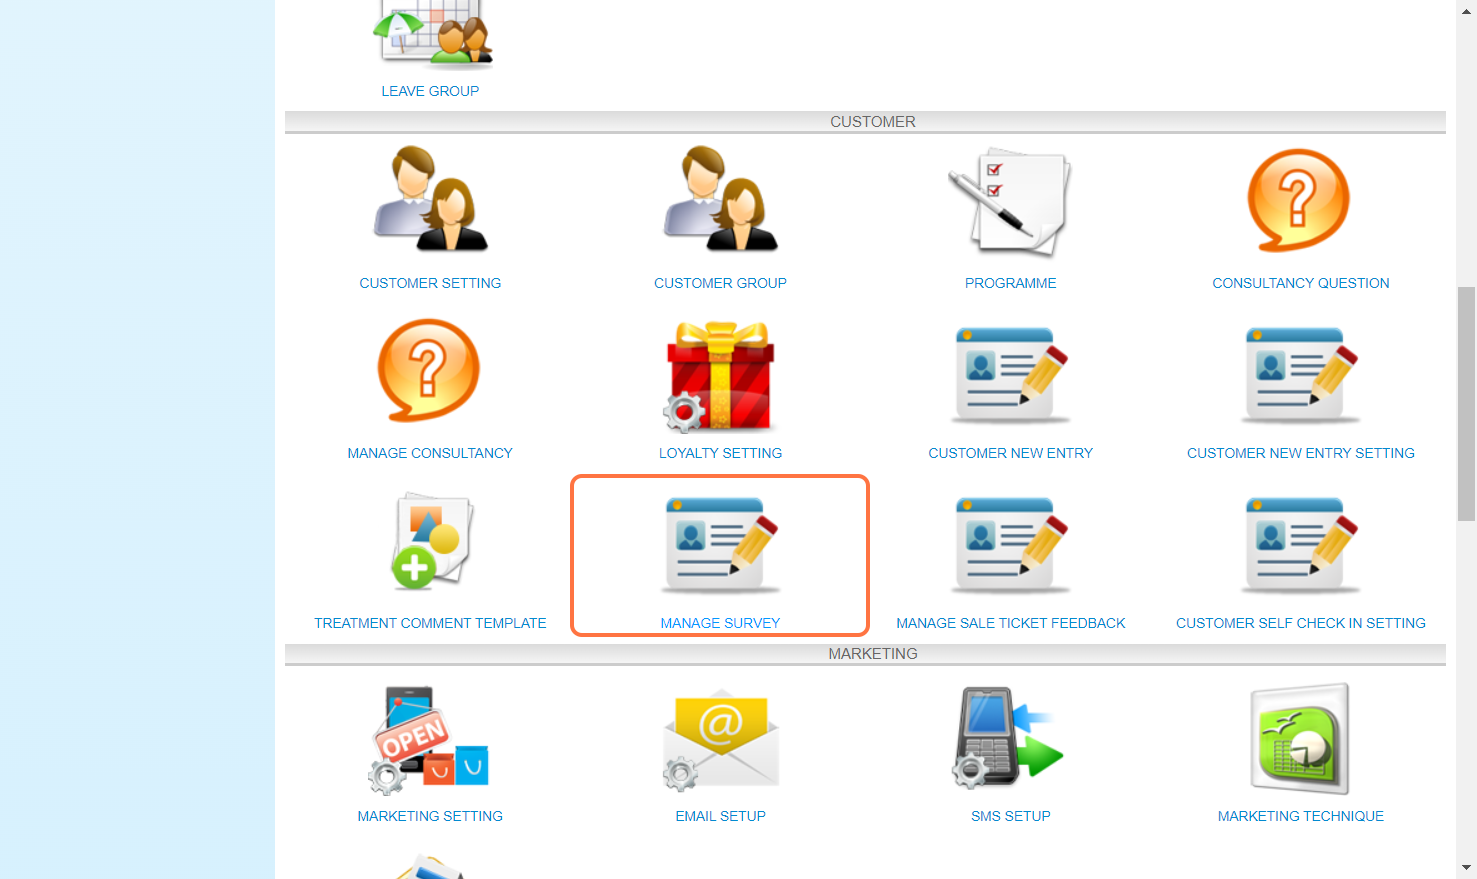
Step 3: Click on “NEW” .
Step 4: Enter a “Title” for new survey form in the Survey Setting. Also the Description and Remark can be filled in here if needed.
Step 5: Click once on the “Form Description” field on the right to edit it.
Step 6: The left side will automatically display the “Description field” in the Field Setting then enter the content in the box.
The right side will then display the format of the Form.

Step 7. Click “Add Field” .
Step 8: Long-press and drag “elements” from the left panel into the right panel to add it. In the example diagram, the Star Rating is chosen.
Step 9: Enter information in the “Question” field.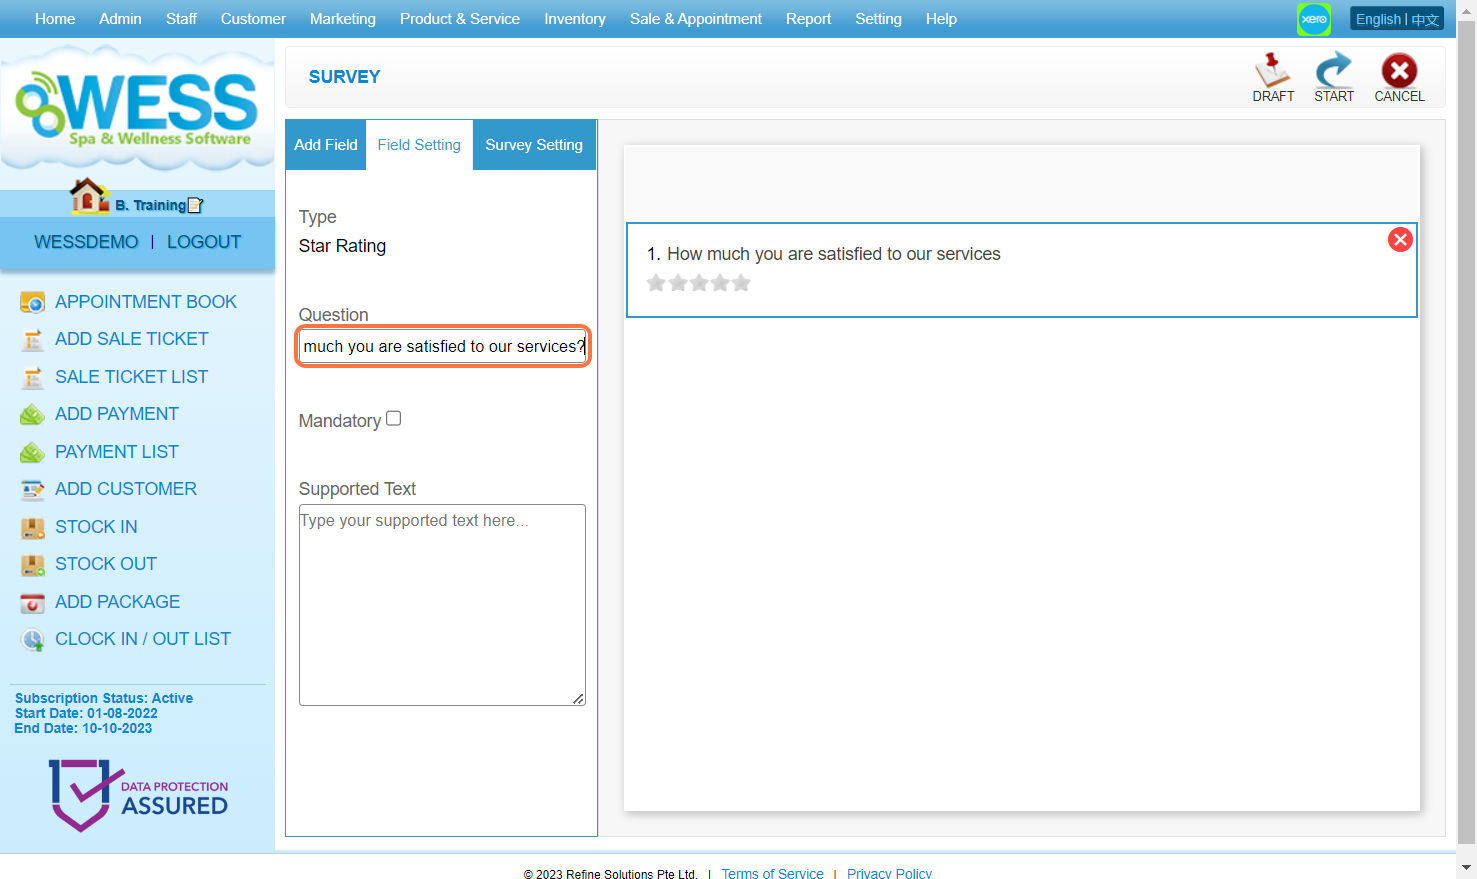
Step 10: [Optional] Check “Mandatory” if the question is important.
Step 11: In the example image, when clicking on the element on the right to edit again.
Step 12. [Optional] When clicking on the last input box, a new option input box is automatically created below.
Or click the orange plus button (+) next to the option input box.

Step 13: [Optional] Click on the red close icon “❎” to remove the option.
Step 14: Click on the red close icon “❎” to remove the element.
Step 15: Click “DRAFT” .
Step 16: Make sure the new survey form has been saved.
Step 17: If decide to activate the form and let the customer fill it in, click START icon “➦” .
Step 18: Make sure the form has been activated/started.
Last Updated: July 2024
https://wesshelp.wessconnect.com/2023/12/27/how-to-give-customers-fill-in-the-survey-form/
Step 1: Click “Customer” .
Step 2: Click “SURVEY SUBMISSION” .
Step 3: Select a survey form that will be given to the customer.
For example “Service Feedback” is selected in the example image.
Step 4: Fill in the form.
Step 5: Once have done, click “Submit” .
Step 6: Make sure the response has been submitted.
Step 7: [Optional] Click on “View” to check the submitted response.
Last Updated: July 2024
https://wesshelp.wessconnect.com/2023/12/27/how-to-check-the-survey-form-that-has-been-submitted/
Step 1: Click “Customer” .
Step 2: Click “SURVEY SUBMISSION LIST” .
Step 3: Select a submitted response.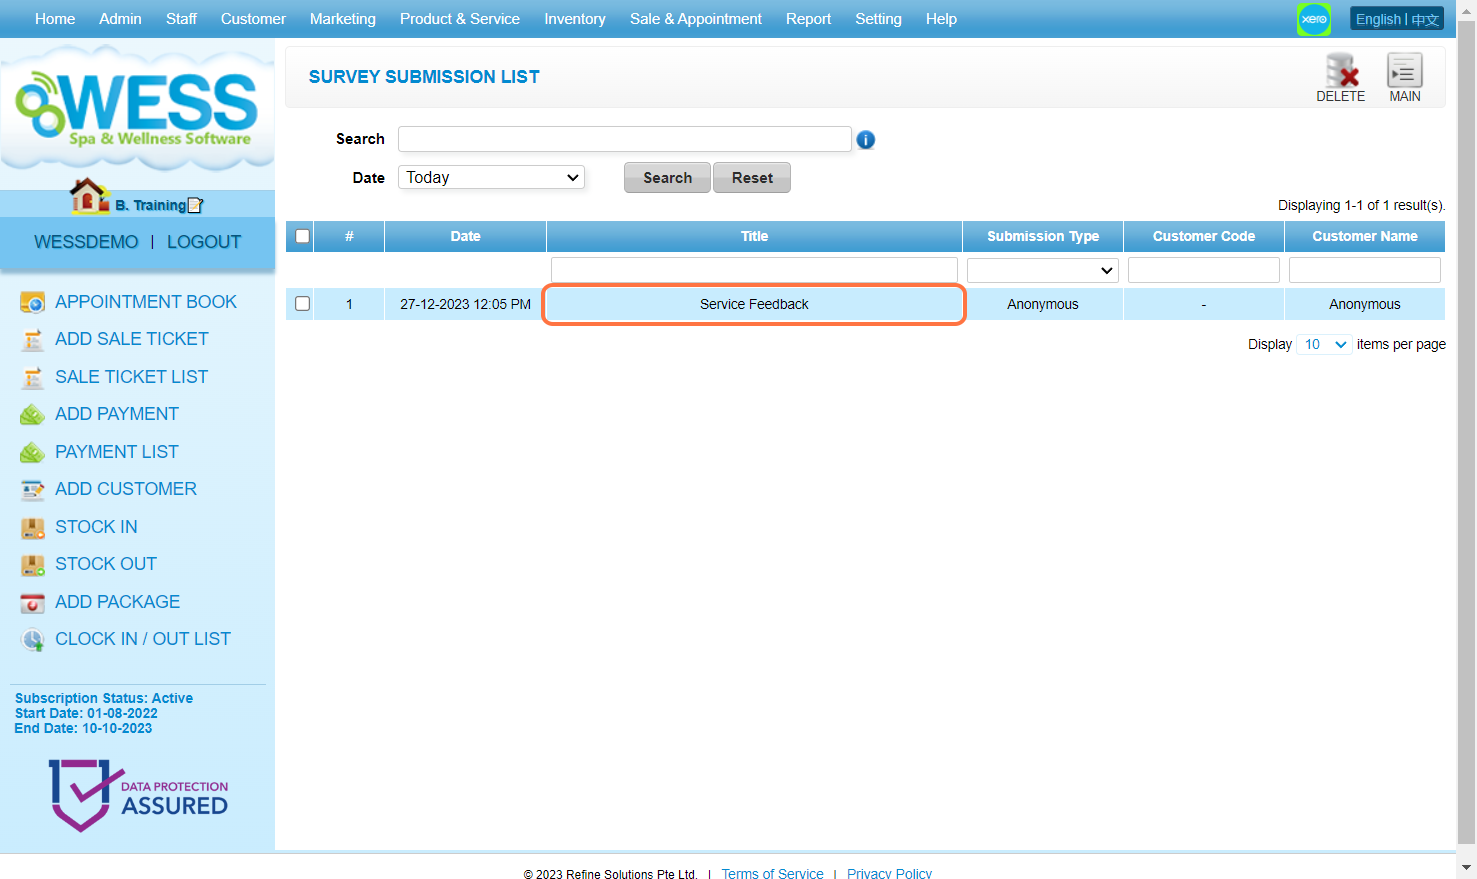
Step 4: Check the submitted response here.
Step 5: [Optional] Click on “Export” to download the customer input data.
Step 6: [Optional] Click on “Print” to download the survey form.
Last Updated: July 2024
https://wesshelp.wessconnect.com/2023/12/27/how-to-view-the-survey-form-analysis/
Step 1: Click “Setting” .
Step 2: Click “MANAGE SURVEY” .
Step 3: Click on the pen icon “✏️” to edit.
4. Click on “ANALYSIS” .
Step 5: Check the analysis and statistics of the customer response here.
Last Updated: July 2024
https://wesshelp.wessconnect.com/2024/08/28/how-to-clone-the-survey-form/
Step 1: Click “Setting” . 
Step 2: Click “MANAGE SURVEY” . 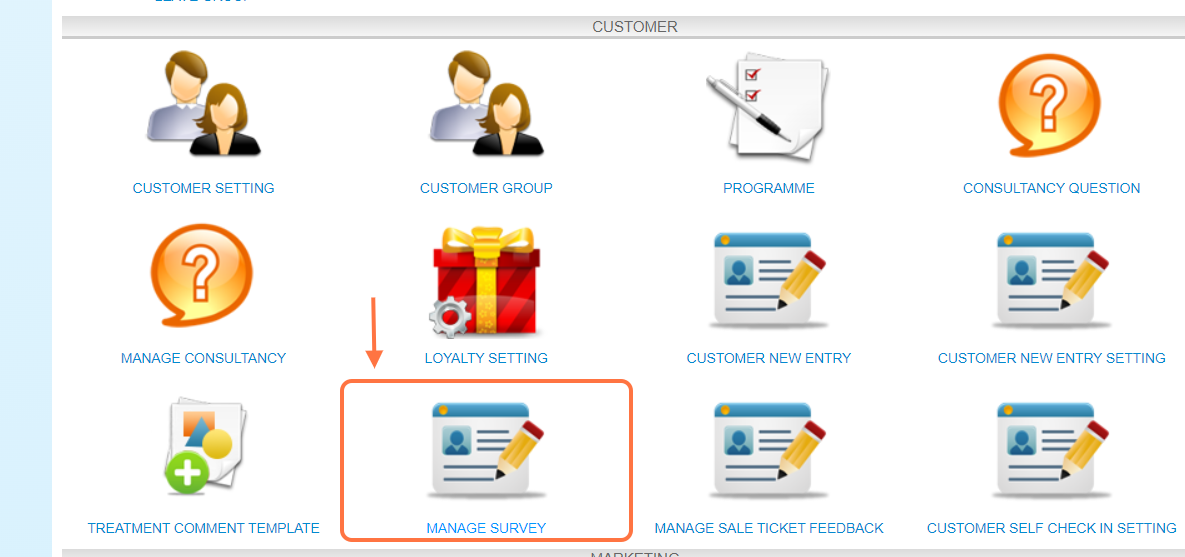
Step 3: Click on the pen icon “✏️” of any survey form to edit.
Step 4: Click “CLONE” to copy this form. 
Step 5: Make sure the record has been saved.
Step 6: When you return to the page, the record will be shown here. 
Last Updated: Aug 2024