打印机

How to set company name and logo at the header for Sale Delivery Order?

步骤1 : 点击 “Setting” .Step 1: Click “Setting” .

步骤2:点击 “PRINT SETTING” .Step 2: Click “PRINT SETTING” .

步骤3:选择 “Sale Delivery Order” 后点击 铅笔图标 “✏️”编辑Step 3: Select “Sale Delivery Order” and click pen icon “✏️” to edit.

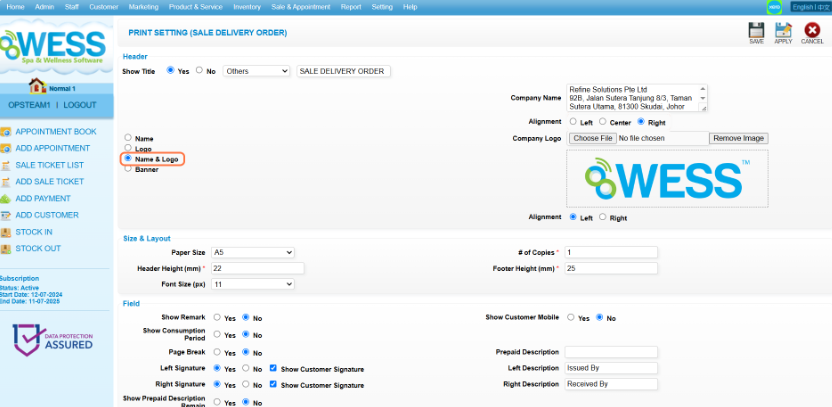
步骤4:点击 “Name & Logo” .

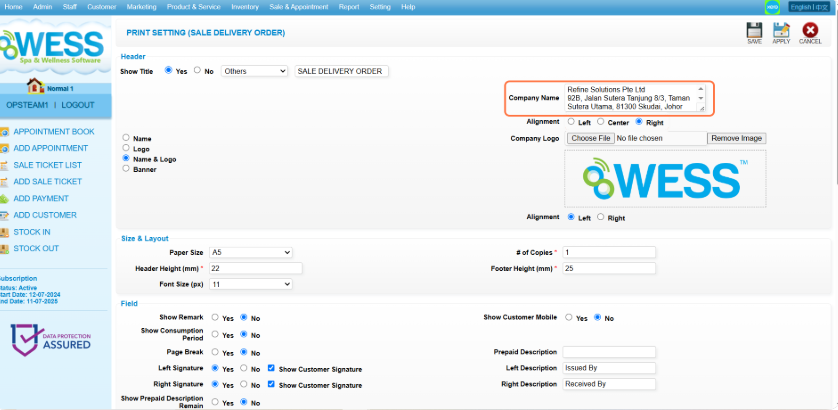
步骤5:输入 company name (公司名称)。

步骤6:设置 “Alignment”“Left”“Center”“Right” .Step 6: Set “Alignment” to “Left” or “Center” or “Right” .

步骤7:点击 “Choose File” 上传 图片。Step 7: Click “Choose File” to upload image.

步骤8:上传的 图片 会被 展示 在这里。Step 8: The uploaded image will be showed at here.

步骤9:设置 “Alignment”“Left”“Right” .Step 9: Set “Alignment” to “Left” or “Right” .

步骤10:点击 保存图标 “💾”.Step 10: Click Save icon “💾”.

步骤11:确保 记录保存Step 11: Make sure the record has been saved.

步骤12:点击 “Sale & Appointment” .Step 12: Click “Sale & Appointment” .

步骤13:点击 “SALE TICKET” .Step 13: Click “SALE TICKET” .

步骤14:点击 “NEW” .Step 14: Click “NEW” .

步骤15:输入 顾客名。Step 15: Enter the customer name.

步骤16:点击 “Employee” .Step 16: Click “Employee” .

步骤17:选择 employee(员工)。Step 17: Choose the employee.

步骤18:点击 “SET(设置)”.Step 18: Click “SET”.

步骤19:点击 “Product”.Step 19: Click “Product”.

步骤20:选择 product(产品)。Step 20: Choose a product.

步骤21:点击 “PAY(付款)”.Step 21: Click “PAY”.

步骤22:点击 “Full”.Step 22: Click “Full”.

步骤23:点击 “CHECK OUT”.Step 23: Click “CHECK OUT”.

步骤24:点击 “DELIVERY ORDER”.Step 24: Click “DELIVERY ORDER”.

步骤25: 公司名称标志 会被 展示 在这里。Step 25: The company name and logo will be showed at here.

最后更新:2025年4月

还是解决不了问题?别担心,我们会在这里为你提供帮助

还是解决不了问题?
别担心,我们会在这里为你提供帮助

WESS