
https://wesshelp.wessconnect.com/2025/01/20/how-to-add-a-new-user/
Step 1: Click “ADMIN” . 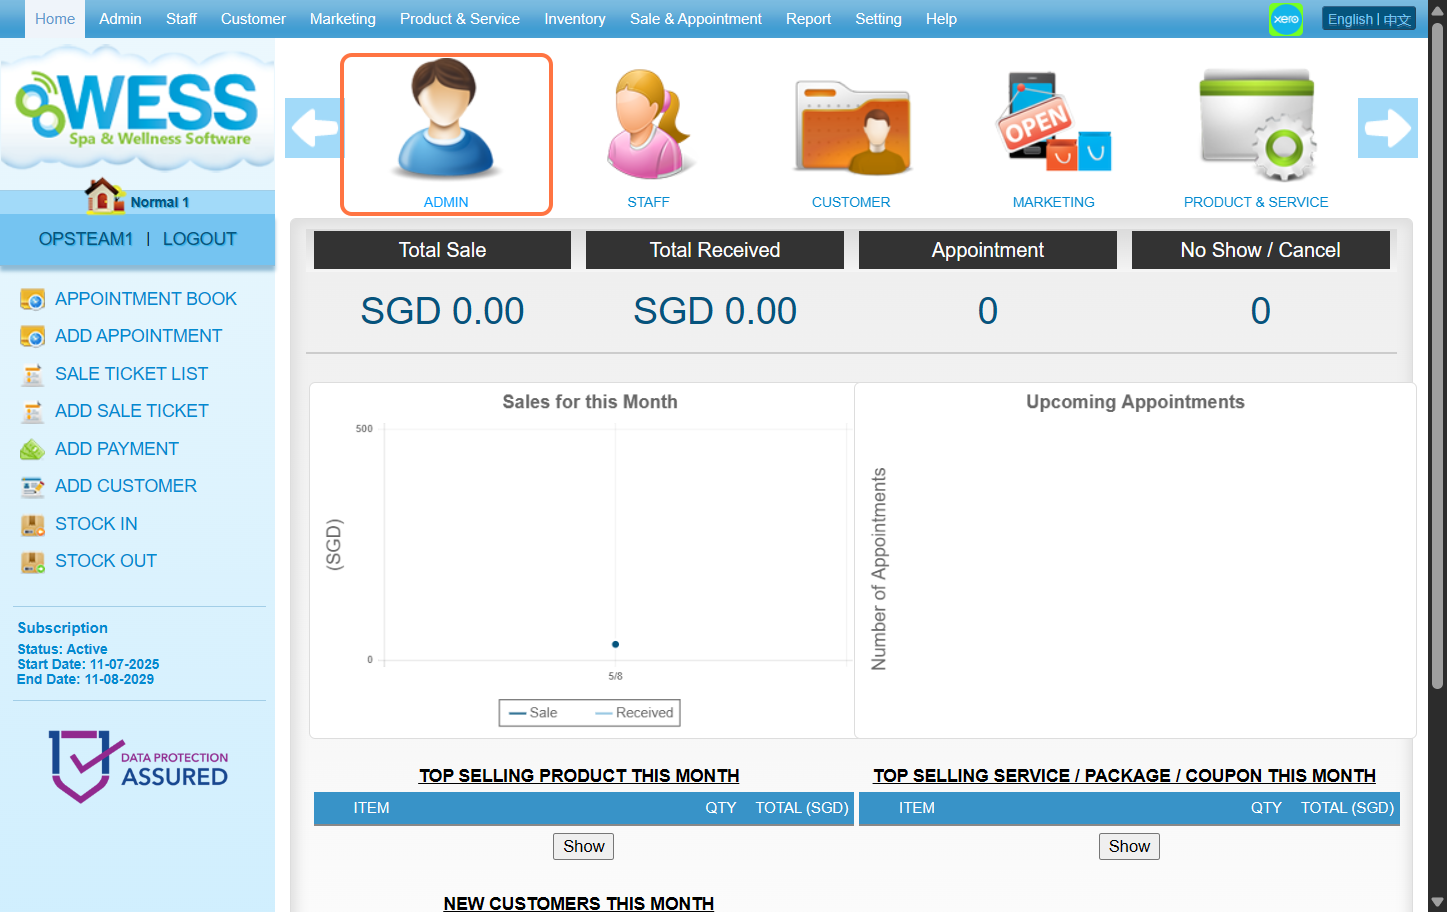
Step 2: Click “USER” .
Step 3: Click “NEW” .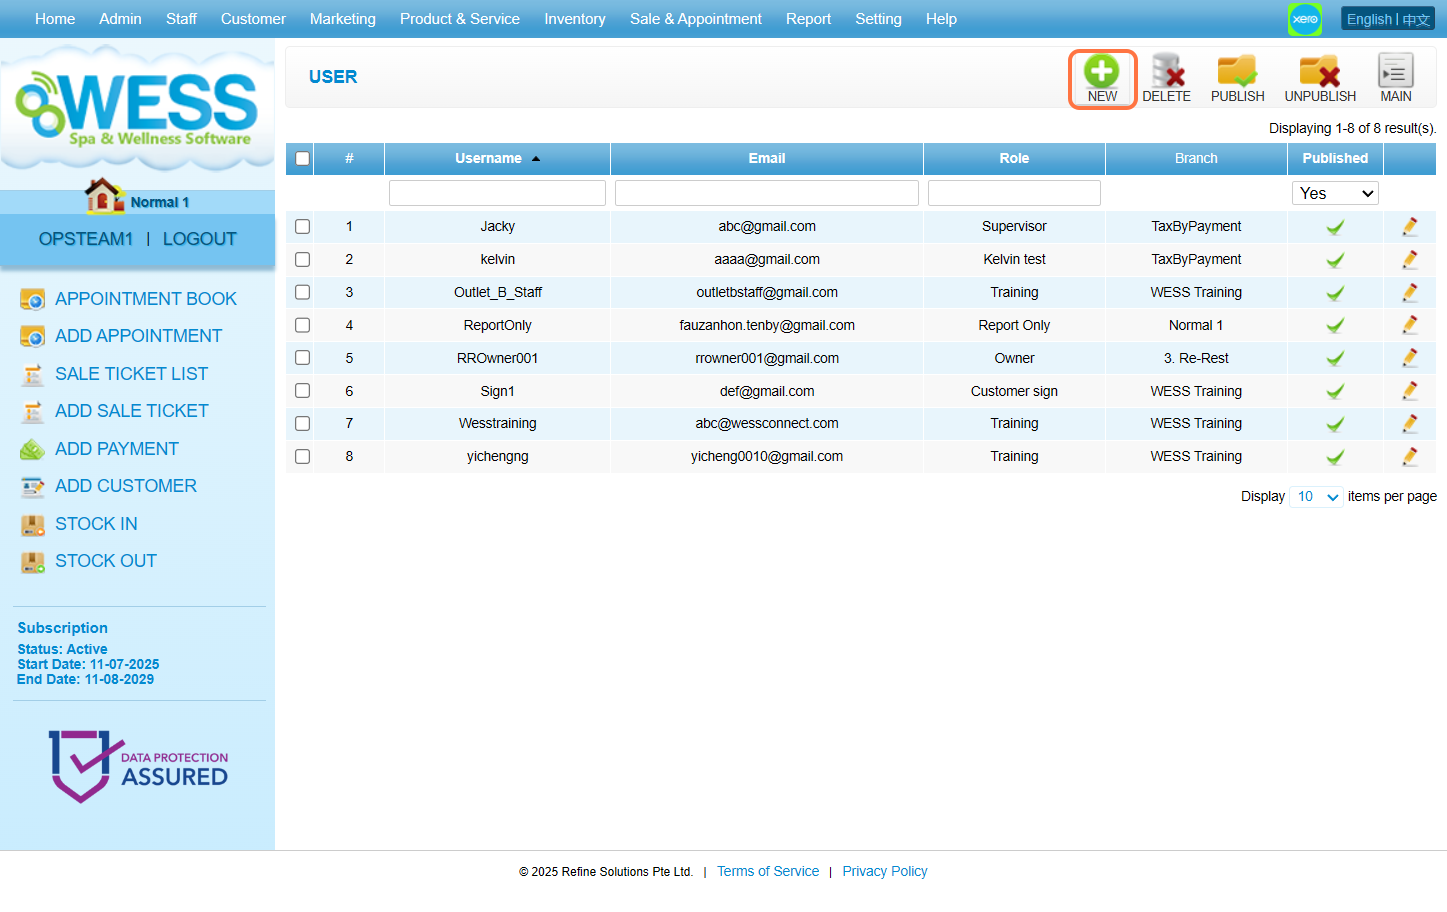
Step 4: Fill in the relevant information accordingly
[!] Those with * are mandatory to fill in
[!] The password must contain at least the following:
a. 8 characters
b. one uppercase letter [A-Z]
c. one lowercase letter [a-z]
d. one number [1-0]
e. one special character [exp: ‘@’ , ‘#’ , ‘_’ or etc]
[!] “Role” determine which access this user has
[!] “Preferred Language” determines the language every time the user logs in to WESS.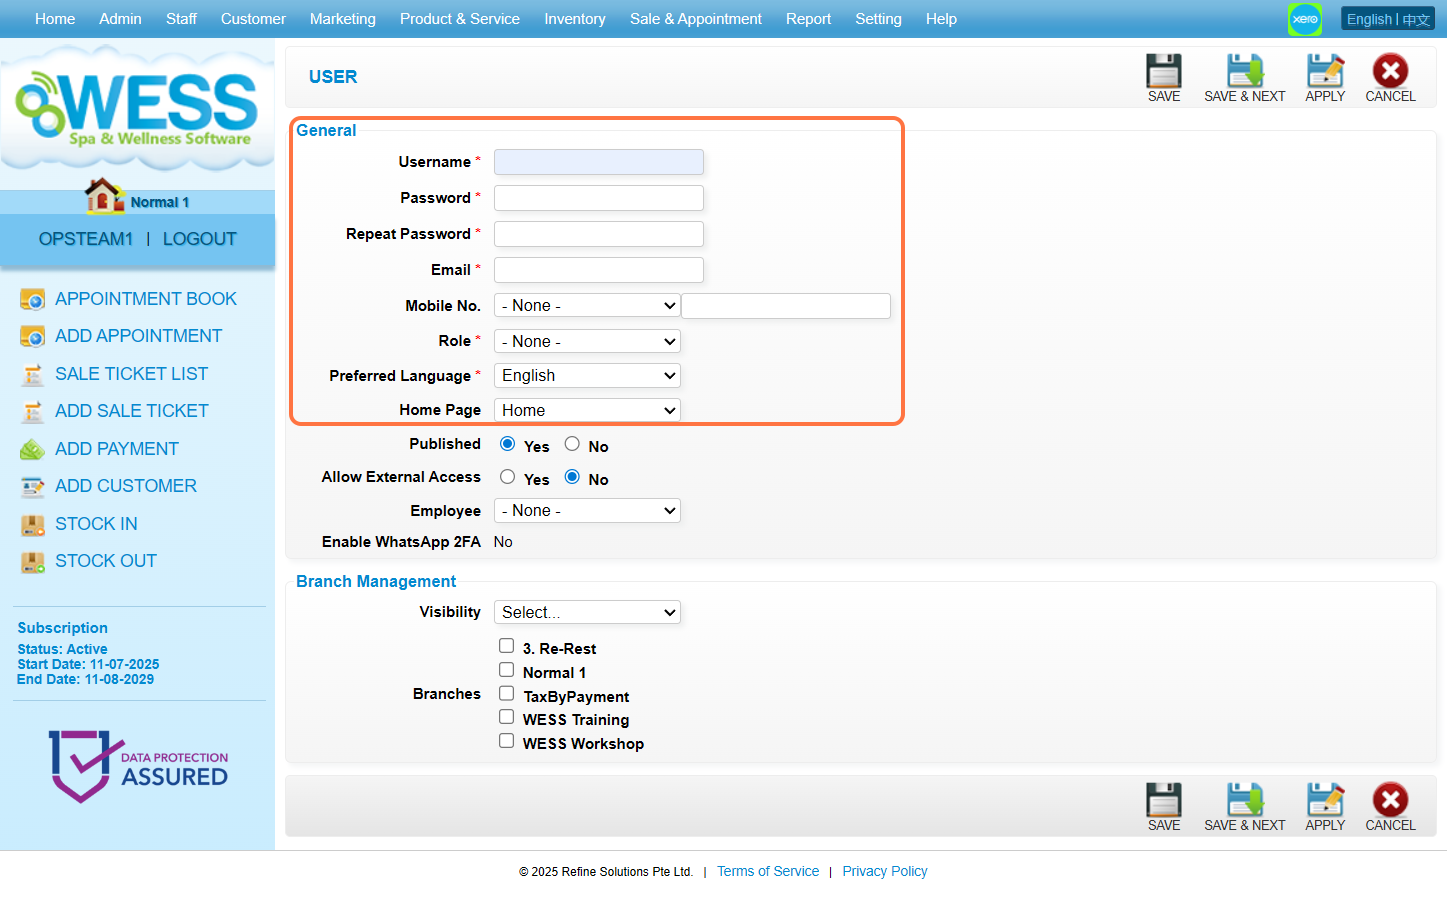
Step 5: Make sure the “Published” has been set to “Yes“.
Step 6: Make sure “Allow External Access” is set to “No“.
[!] This setting allows the user to log in to WESS from a network other than the outlet.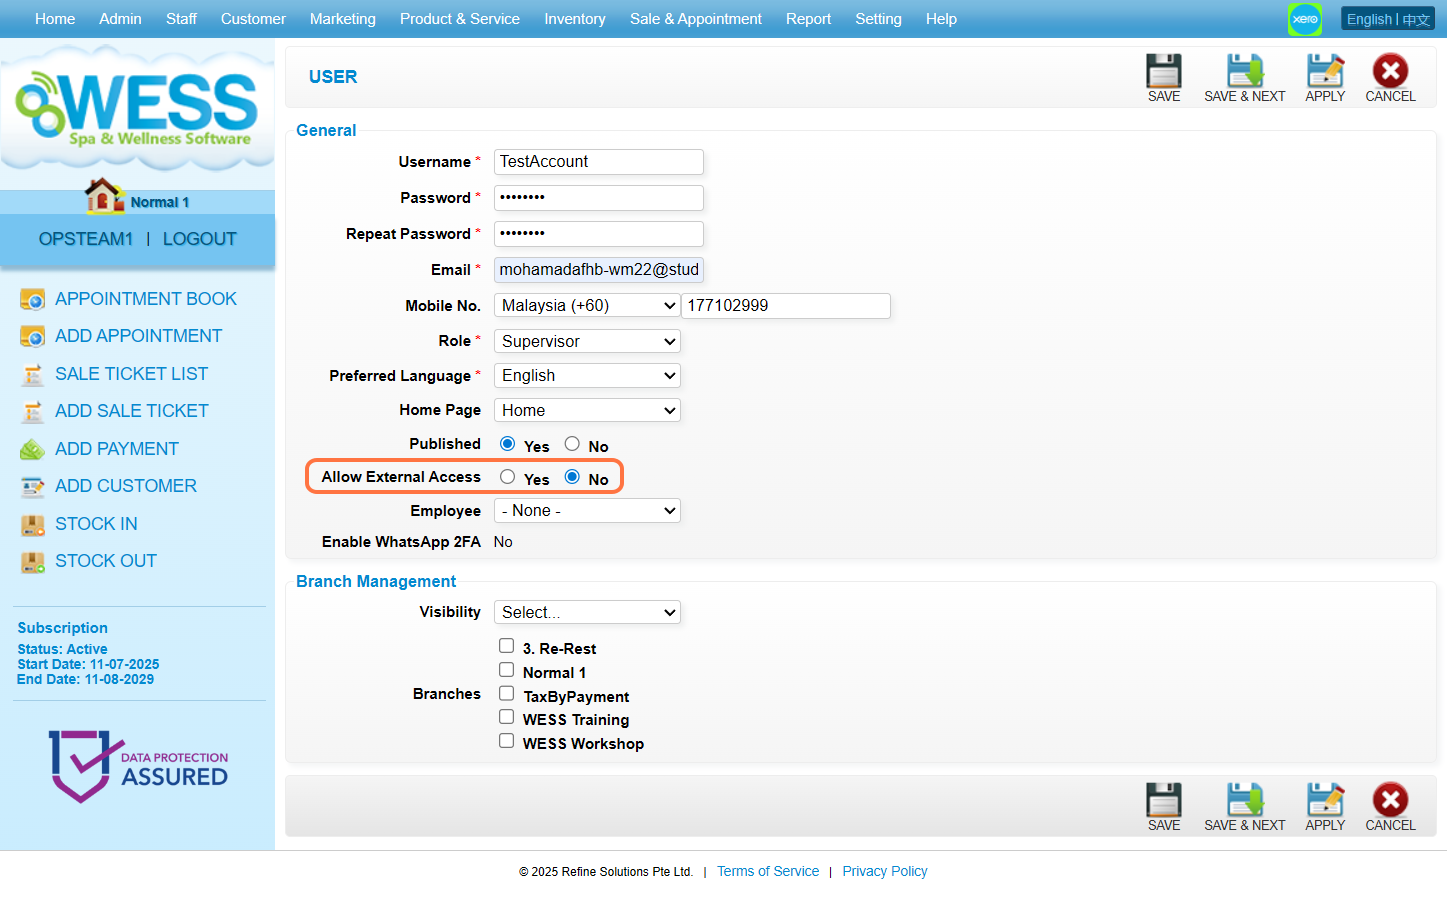
Step 7: [Optional] Click on “Employee” to select the employee.
[!] Select an employee to become an admin.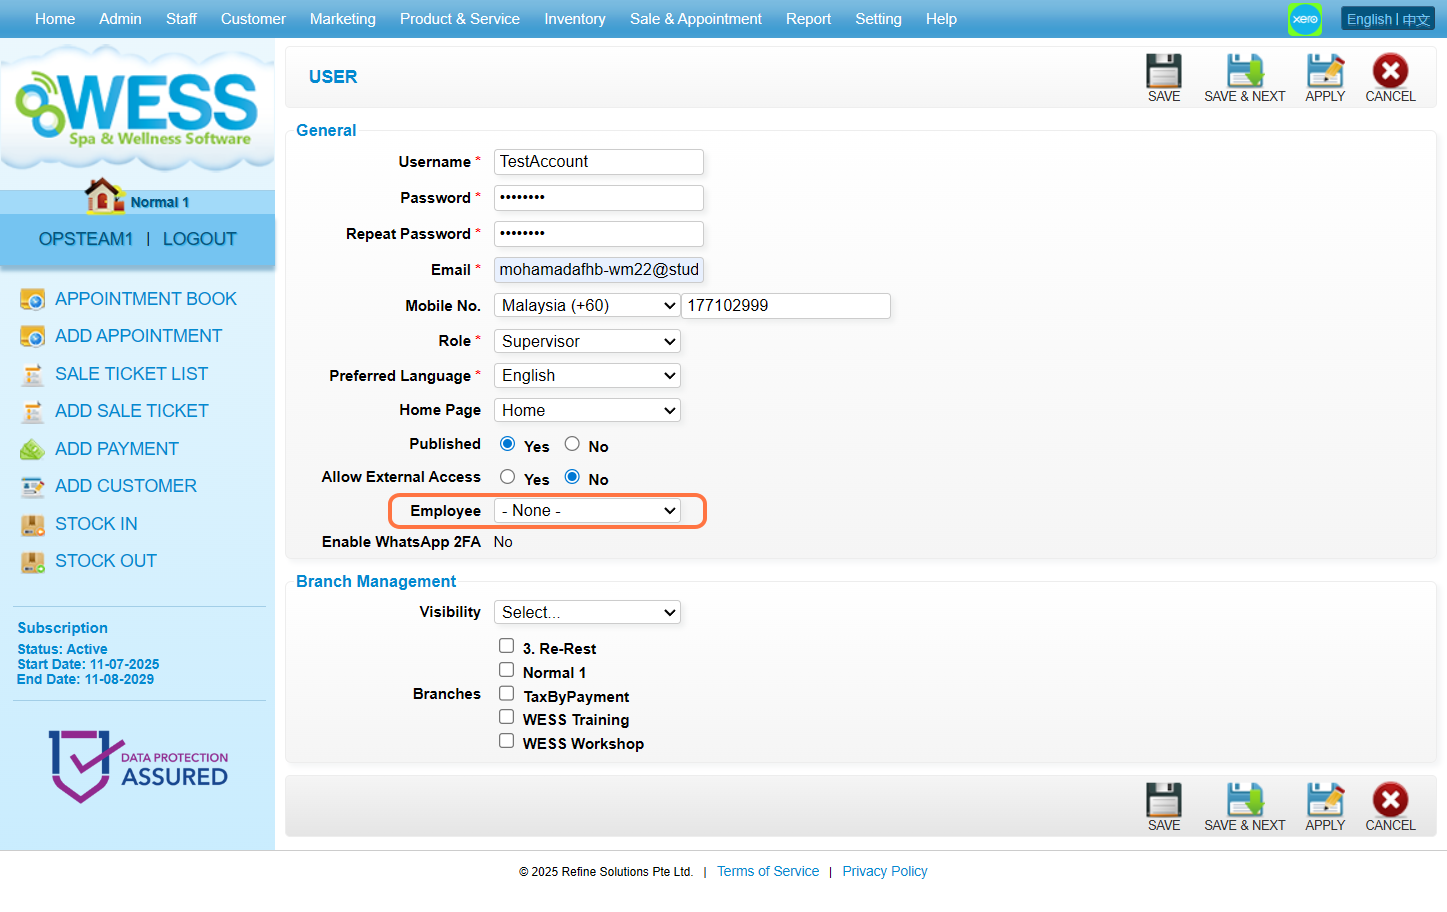
Step 8: Set up the Branch Management settings.
[!] Visibility: All – All branches can see this user
[!] Visibility: Select – Only branches who are ticked can see this user
Step 9: Click “SAVE”.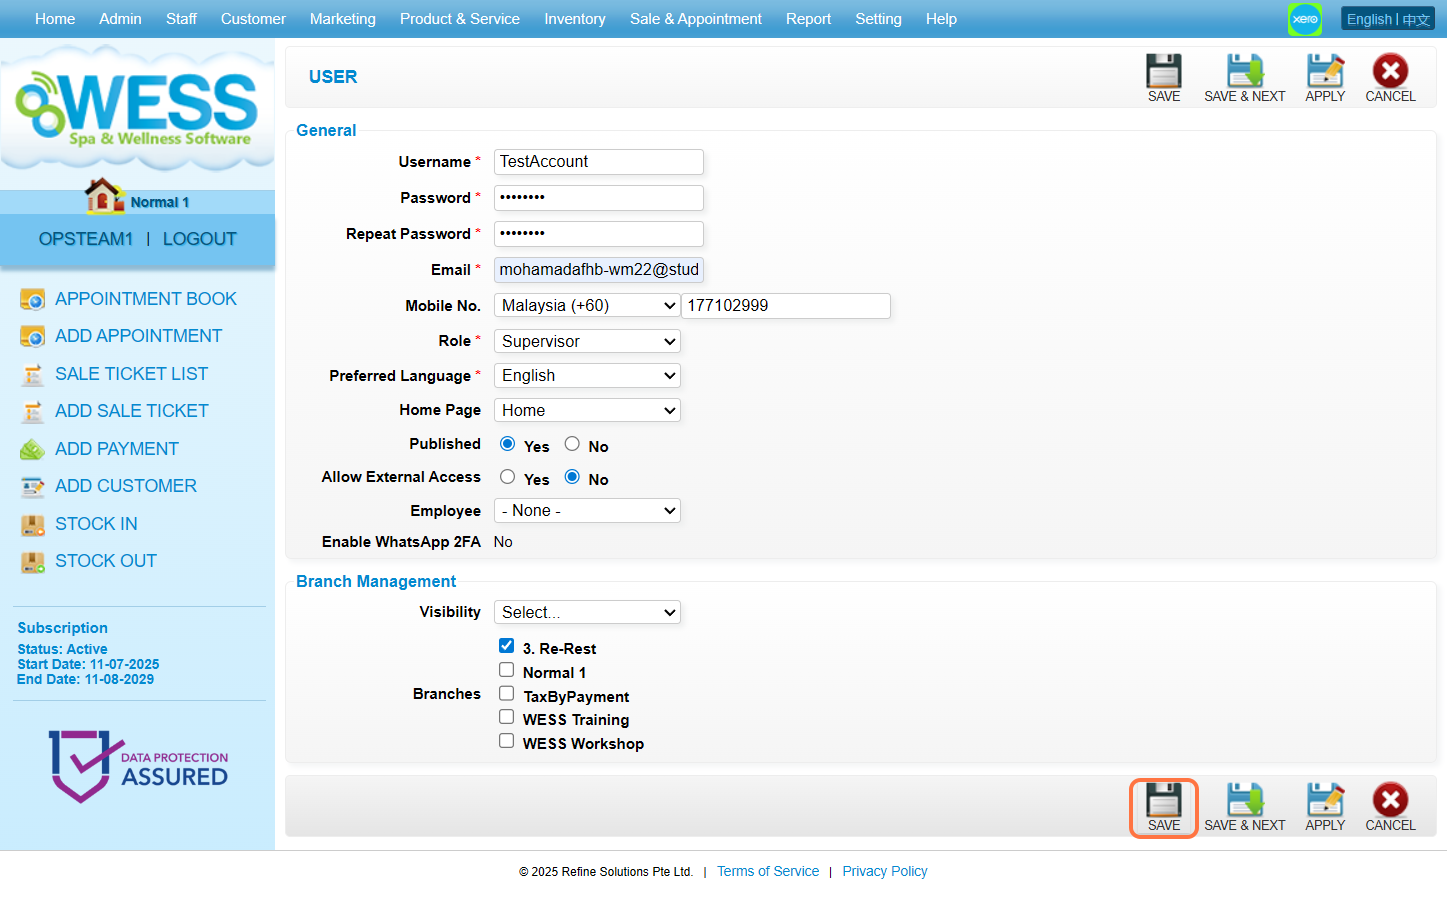
Last Updated: August 2025
https://wesshelp.wessconnect.com/2024/11/28/how-to-change-the-user-password/
Step 1: Click “Admin” .
Step 2: Click “USER” .
Step 3: Click on the pen icon “✏️” to edit.
Step 4: Enter a new password.
[!] The password must contain at least the following:
a. 8 characters
b. one uppercase letter [A-Z]
c. one lowercase letter [a-z]
d. one number [1-0]
e. one special character [exp: ‘@’ , ‘#’ , ‘_’ or etc]
Step 5: Repeat the password here for confirmation.
Step 6: Click on “APPLY” or other disk icons to save.
Step 7: Make sure the change has been saved.
Last Updated: November 2024
https://wesshelp.wessconnect.com/2024/12/02/how-to-unpublish-a-user-who-is-no-longer-available/
[ℹ️] Method 1
Step 1: Click “Admin” .
Step 2: Click “USER” .
Step 3: Click on the pen icon “✏️” to edit .
Step 4: Set “Published” to “No” .
[ℹ️] Method 2
Step 5: Click on “APPLY” or other disk icons to save.
Step 6: Make sure the change has been saved.
Step 7: Click on the “✔️” to unpublish.
Step 8: Make sure the change has been saved.
Last Updated: December 2024
https://wesshelp.wessconnect.com/2024/12/03/how-to-publish-the-unpublished-user/
Step 1: Click “Admin” .
Step 2: Click “USER” .
Step 3. Select “No” to show the unpublished user.
ℹ️ Method 1
Step 4: Click on the pen icon “✏️” to edit.
Step 5: Set “Published” to “Yes” .
Step 6: Click on “APPLY” or other disk icons to save.
Step 7: Make sure the change has been saved.
ℹ️ Method 2
Step 8: Click on the “❎” to publish.
Step 9: Make sure the change has been saved
Last Updated: December 2024
https://wesshelp.wessconnect.com/2024/12/03/how-to-restrict-user-access-to-the-system/
Step 1: Click “Admin” .
Step 2: Click “USER” .
Step 3: Click on the pen icon “✏️” to edit.
Step 4: Set “Allow External Access” to “No” .
[!] Make sure you have the main account with “Allow External Access” on to prevent a total lockout.
Step 5: Click on “APPLY” or other disk icons to save.
Step 6: Make sure the change has been saved.
Last Updated: December 2024
https://wesshelp.wessconnect.com/2023/11/09/how-to-set-the-branch-access-for-a-user-2/
Step 1: Click “ADMIN” .
Step 2: Click “USER” .
Step 3: Click on any of the pen icon “✏️” that you want to edit.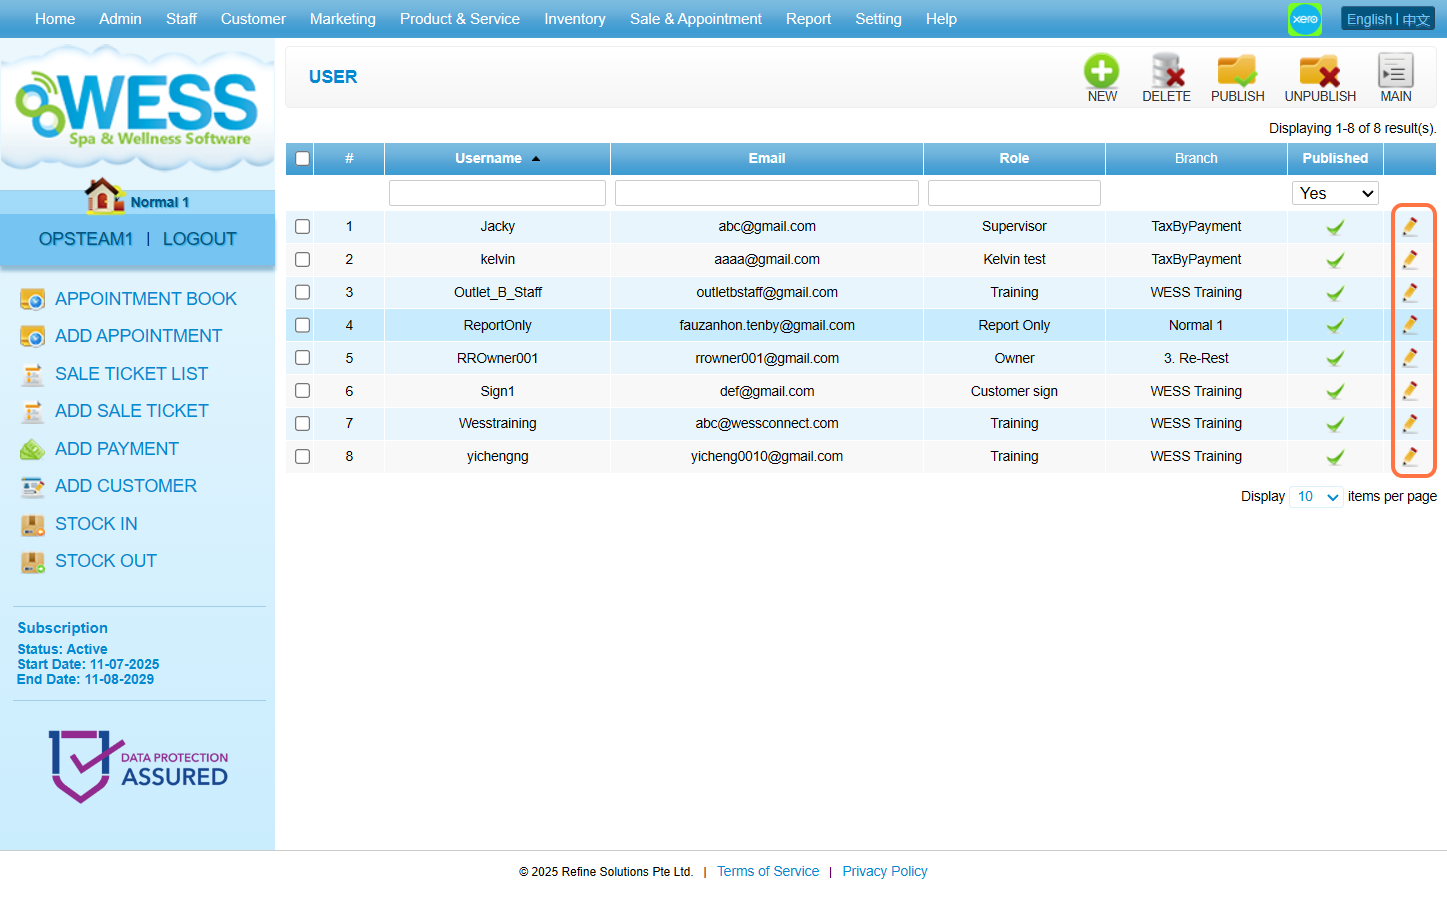
Step 4: Set up the Branch Management settings.
[!] Visibility: All – All branches can see this user
[!] Visibility: Select – Only branches who are ticked can see this user
Step 5: Click “SAVE”.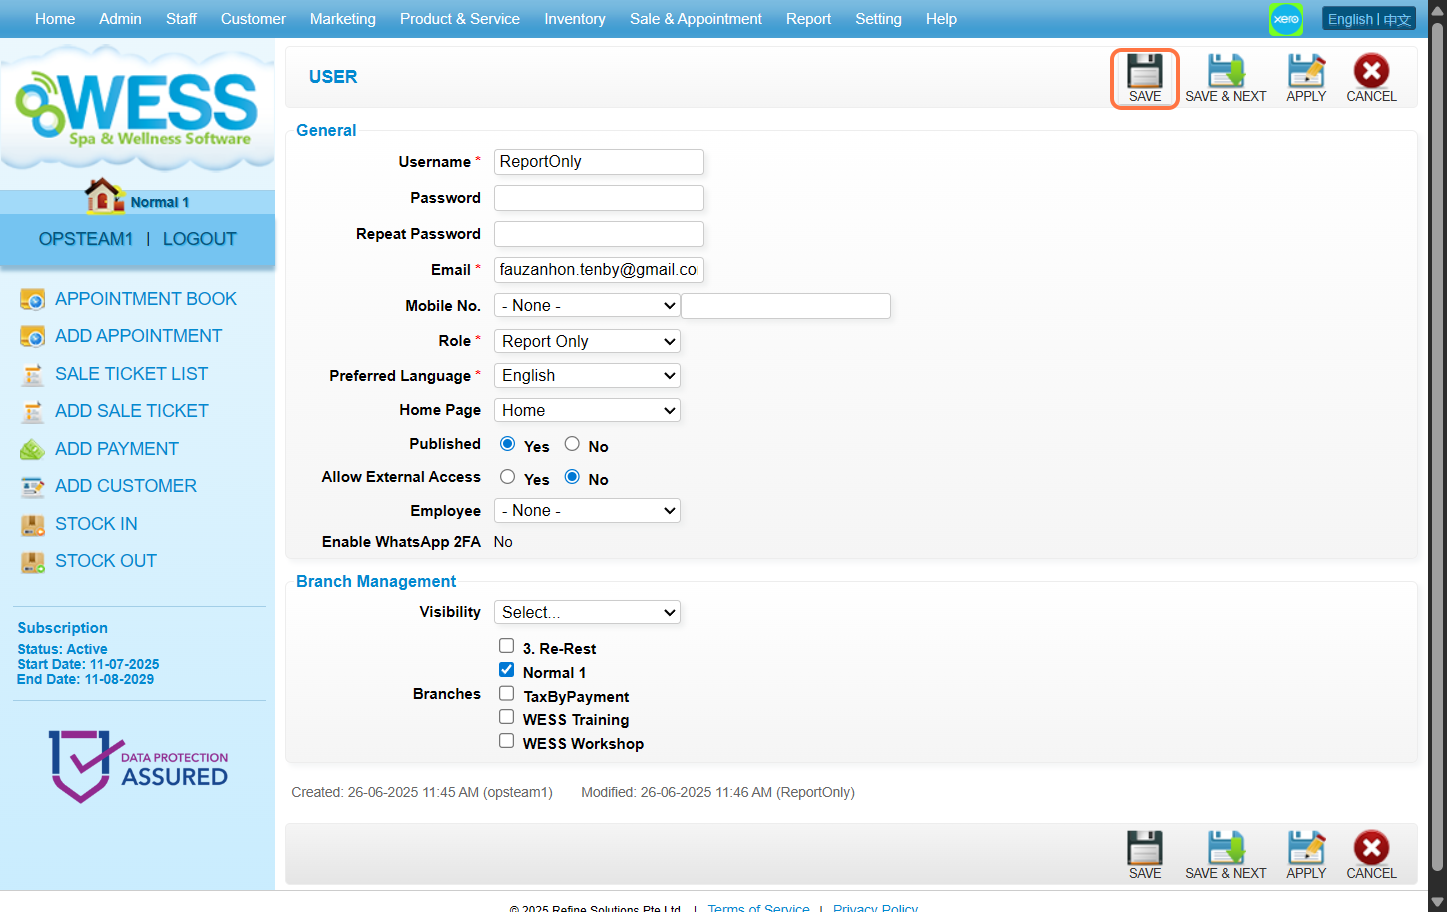
Last Updated: August 2025
https://wesshelp.wessconnect.com/2023/11/09/how-to-check-my-accounts-access-right-2/
Step 1: Click on the username.
Step 2: Click on “MY ROLE” .
Step 3: Access rights can be checked here. If certain actions cannot be performed, please contact your admin as some access may be hidden.
[!] If you have the highest role (admin/manager/owner) in the system, please contact WESS support.
Last Updated: July 2024
https://wesshelp.wessconnect.com/2023/11/09/how-to-add-a-new-change-existing-legal-host-ip/
Step 1: When a device is connected to an external network, the user will receive the error message with the IP address.
Step 2: In the main account, click on “Setting” .
Step 3: Click on “BRANCH” .
Step 4: Click on LEGAL HOST or “🖥️” .
Step 5: Type the IP shown from the error message [refer to Step 1].
Step 6: Click on the “➕” to add.
Step 7: [Optional] The user can click on the IP address to change it.
Step 8: [Optional] Click on the “✔️” to update.
Step 9: Click on “APPLY” or other disk icons to save.
Step 10: Make sure the change has been saved.
Step 11: [Optional] You can click on the dustbin icon “🗑” to remove.
[!] Make sure you click disk icons to save the changes.
Last Updated: August 2025
https://wesshelp.wessconnect.com/2024/08/06/how-to-login-to-wess/
Step 1: Type your username.
[!] Make sure your account existed.
Step 2: Type your “password“.
Step 3: Click “Login” button.
Step 4: Select a branch to log in. Then click “Enter“.
Step 5: Login successful screen. 
Last Updated: Aug 2024
https://wesshelp.wessconnect.com/2024/12/02/how-to-create-shortcut/
Step 1: Click “Setting” .
Step 2: Click “SHORTCUT” .
Step 3: Drag any function you want from the right to the left .
Step 4: [Optional] Drag unnecessary features from the left to the right.![Step 4: [Optional] Drag unnecessary features from the left to the right.](https://images.tango.us/workflows/55953e59-c4a8-40a3-a9c5-e84591d72d52/steps/f70867ac-3faa-430d-8163-3c7e25cf564b/09544d73-6f4b-435a-b339-d080e8b0b98e.png?mark-x=734&mark-y=151&m64=aHR0cHM6Ly9pbWFnZXMudGFuZ28udXMvc3RhdGljL2JsYW5rLnBuZz9tYXNrPWNvcm5lcnMmYm9yZGVyPTQlMkNGRjc0NDImdz02MTgmaD02NiZmaXQ9Y3JvcCZjb3JuZXItcmFkaXVzPTEw)
Step 5: Click any Save icon “💾” .
Step 6: Make sure the changes has been saved.
Step 7: [Optional] To remove all shortcuts, click “Clear All” .![Step 7: [Optional] To remove all shortcuts, click “Clear All” .](https://images.tango.us/workflows/55953e59-c4a8-40a3-a9c5-e84591d72d52/steps/91e6135e-b165-4d64-896c-bb55b932a6f9/44dd8dd4-6ef4-44ca-b38c-46289e5b72a2.png?mark-x=607&mark-y=172&m64=aHR0cHM6Ly9pbWFnZXMudGFuZ28udXMvc3RhdGljL2JsYW5rLnBuZz9tYXNrPWNvcm5lcnMmYm9yZGVyPTQlMkNGRjc0NDImdz0xMDYmaD01NyZmaXQ9Y3JvcCZjb3JuZXItcmFkaXVzPTEw)
Last Updated: December 2024
https://wesshelp.wessconnect.com/2024/12/27/how-to-edit-the-own-user-password/
Step 1: Click on the username.
Step 2: Create a “Password” .
[!] The password must contain at least the following:
a. 8 characters
b. one uppercase letter [A-Z]
c. one lowercase letter [a-z]
d. one number [1-0]
e. one special character [exp: ‘@’ , ‘#’ , ‘_’ or etc]
Step 3: Repeat the password here for confirmation.
Step 4: Click Save icon “💾”.
Step 5: Make sure the change has been saved.
Last Updated: December 2024
https://wesshelp.wessconnect.com/2023/11/14/how-to-create-a-new-role/
Step 1: Click “Admin” .
Step 2: Click “ROLE” .
Step 3: Click on “NEW” .
Step 4: Enter a role name.
Step 5: [Optional] Fill in the details in the “description” .
Step 6: Make sure the “Published” has been set to “Yes” .
Step 7: [Optional] Click on another tab if needed.
Step 8: Click on “Enable …” to enable access to the particular feature.
Step 9: Choose which access this user should have.
Step 10: Click on “APPLY” or other disk icons to save.
Step 11: Make sure the change has been saved.

Last Update: July 2024
https://wesshelp.wessconnect.com/2021/06/17/how-to-edit-role-access-right/
Step 1: Click “ADMIN”
Step 2: Click “ROLE”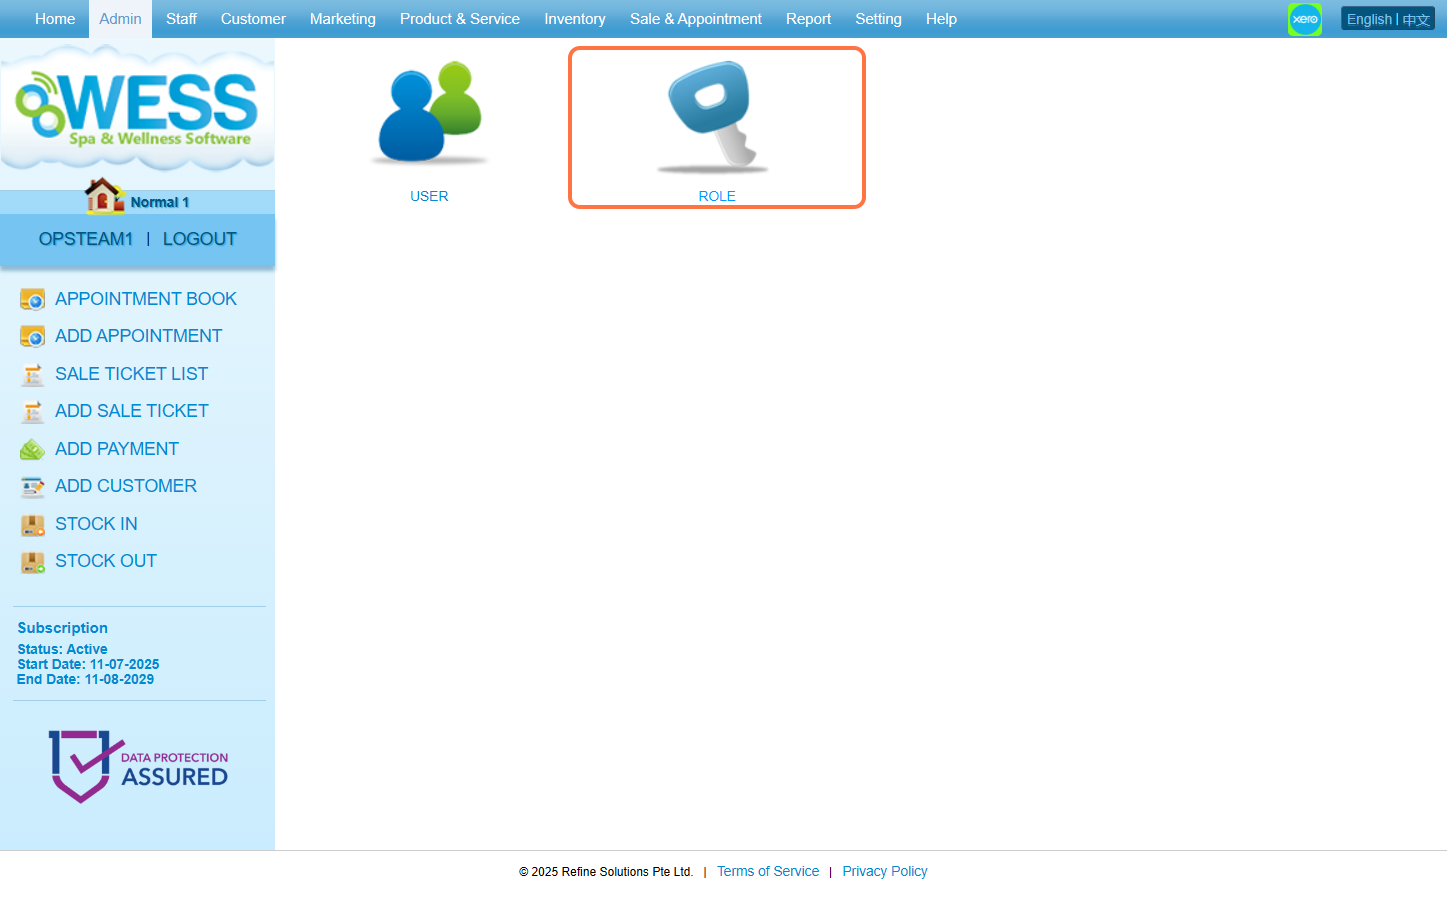
Step 3: Select any role you want to edit/make changes on 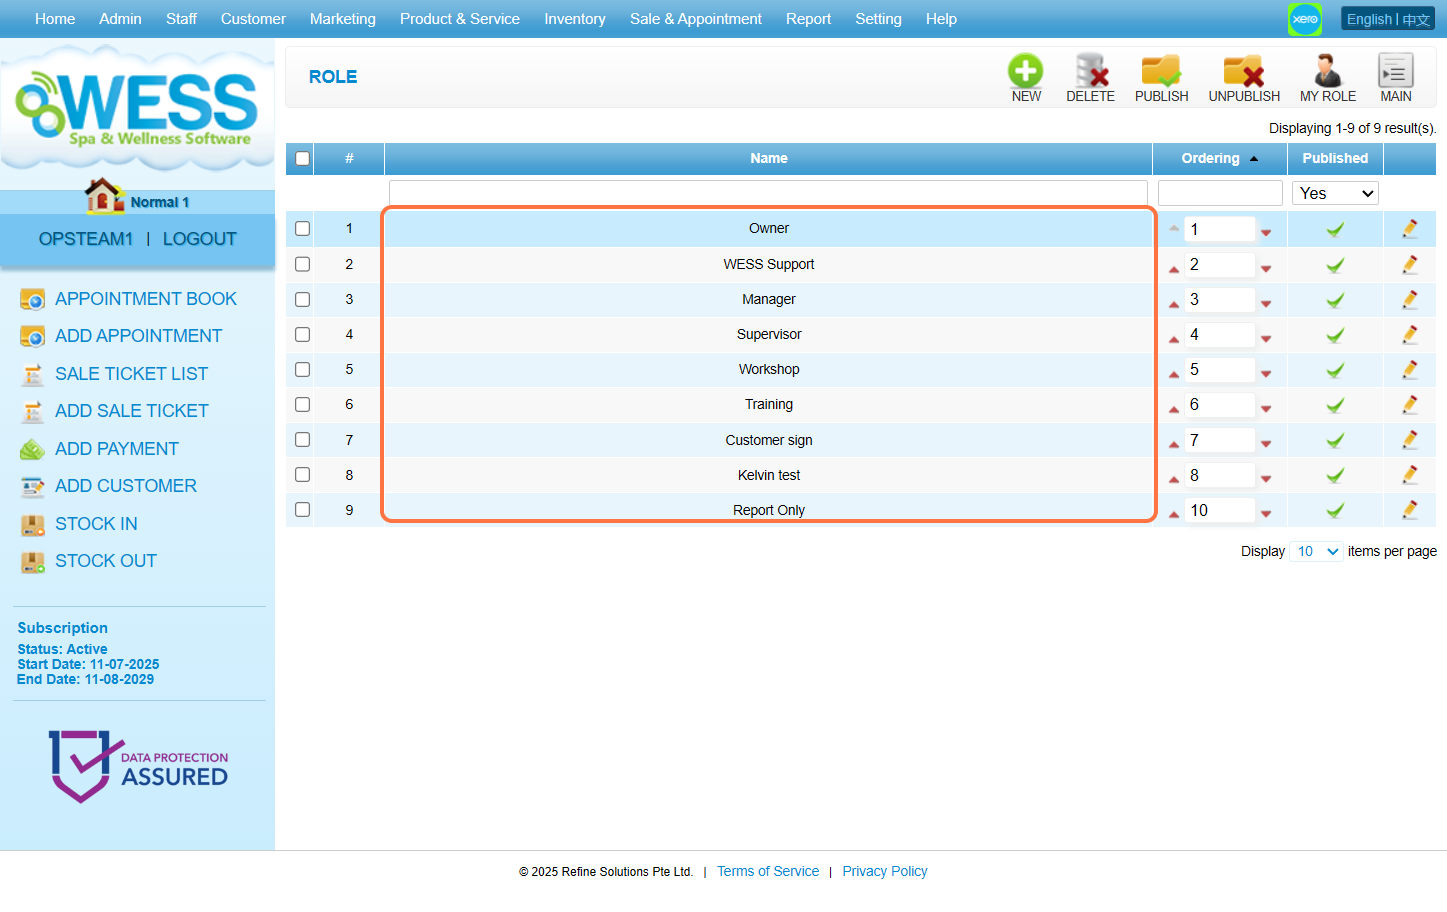
Step 4: Click “EDIT”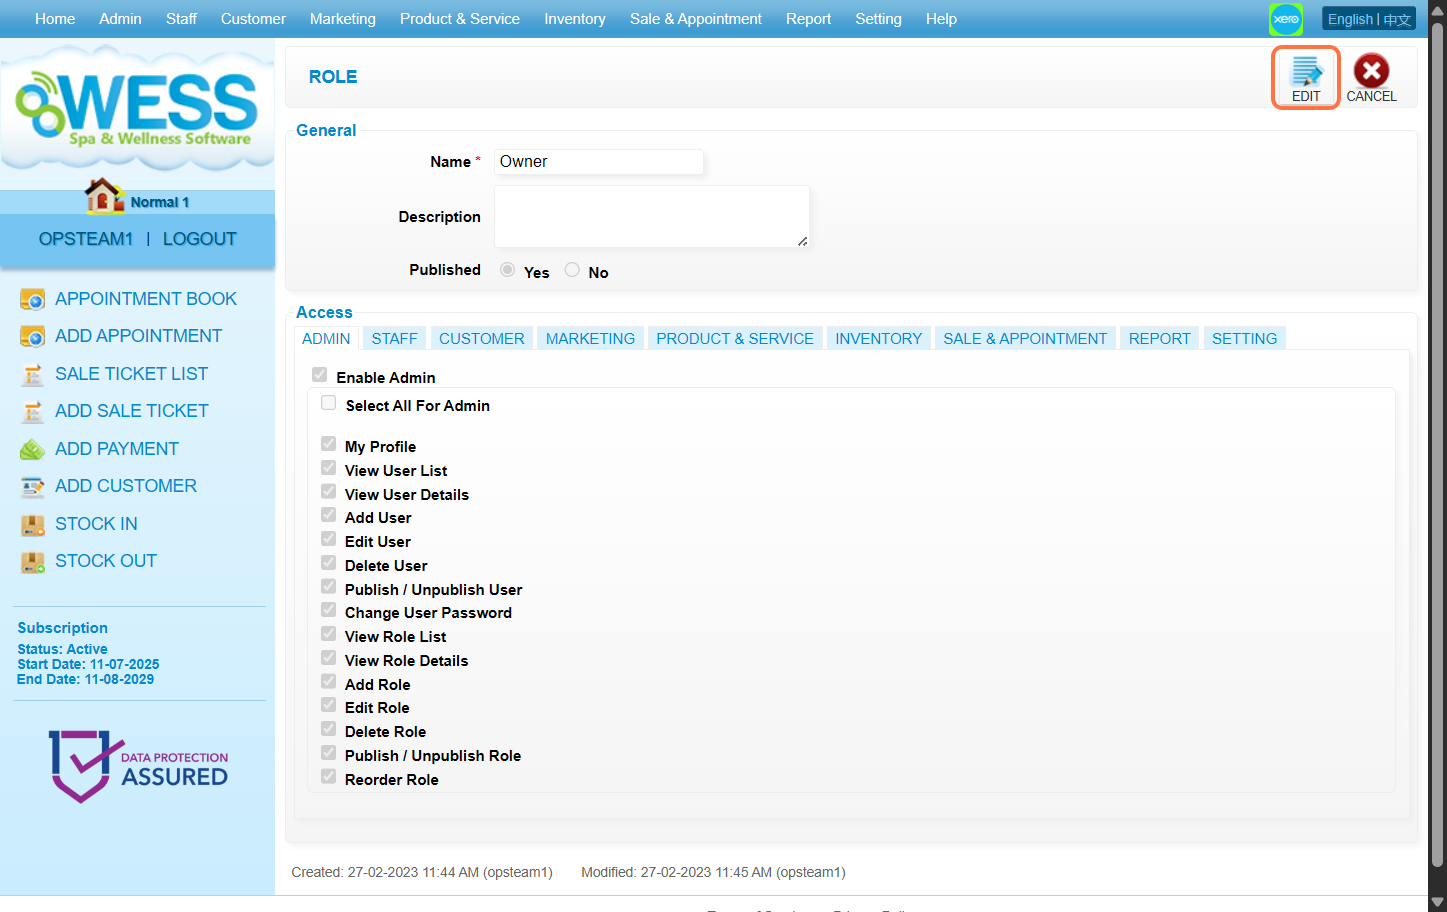
Step 5: Make any edits/changes that you wanted to do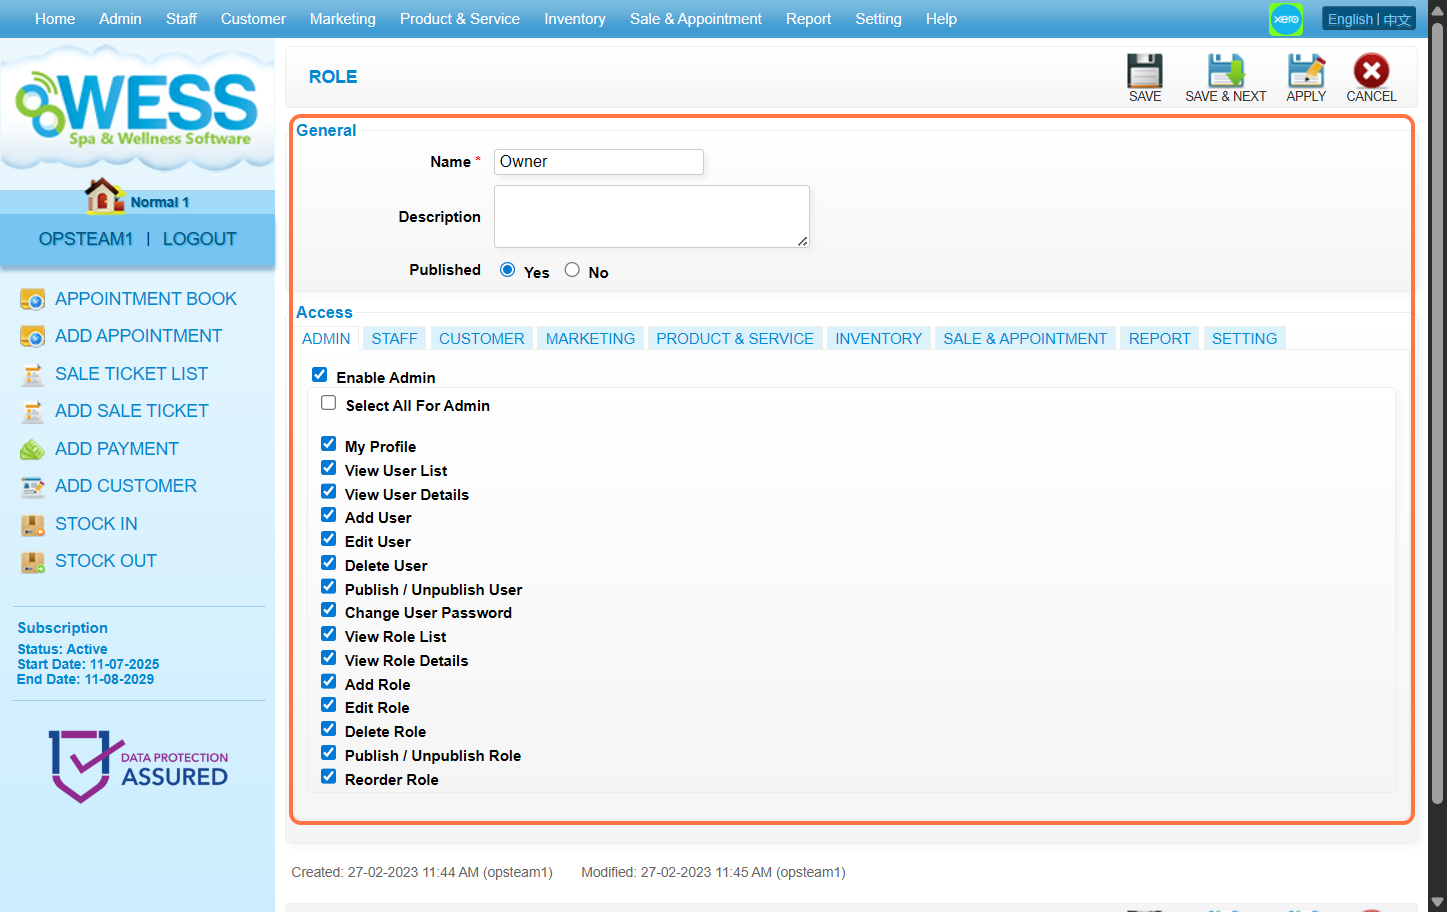
Step 6: Click “SAVE”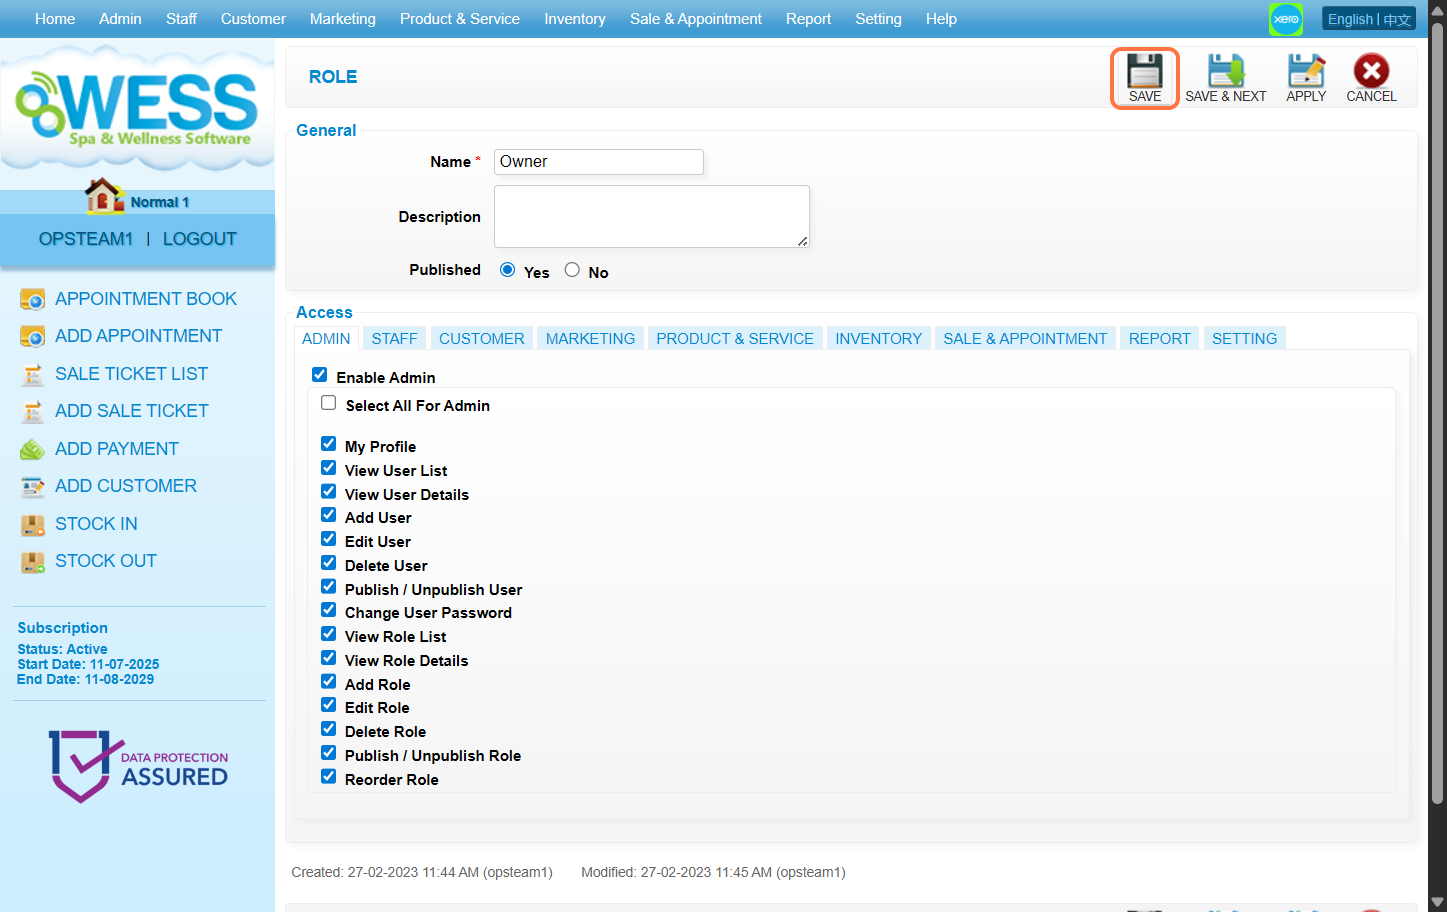
Last update: August 2025
https://wesshelp.wessconnect.com/2023/11/14/how-to-unpublish-a-role-that-is-no-longer-available/
Step 1: Click “Admin” .
Step 2: Click “ROLE” .
[ℹ️] Method 1
Step 3: Click on the pen icon “✏️” to edit.
Step 4: Set “Published” to “No” .
Step 5: Click on “APPLY” or other disk icons to save.
Step 6: Make sure the change has been saved.
[ℹ️] Method 2
Step 7: Click on the “✔️” to unpublish.
Step 8: Make sure the change has been saved.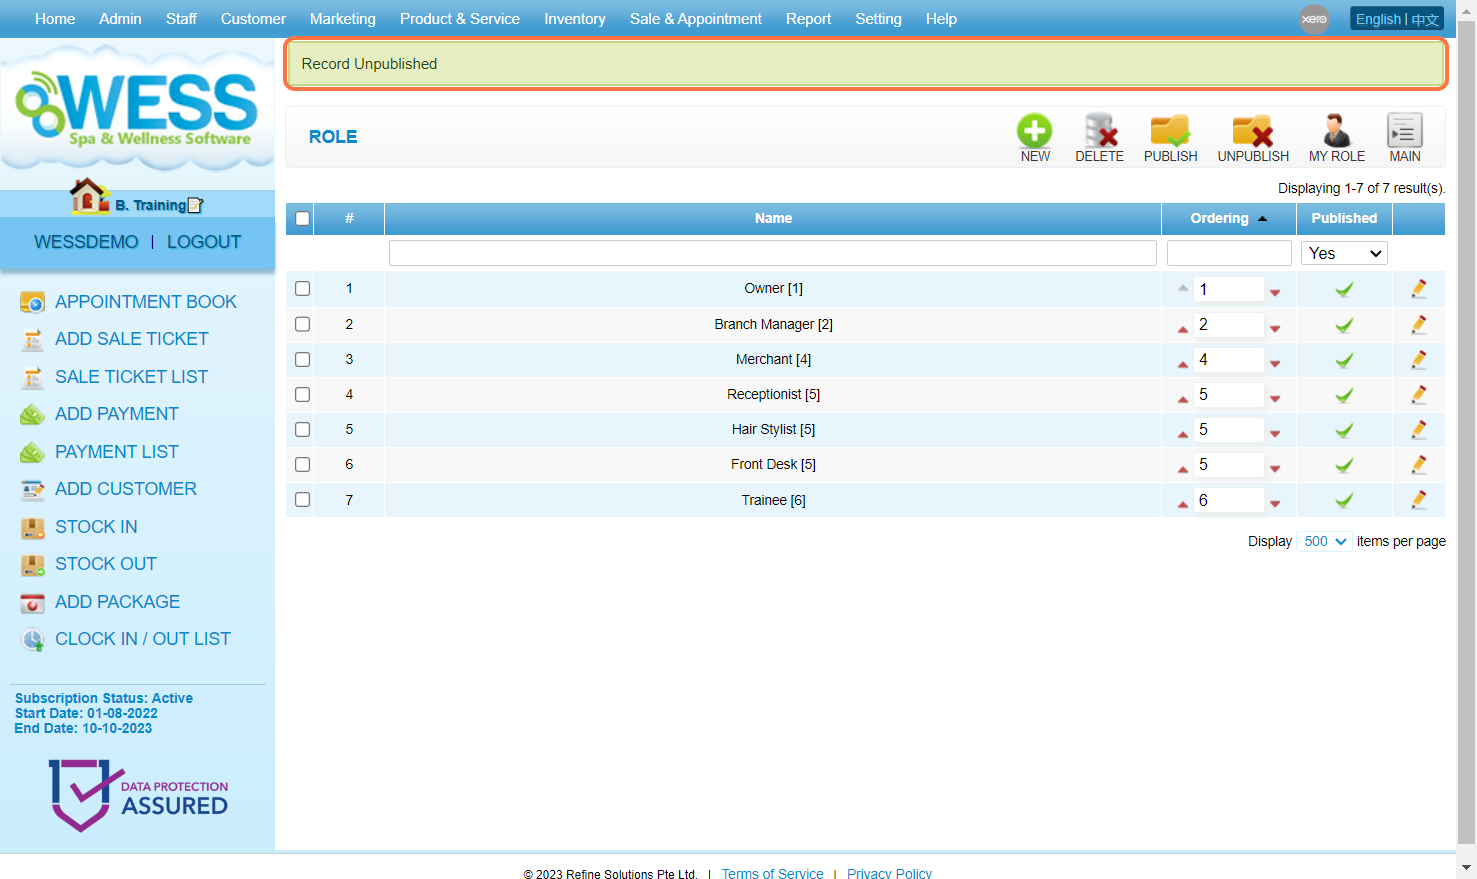
Last Update: July 2024
https://wesshelp.wessconnect.com/2023/11/14/how-to-publish-the-unpublished-role/
Step 1: Click “Admin” .
Step 2: Click “ROLE” .
Step 3. Select “No” to show the unpublished role.
[ℹ️] Method 1
Step 4: Click on the pen icon “✏️” to edit.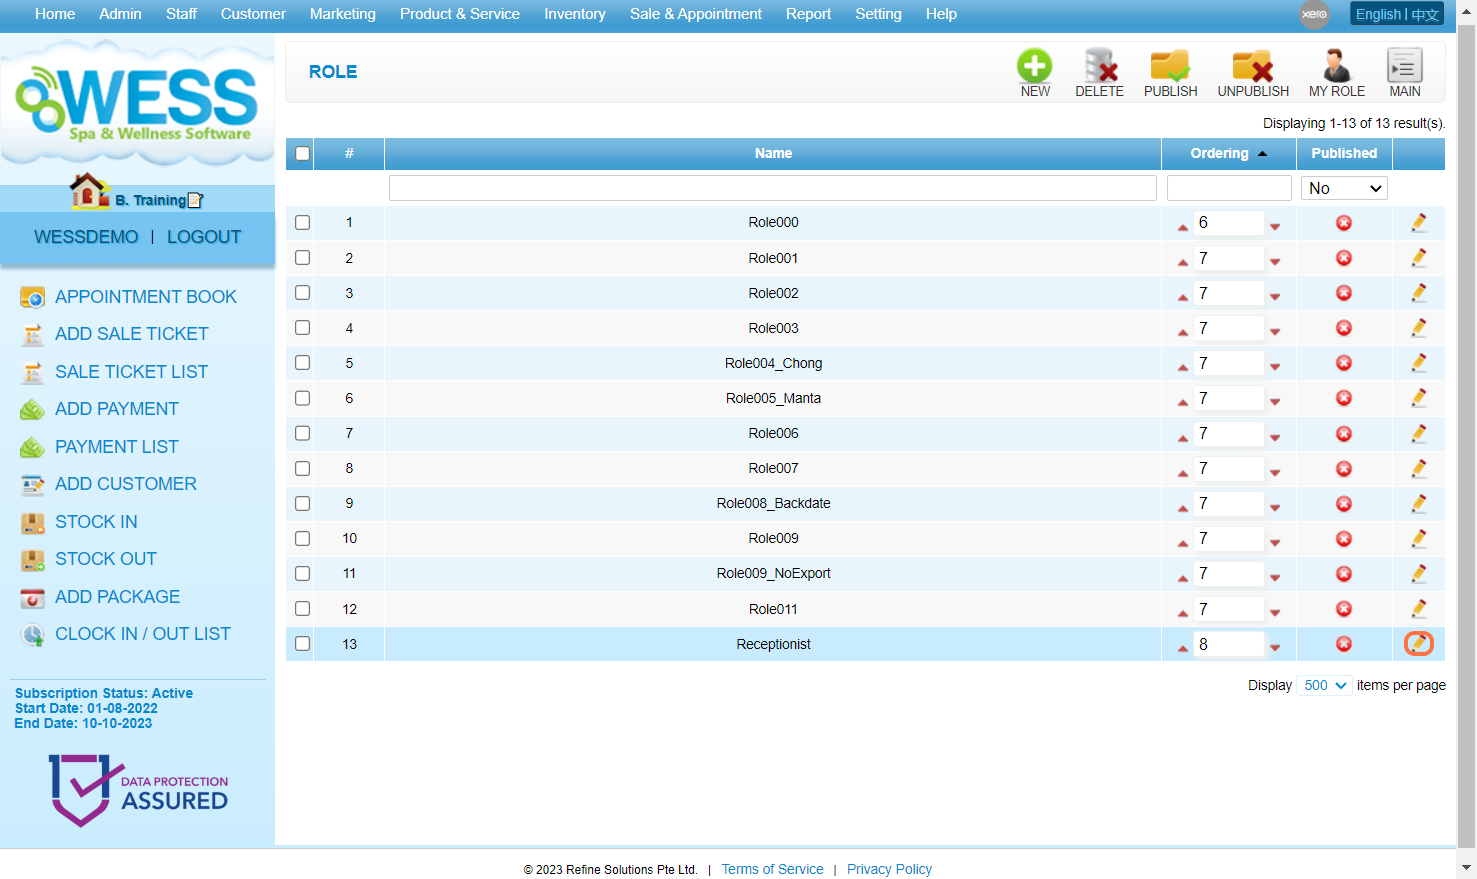
Step 5: Set “Published” to “Yes” .
Step 6: Click on “APPLY” or other disk icons to save.
Step 7: Make sure the change has been saved.
[ℹ️] Method 2
Step 8: Click on the “❎” to publish.
Step 9: Make sure the change has been saved.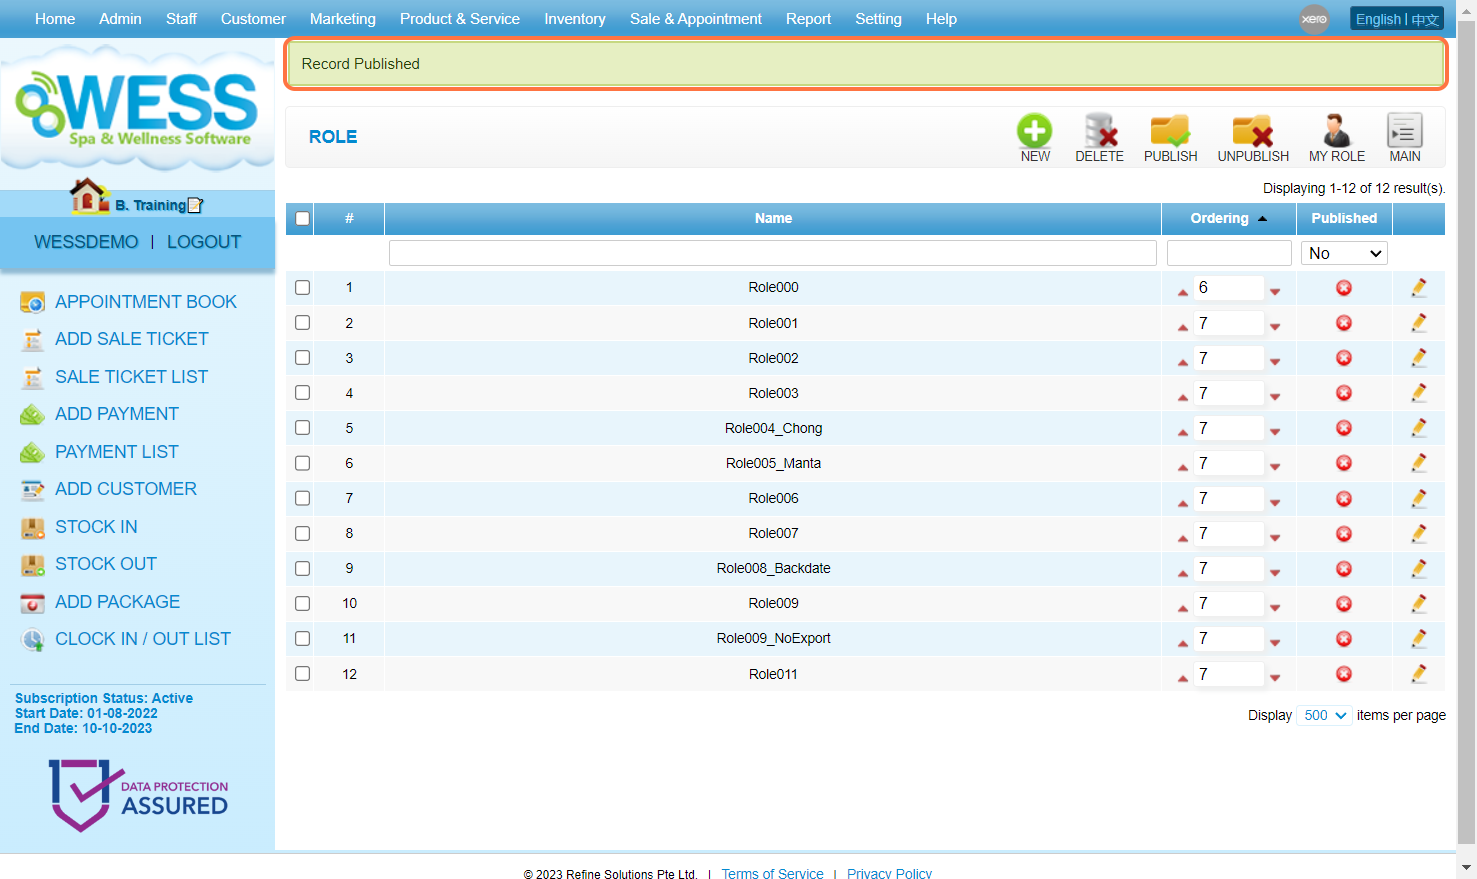
Last Update: July 2024
https://wesshelp.wessconnect.com/2023/11/14/how-to-adjust-the-role-ordering/
Step 1: Click “Admin” .
Step 2: Click “ROLE” .
Step 3: Click on the Move Up icon “🔺” to raise the role’s priority.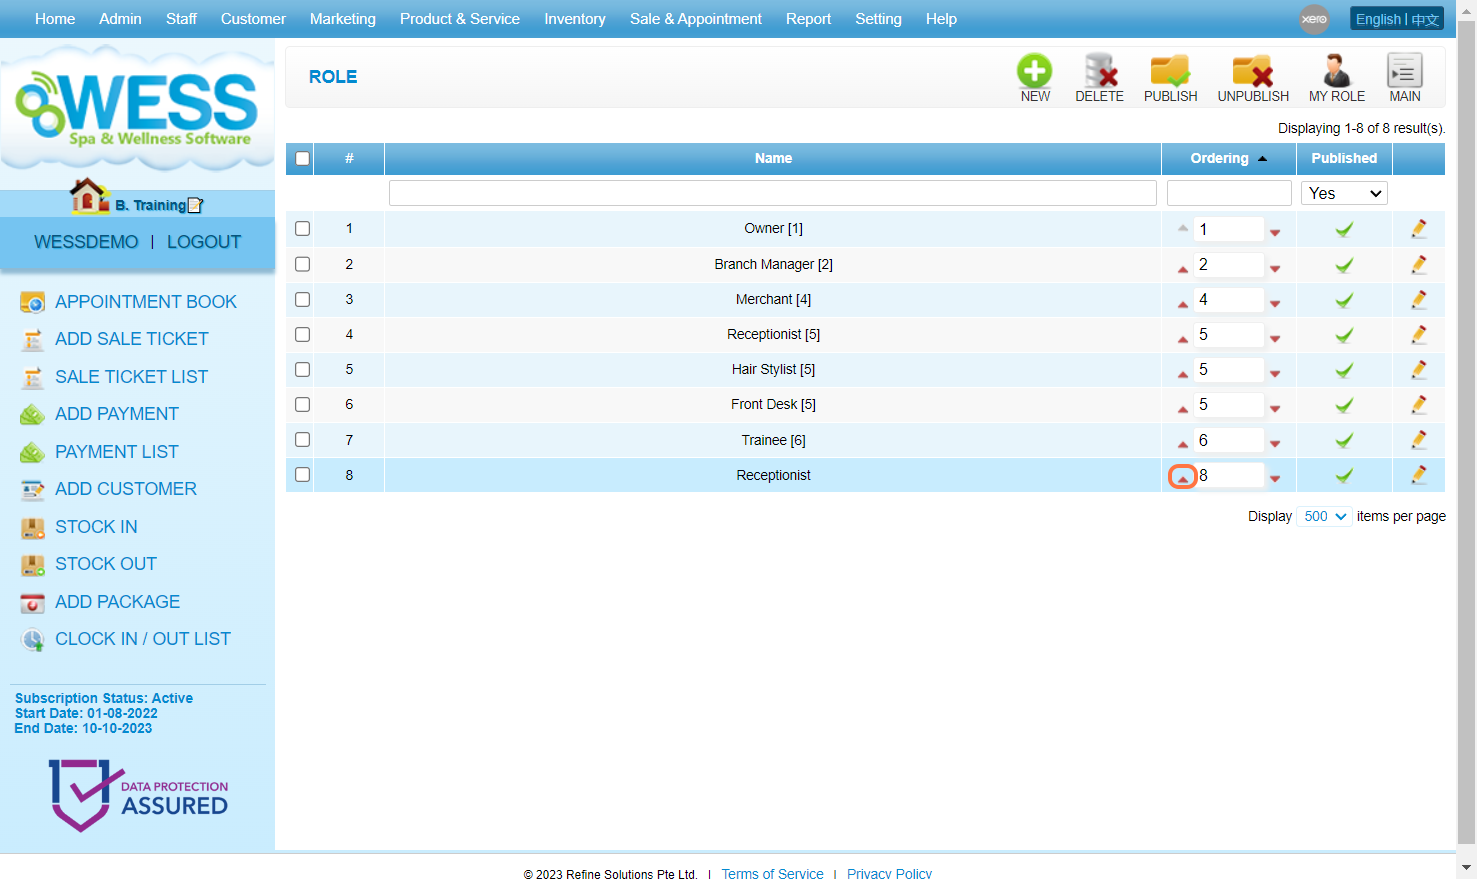
Step 4: Make sure the change has been saved.
Step 5: Click on the Move Down icon “🔻” to lower the role’s priority.
Step 6: Make sure the change has been saved.
Last Update: July 2024
https://wesshelp.wessconnect.com/2023/11/14/why-am-i-not-able-to-delete-the-user-role/
Once the user/role has records (have login records, been assigned to users), these will not be able to be deleted.
ℹ️ Solution:
2. User: Set the user to unpublished
3. Role: Set the role to unpublished
Last Update: Nov 2023
1. This can be caused by several internet-related issues:
a. You have a network (Wi-Fi / hotspot / cellular data) other than a whitelisted network.
b. You have connected the correct modem, but its IP address has been changed.
c. You are using cellular data.
d. Turning the modem on and off.
e. Unstable Wi-Fi connection.

ℹ️ Solution:
2. Check your current IP address
3. Check and change whitelisted IP addresses in the legal host setting
Last Update: Nov 2023