
Step 1: Click “ADMIN” .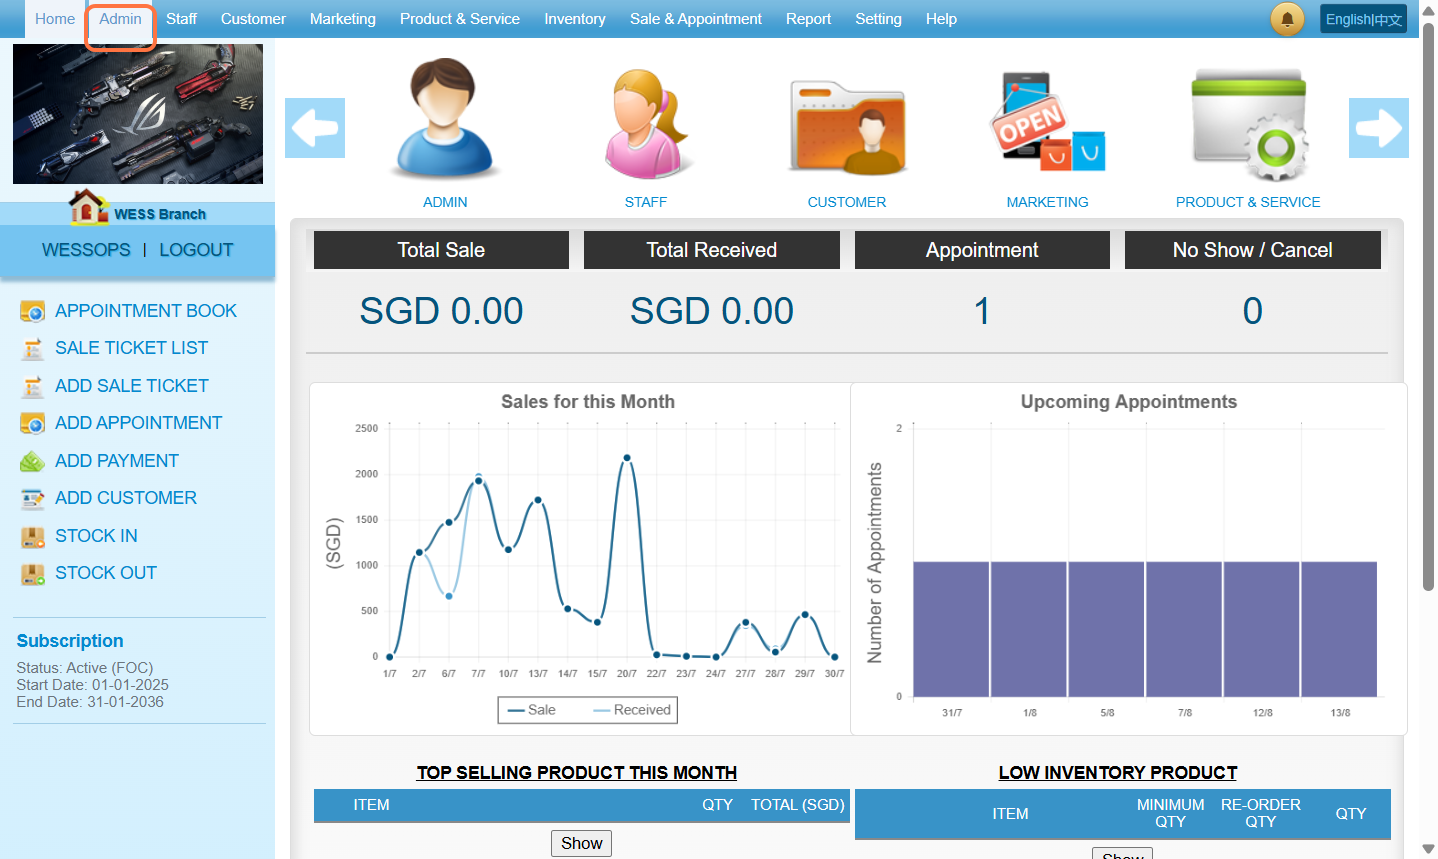
Step 2: Click “USER” .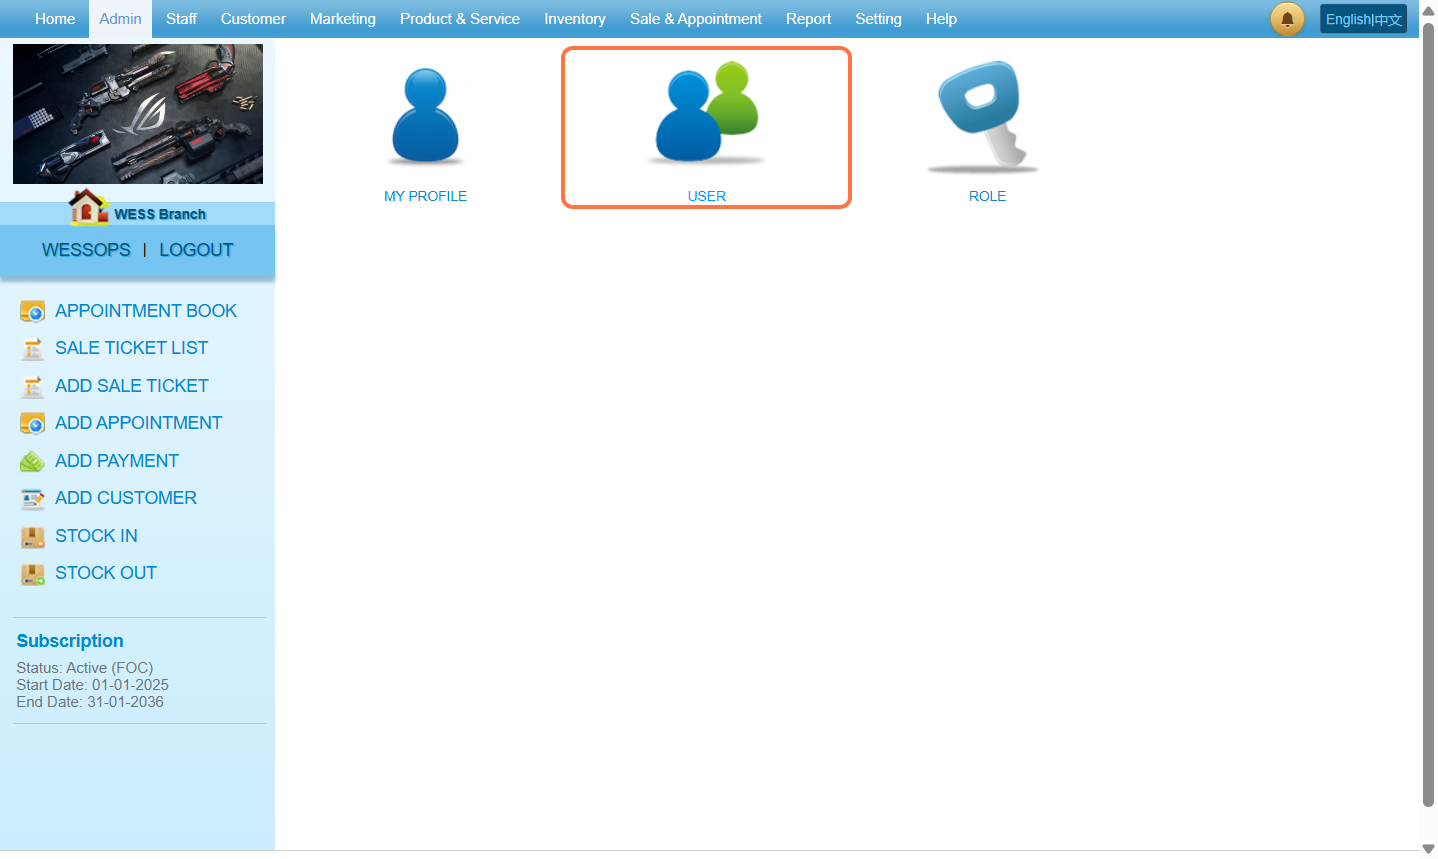
Step 3: Click “NEW“.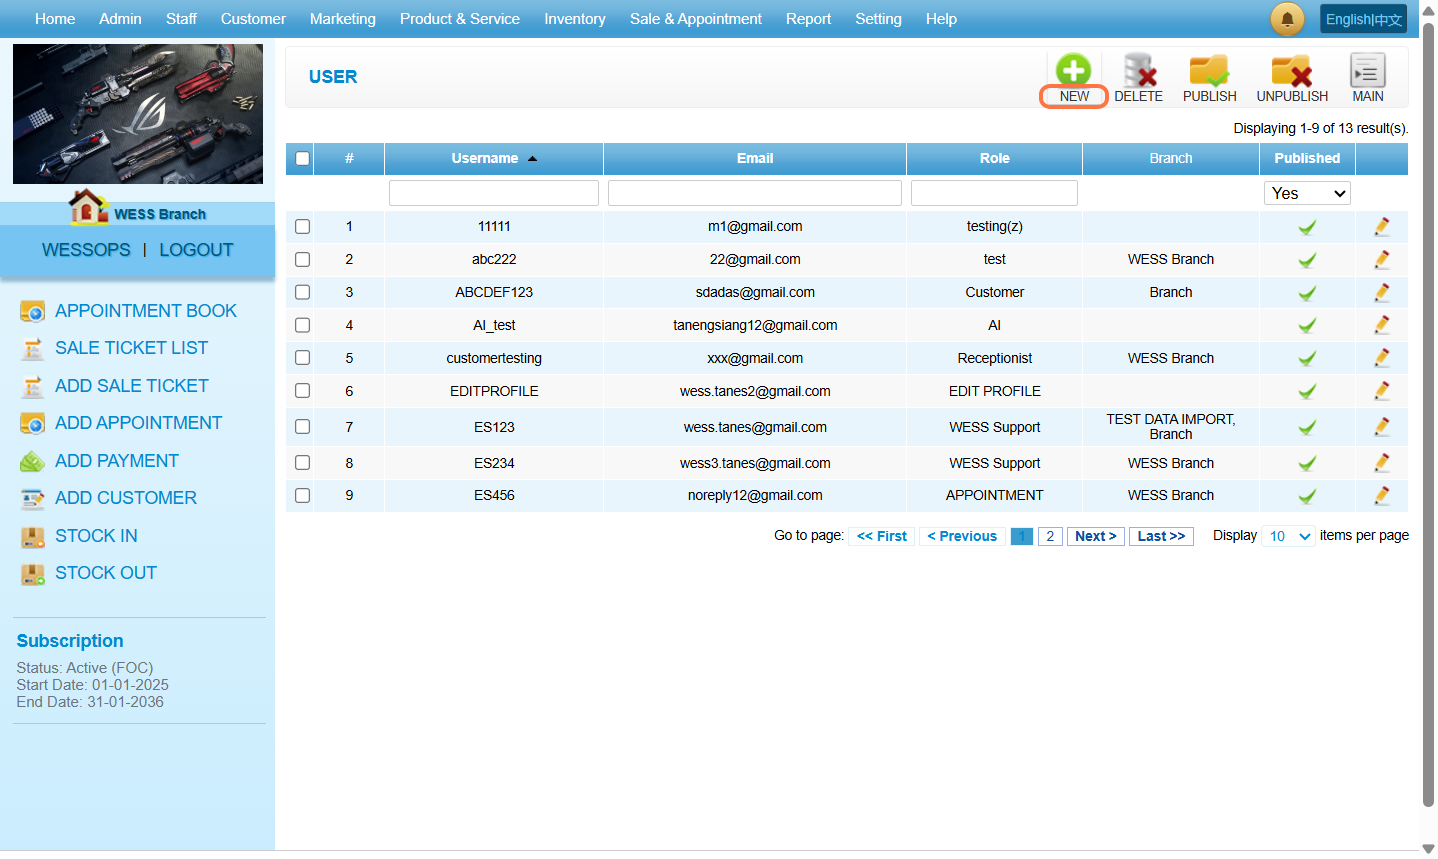
Step 4: Fill in the relevant information accordingly
[!] Those with * are mandatory to fill in
[!] The password must contain at least the following:
a. 8 characters
b. one uppercase letter [A-Z]
c. one lowercase letter [a-z]
d. one number [1-0]
e. one special character [exp: ‘@’ , ‘#’ , ‘_’ or etc]
[!] “Role” determine which access this user has
[!] “Preferred Language” determines the language every time the user logs in to WESS.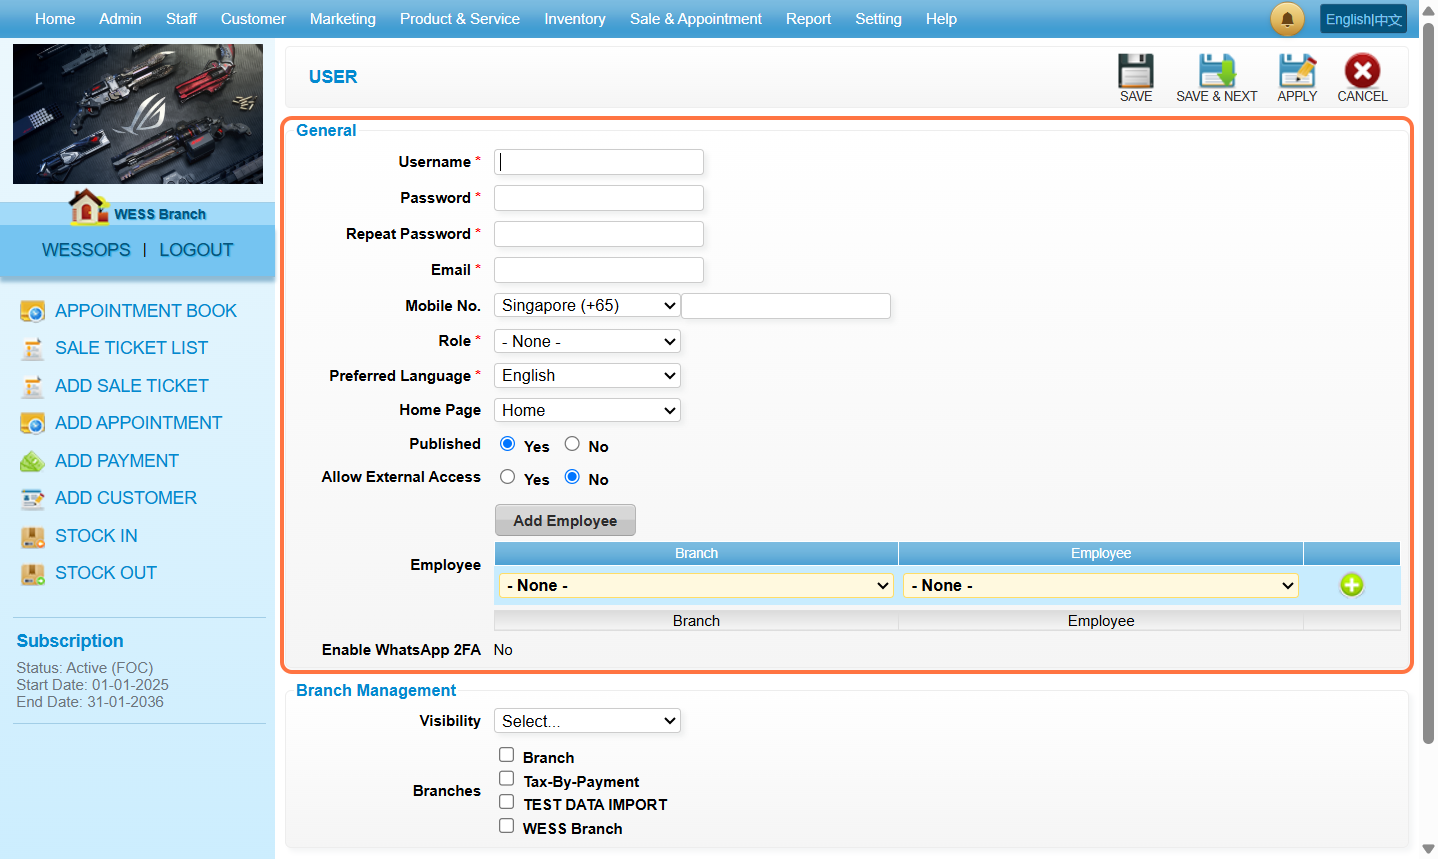
Step 5: Make sure the “Published” has been set to “Yes“.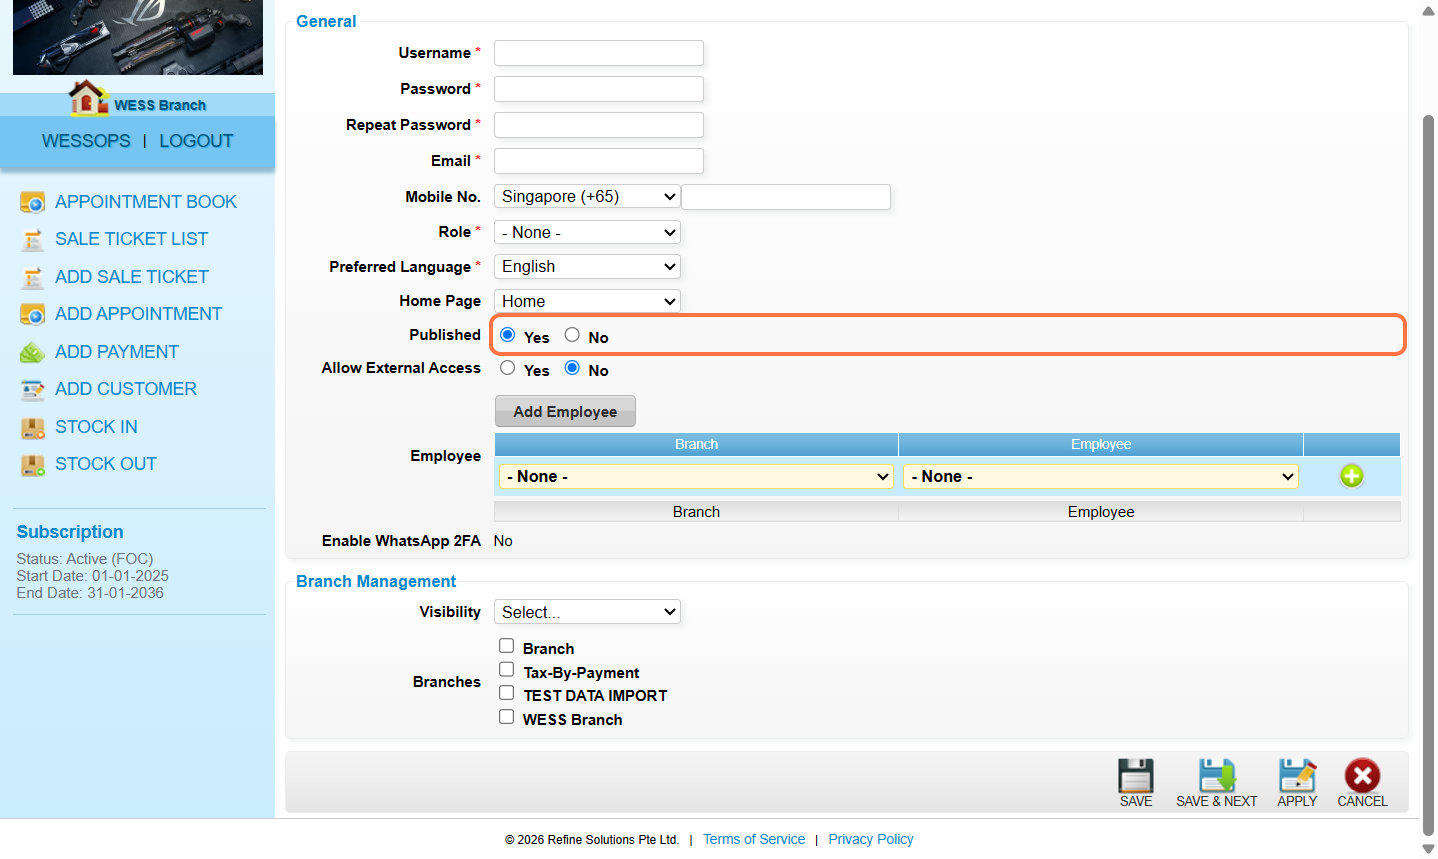
Step 6: Make sure “Allow External Access” is set to “No“.
[!] This setting allows the user to log in to WESS from a network other than the outlet.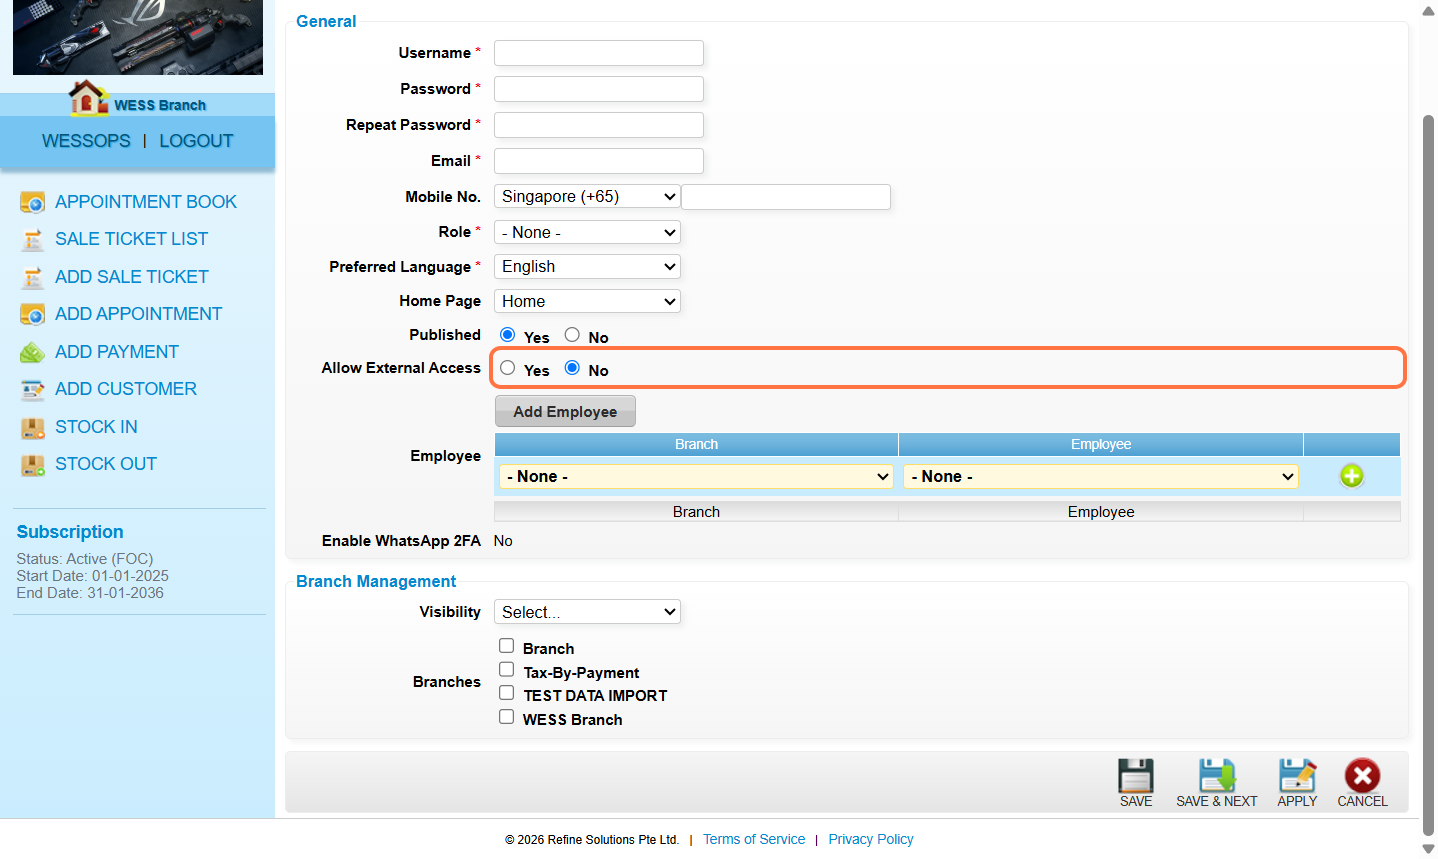
Step 7: Set up the Branch Management settings.
[!] Visibility: All – All branches can see this user.
[!] Visibility: Select – Only branches who are ticked can see this user.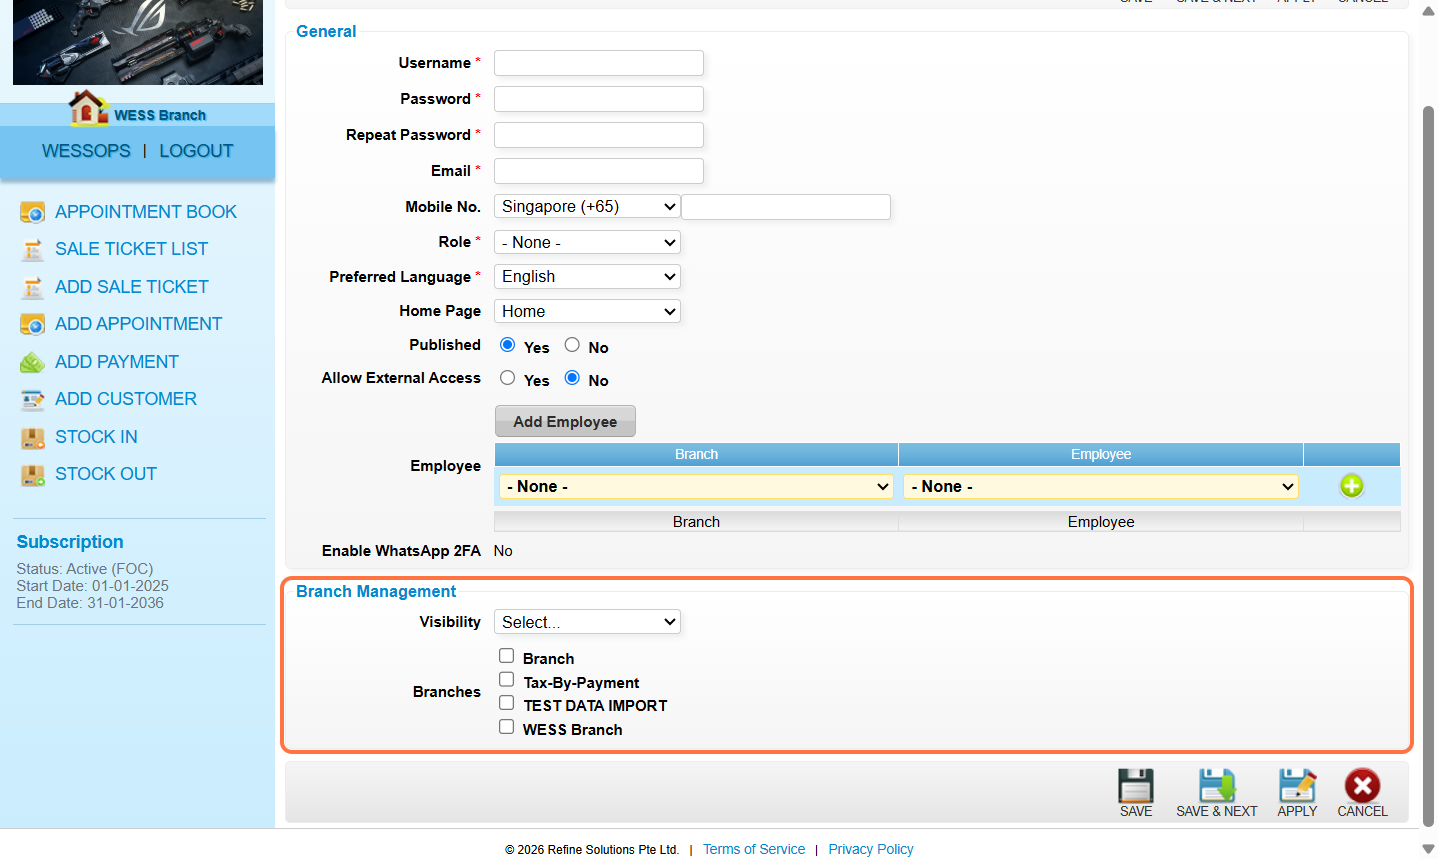
Step 8: Link an employee to a branch.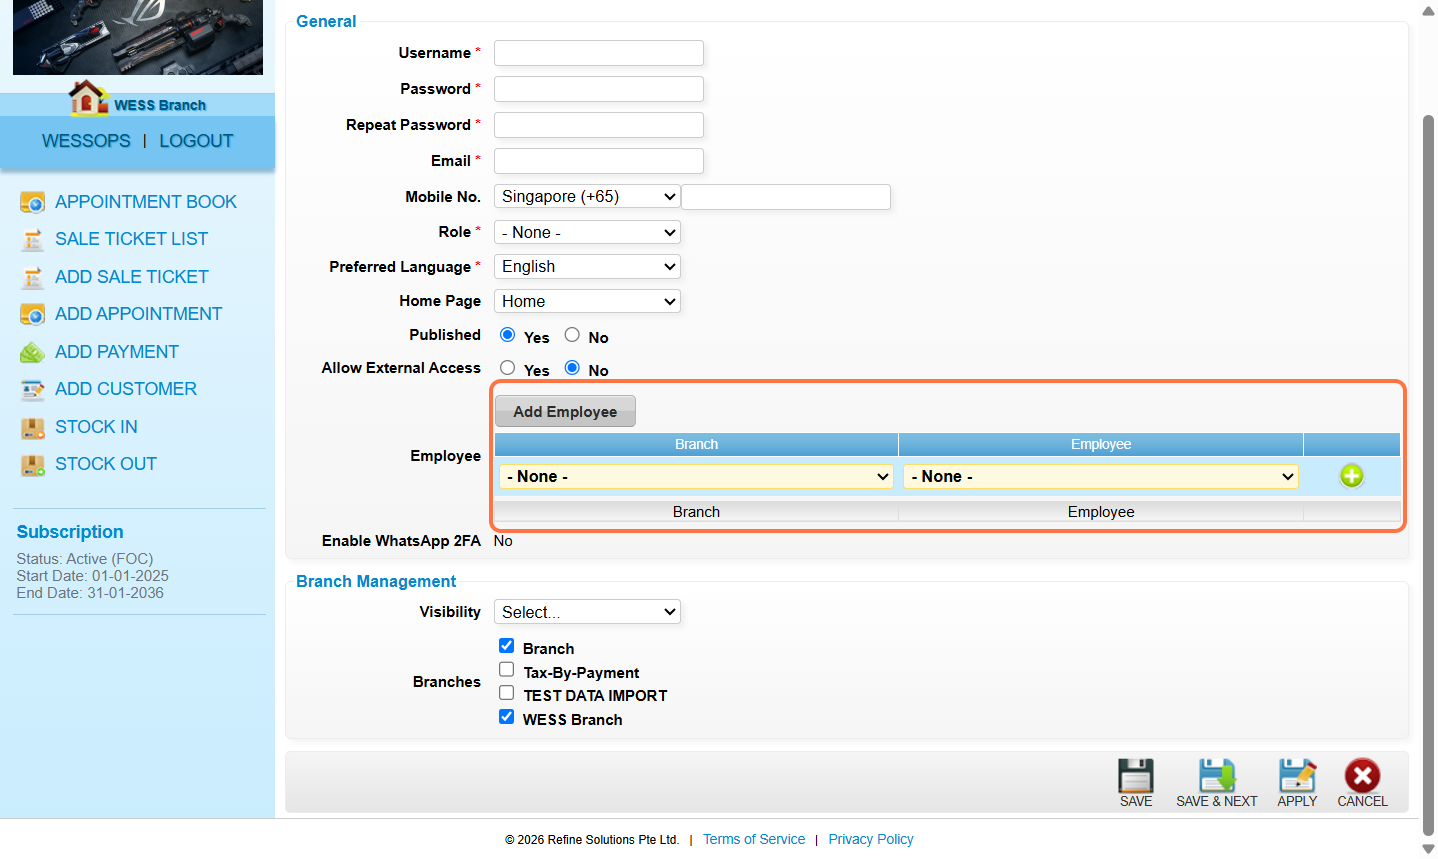
Step 9: Select a branch.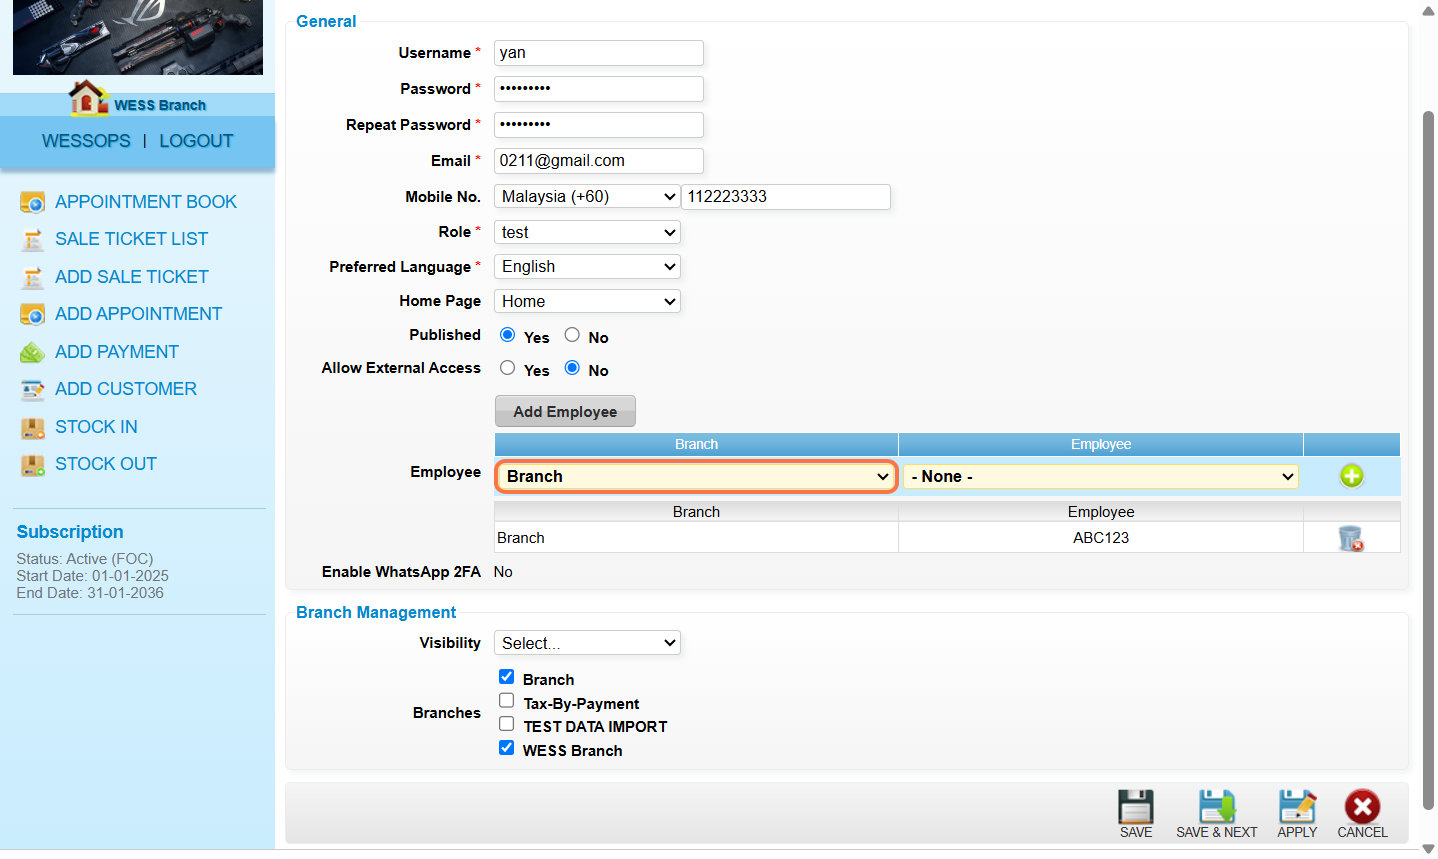
Step 10: Link employee to corresponding branch.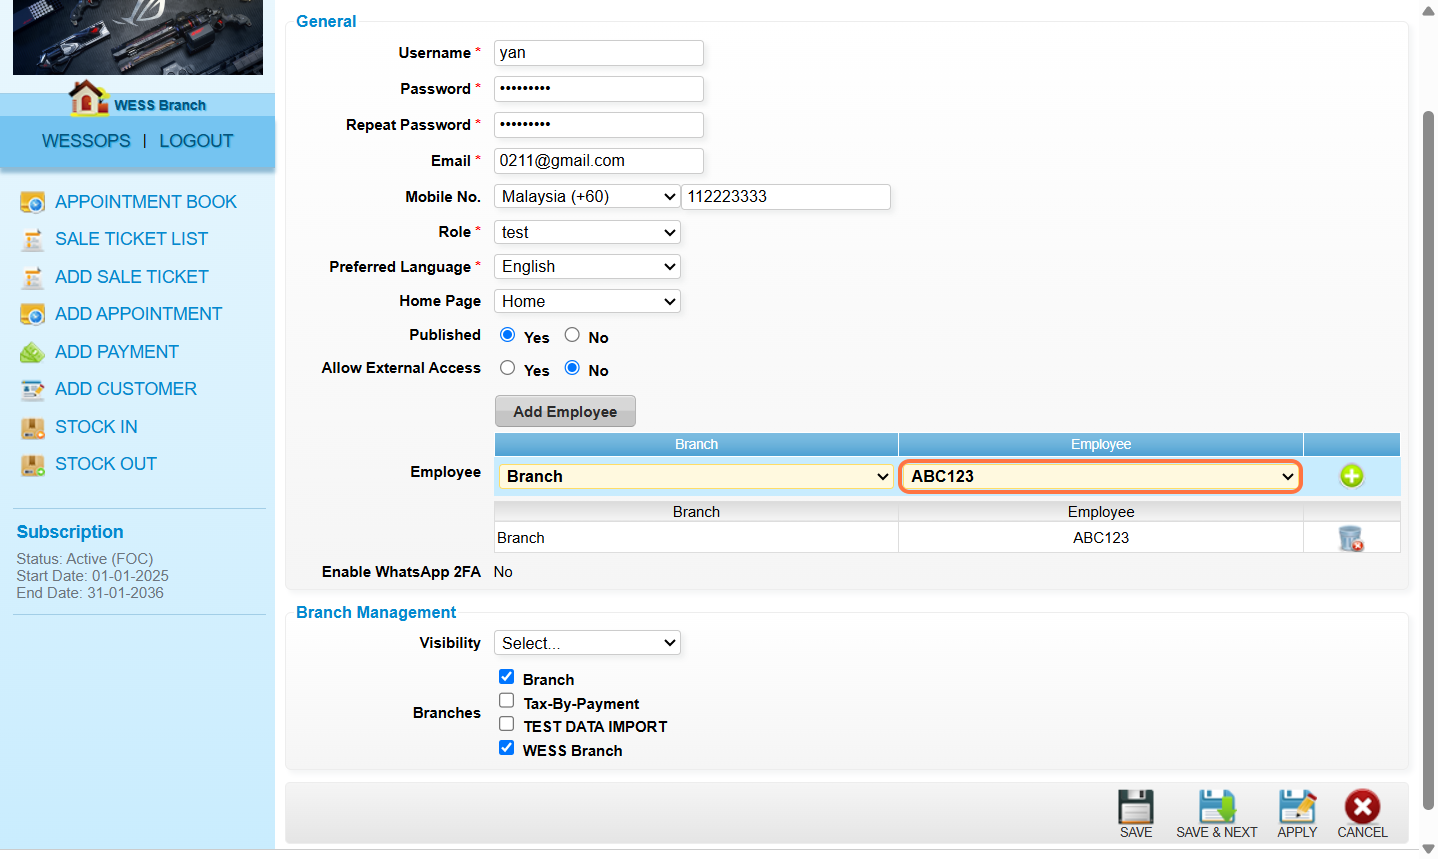
Step 11: Click “Add”.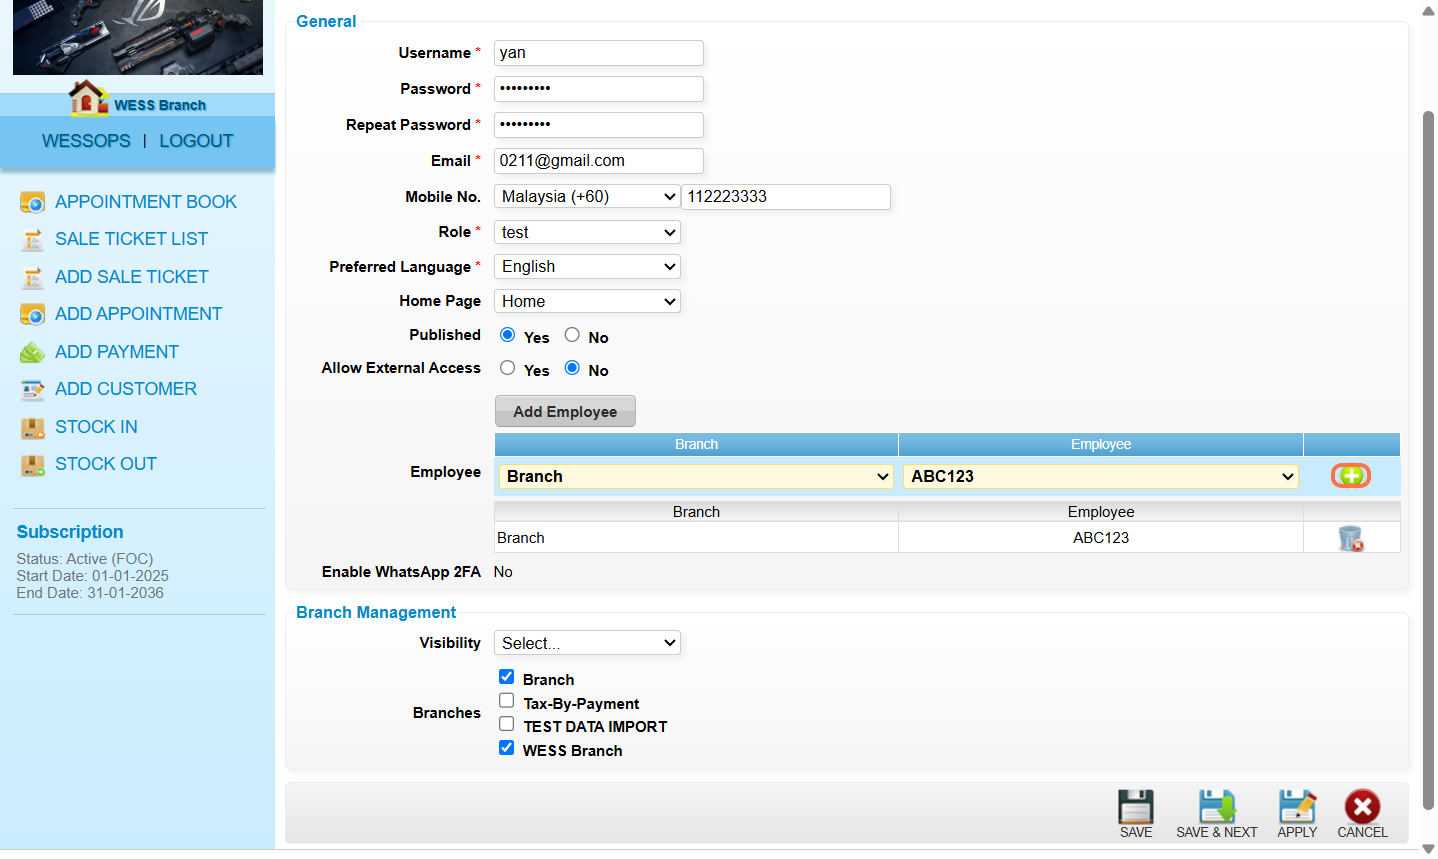
Step 12 [Optional] : To link the employee to another branch, select another branch.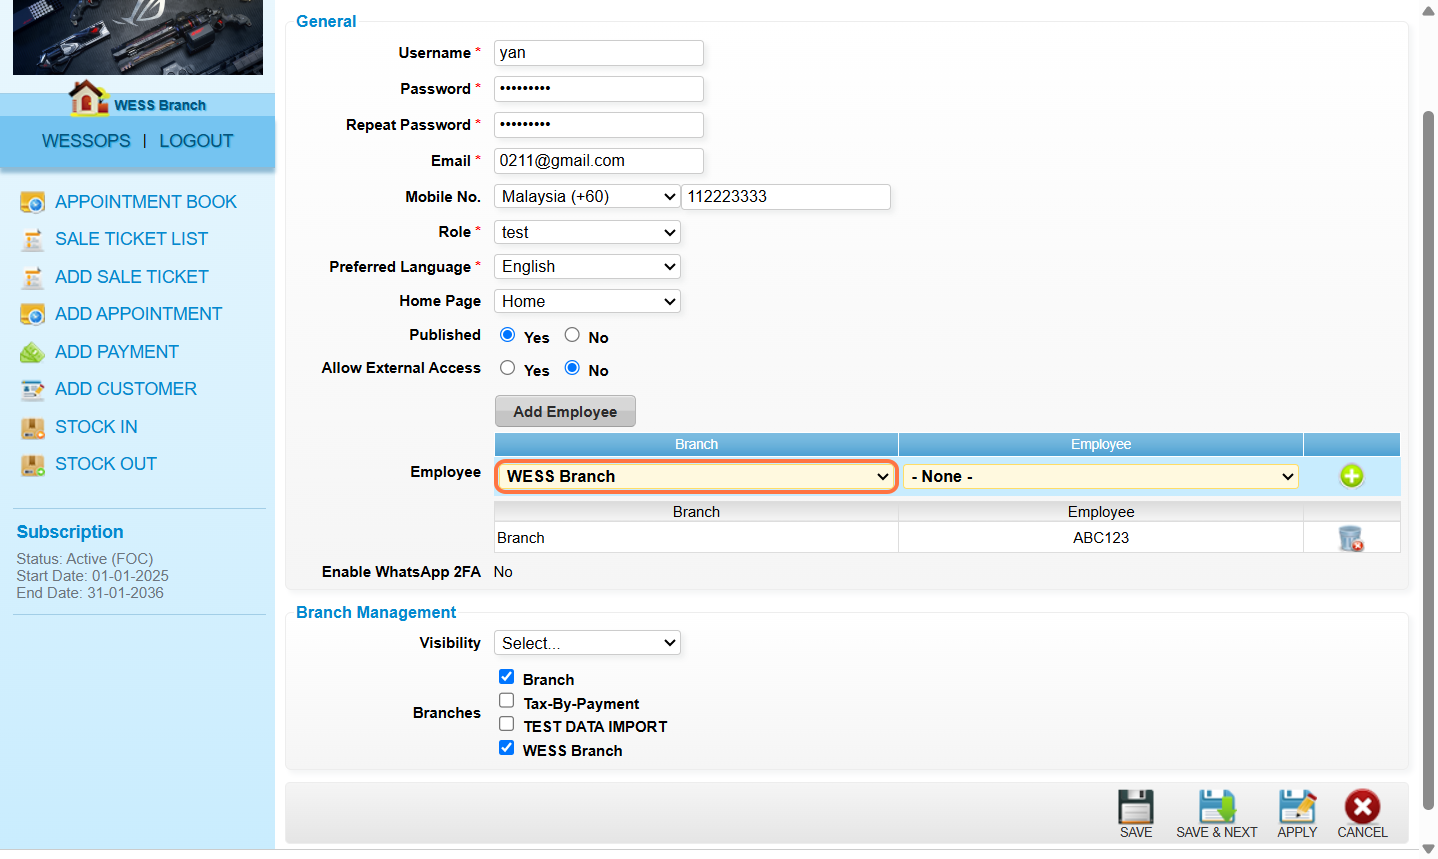
Step 13 [Optional] : Link employee to corresponding branch.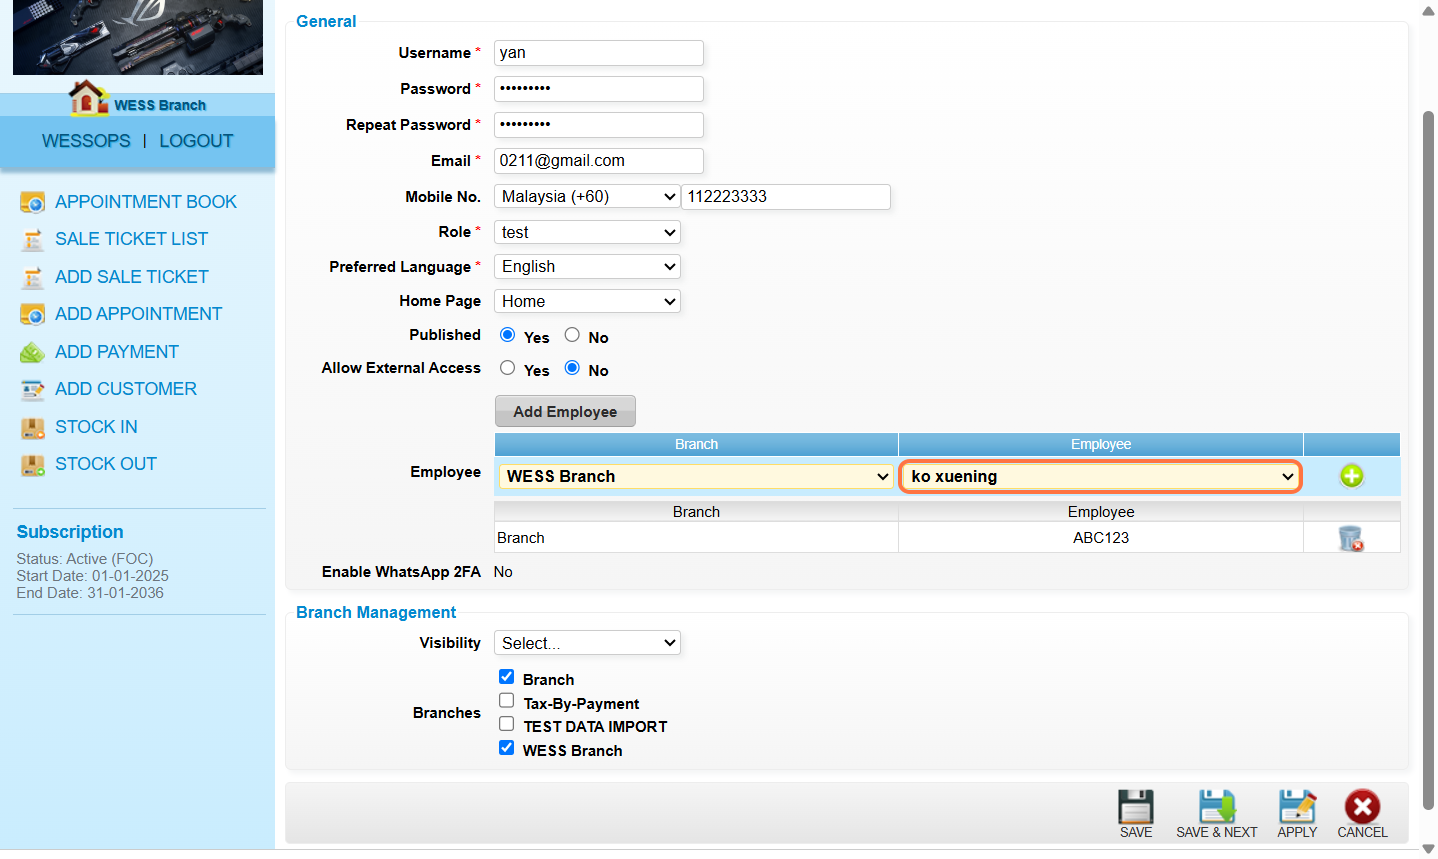
Step 14 [Optional] : Click “Add”.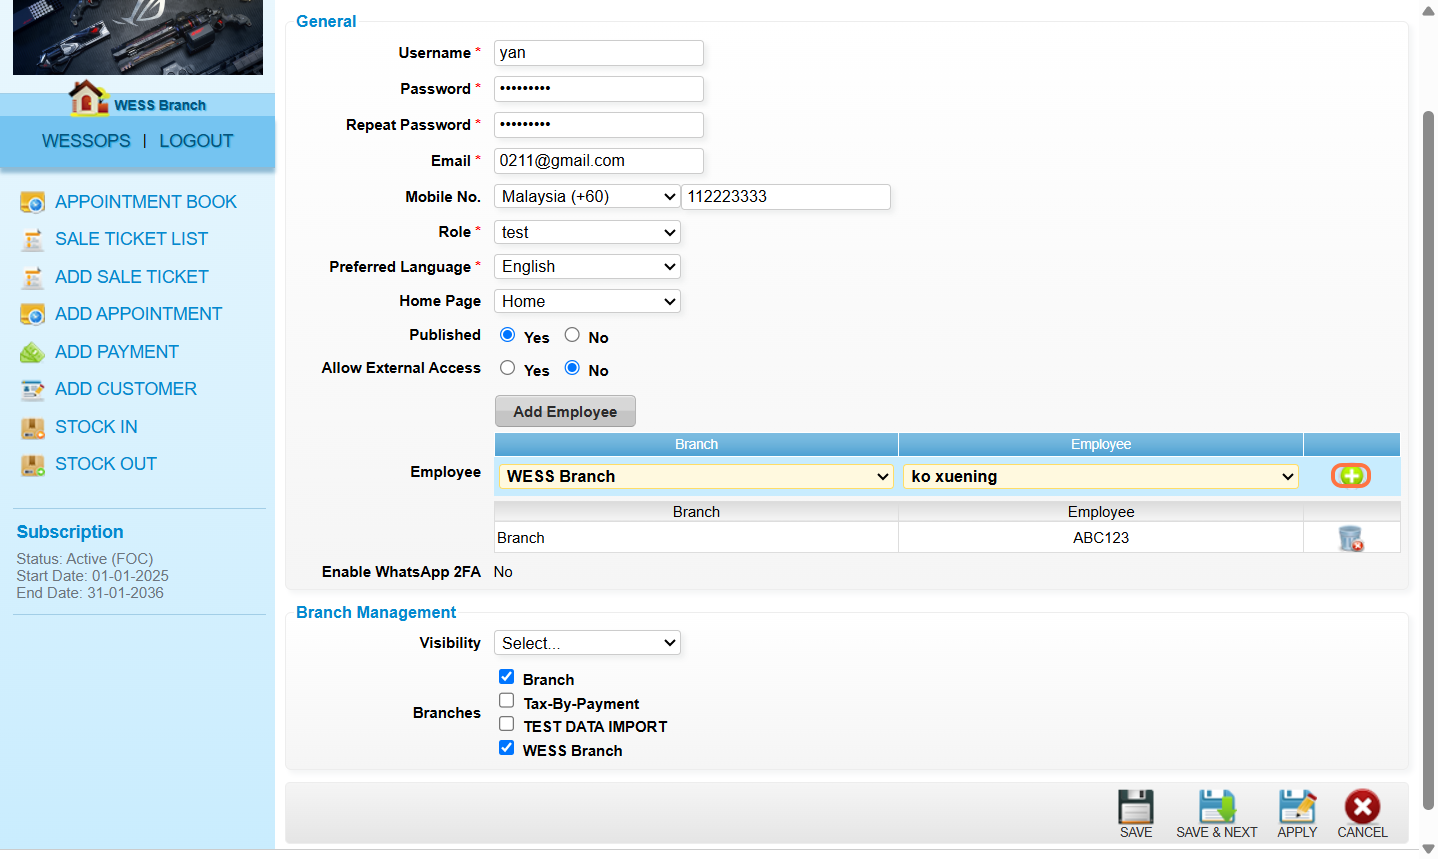
Step 15: Click “Save”.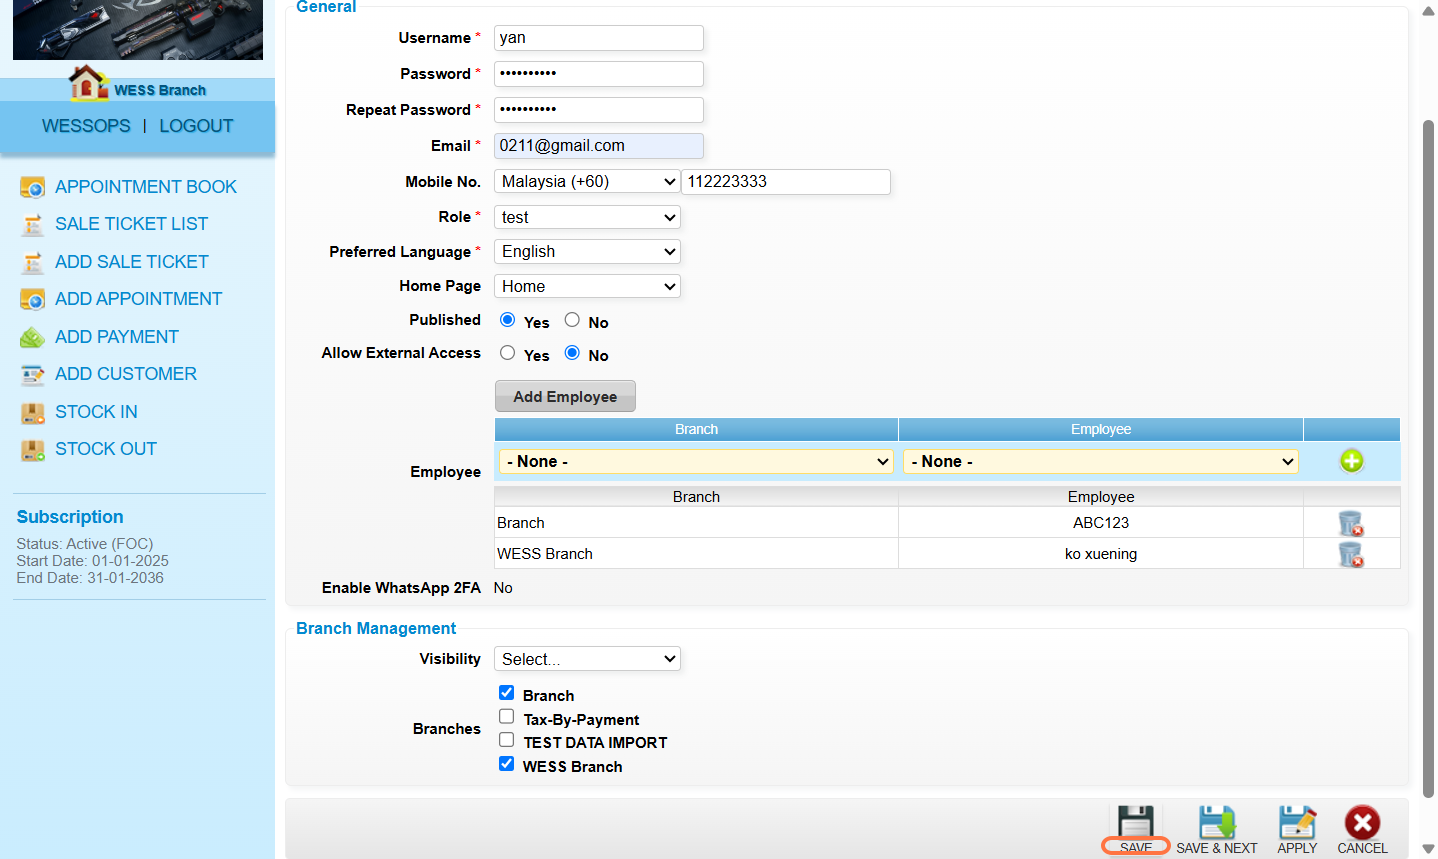
Last Updated: August 2026