
Step 1: Click “Setting” .
Step 2: Click “PRINT SETTING” .
Step 3: Select “Medical Certificate” and click pen icon “✏️” to edit.
Step 4: Click “Logo” .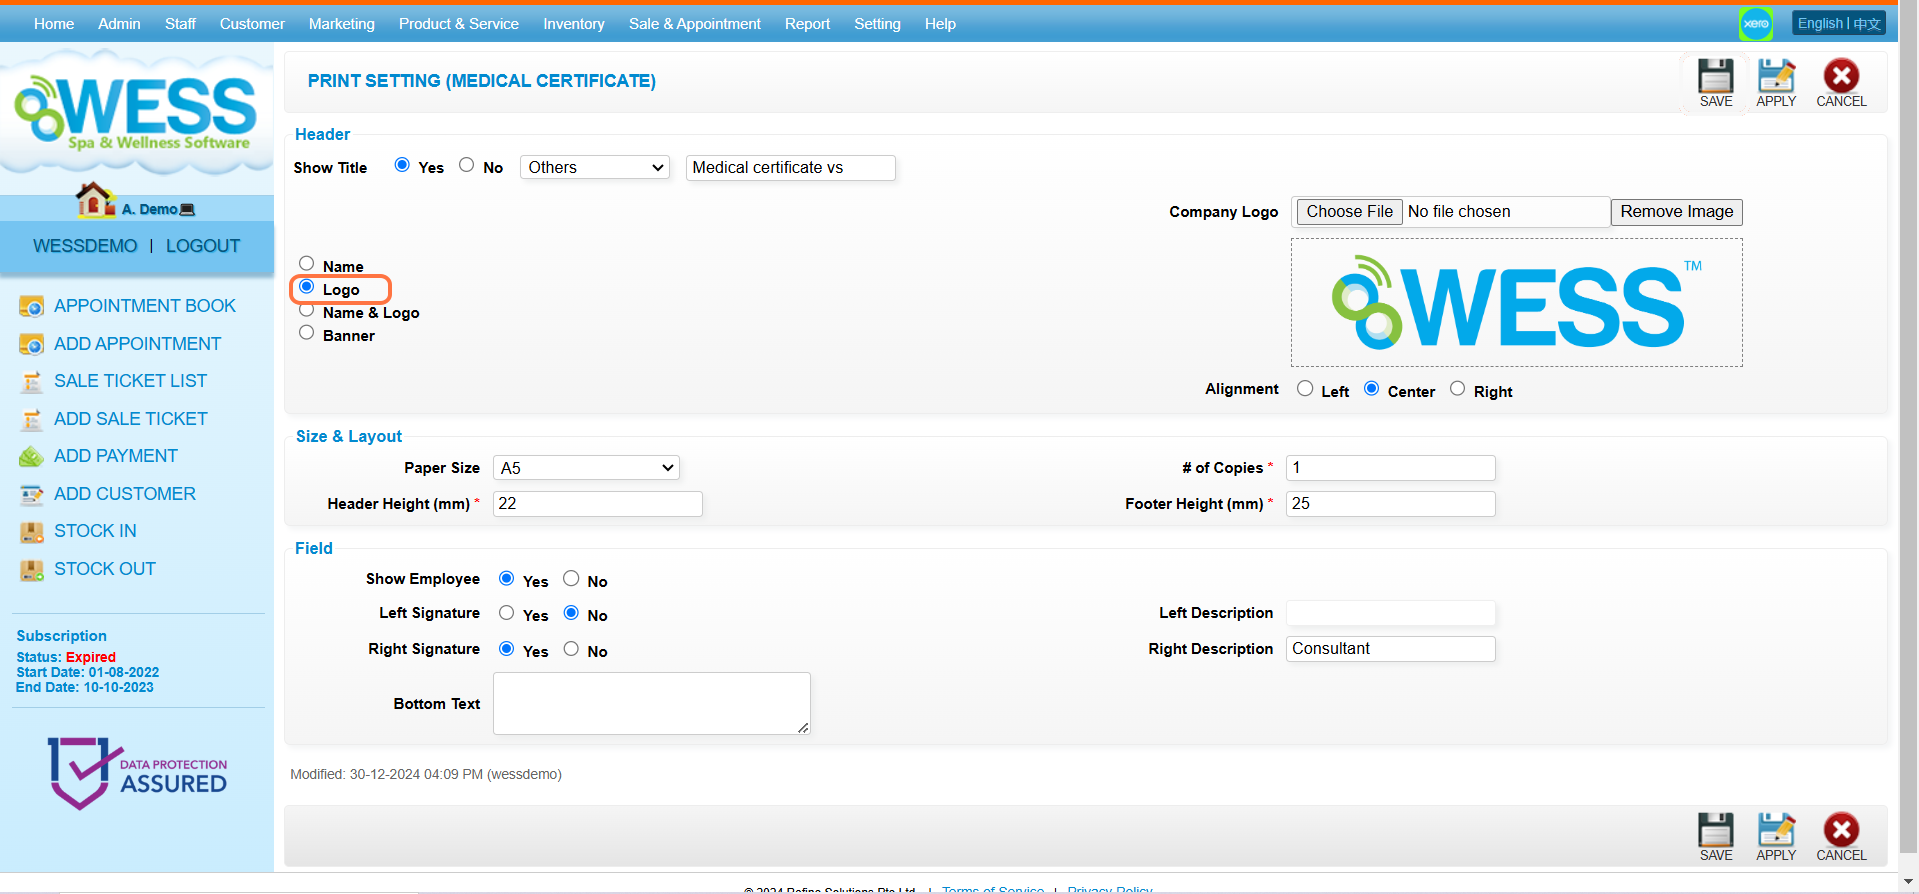
Step 5: Click “Choose File” to upload image.
Step 6: The uploaded image will be showed at here.
Step 7: Set “Alignment” to “Left” or “Center” or “Right” .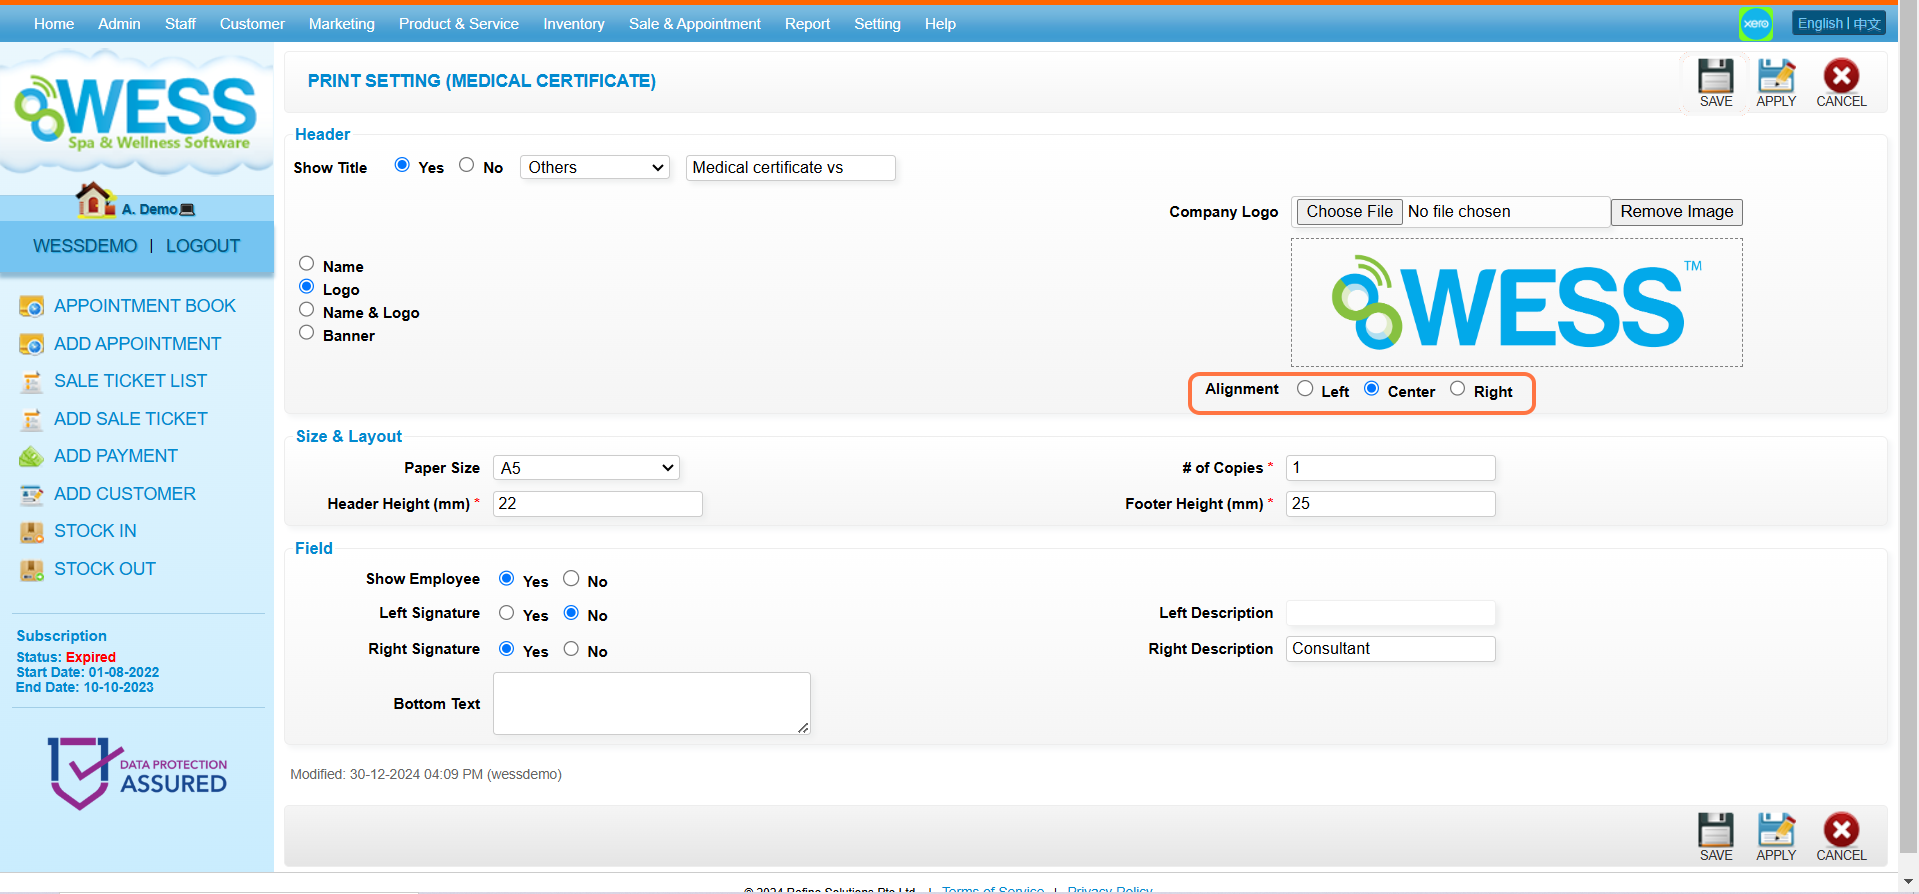
Step 8: Click Save icon “💾”.
Step 9: Make sure the record has been saved.
Step 10: Click “Customer” .
Step 11: Click “MEDICAL CERTIFICATE” .
Step 12: Click “NEW” .
Step 13: Enter the customer name.
Step 14: Click Save icon “💾”.
Step 15: Make sure the record has been saved.
Step 16: Click “PRINT” .
Step 17: The company logo will be showed at here.
Last Updated: August 2025